
The Full Helping
Wed, 10 Apr 2024 17:38:05 +0000
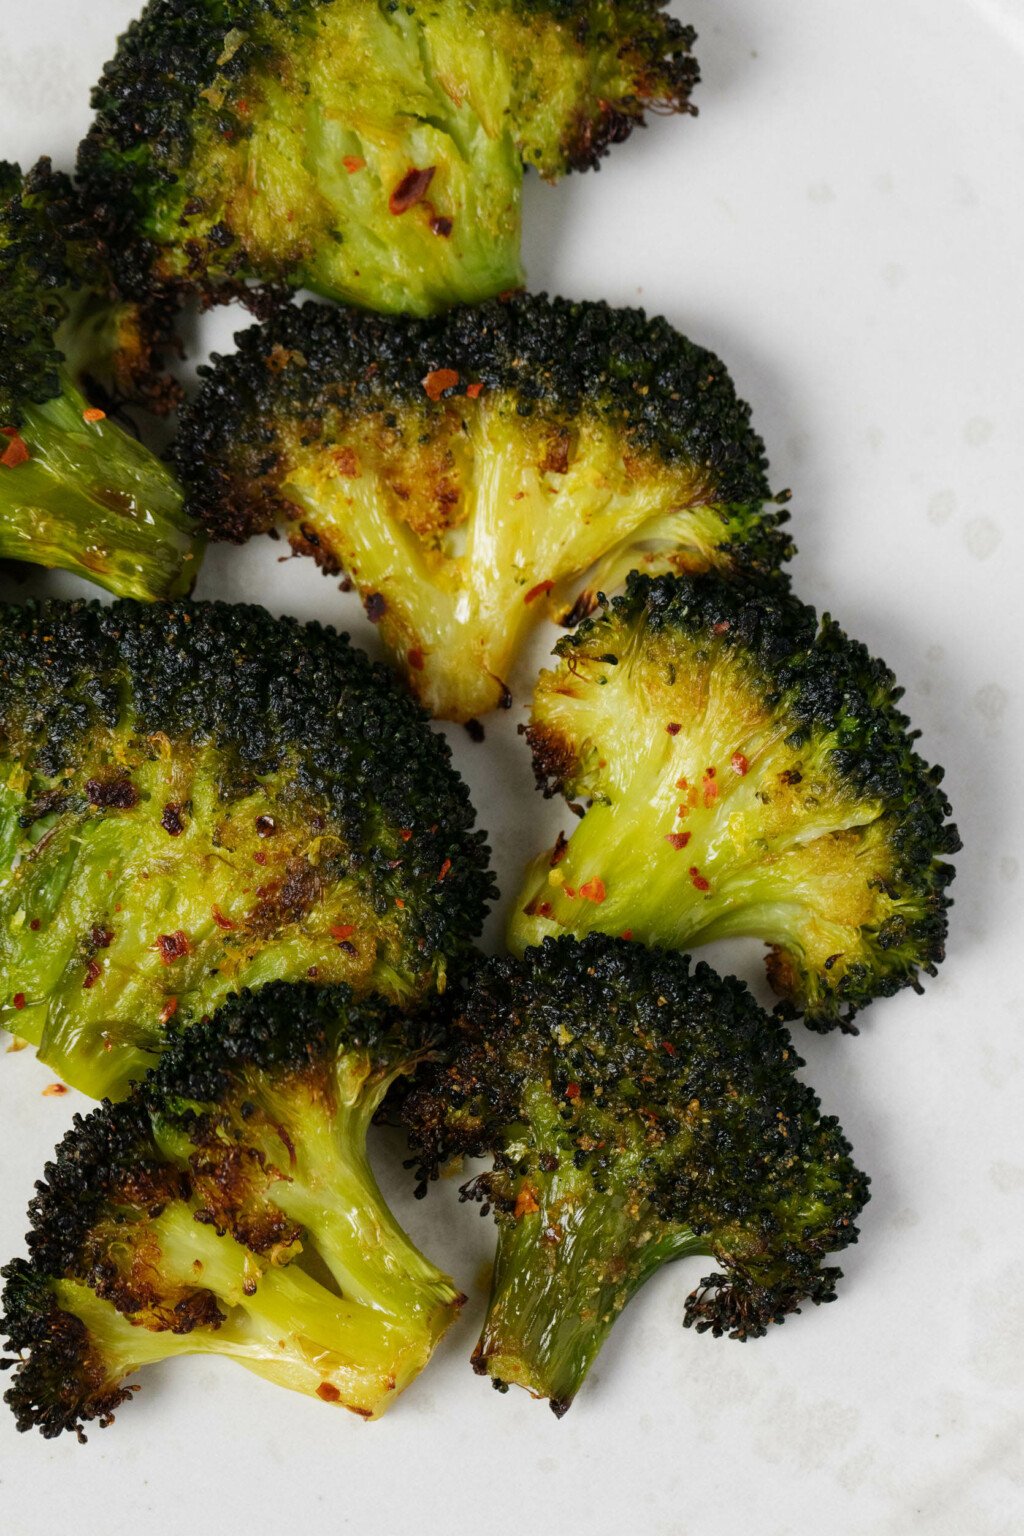
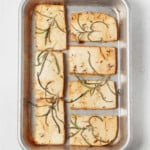
Sheet Pan Smashed Broccoli Florets (Crisp-Tender!)
These sheet pan smashed broccoli florets have an irresistable, crisp-tender texture! If you've been looking for a flavorful and creative way to enjoy broccoli as a side dish or snack, then this recipe is for you. It's easy and fun to prepare, and the recipe offers different seasoning options.
I'm not usually one to jump on viral food trends. The primary reason for this is that I'm not quick enough on the uptake.
The first time I made vegan baked feta pasta, for example, was about two years after it first started trending.
However, that feta pasta is an example of a food trend that became popular for good reasons: great flavor and a cooking method that was both ingenious and time-saving.
It proved to me that viral recipes can be really worthy—they can become timeless keepers, in fact—whether I make them while they're popular or not.
Today, I'm sharing an equally playful recipe with unexpectedly great results: sheet-pan smashed broccoli florets.
My recipe for smashed broccoli is easy and fun. It creates florets that have the tenderness of steamed broccoli, but the crispy edges of roasted broccoli.
On top of that, the florets are super delicious. I'm excited to tell you about them.
What is smashed broccoli?Even if you've never heard of smashed broccoli, it's possible that you have heard of a related recipe: smashed potatoes.
The concept behind both recipes is the same. First, you par-cook a vegetable, so that it's not quite ready to eat, but it's tender enough to smash.
Then, you "smash" the veggie with something—I use either the bottom of a drinking glass or the bottom of a mason jar.
This flattens the vegetable, making it sort of like a big, tender "chip." It also increases surface area, so there's more opportunity to brush or sprinkle the vegetable with toppings or seasonings.
You may be wondering whether or not the effort is worthwhile. Mightn't it be enough to just roast broccoli florets instead?
Actually, I think smashing is very worthwhile!
I like roasted broccoli, but it's very different from these smashed florets. Roasted broccoli is super crispy; sometimes it's even too crispy for my taste.
On the other hand, steamed broccoli—which is one of my go-to vegetable side dishes and a favorite food, period—has no crunch or crispiness at all.
Smashed broccoli is sort of the best of both worlds. The florets are super tender, yet their edges have delightful crispiness.
They really are unique. The process of making them is not only unique, but fun, too.
How to make smashed broccoli florets"Smashing" the broccoli happens in a few steps. First, you'll steam the florets just enough to tenderize them.
Then comes smashing and seasoning.
Finally, you'll roast the florets on a sheet pan. You have the option to add extra seasoning a few minutes before the florets finish roasting; I've included my favorite options.
Step 1: SteamThe goal of the steaming step is to cook the broccoli so that it's fork tender, yet not enough for it to be mushy. I find that 4-5 minutes is the right amount of time.
Step 2: SmashNext comes the fun part: smashing!
But before you smash, you'll need to pat the florets dry.
I do this by transferring my steamed florets to a flat surface that I've lined with tea towels or paper towels. I press and pat them gently to remove as much moisture as I can.
Next, you'll transfer the florets to a parchment-lined baking sheet. Grab a drinking glass or a mason jar—whichever you have on hand—and use the bottom to "smash," or flatten the florets.
This may require a little pressure. The goal is to flatten the florets gently, but not to pound on them so that they start to fall apart.
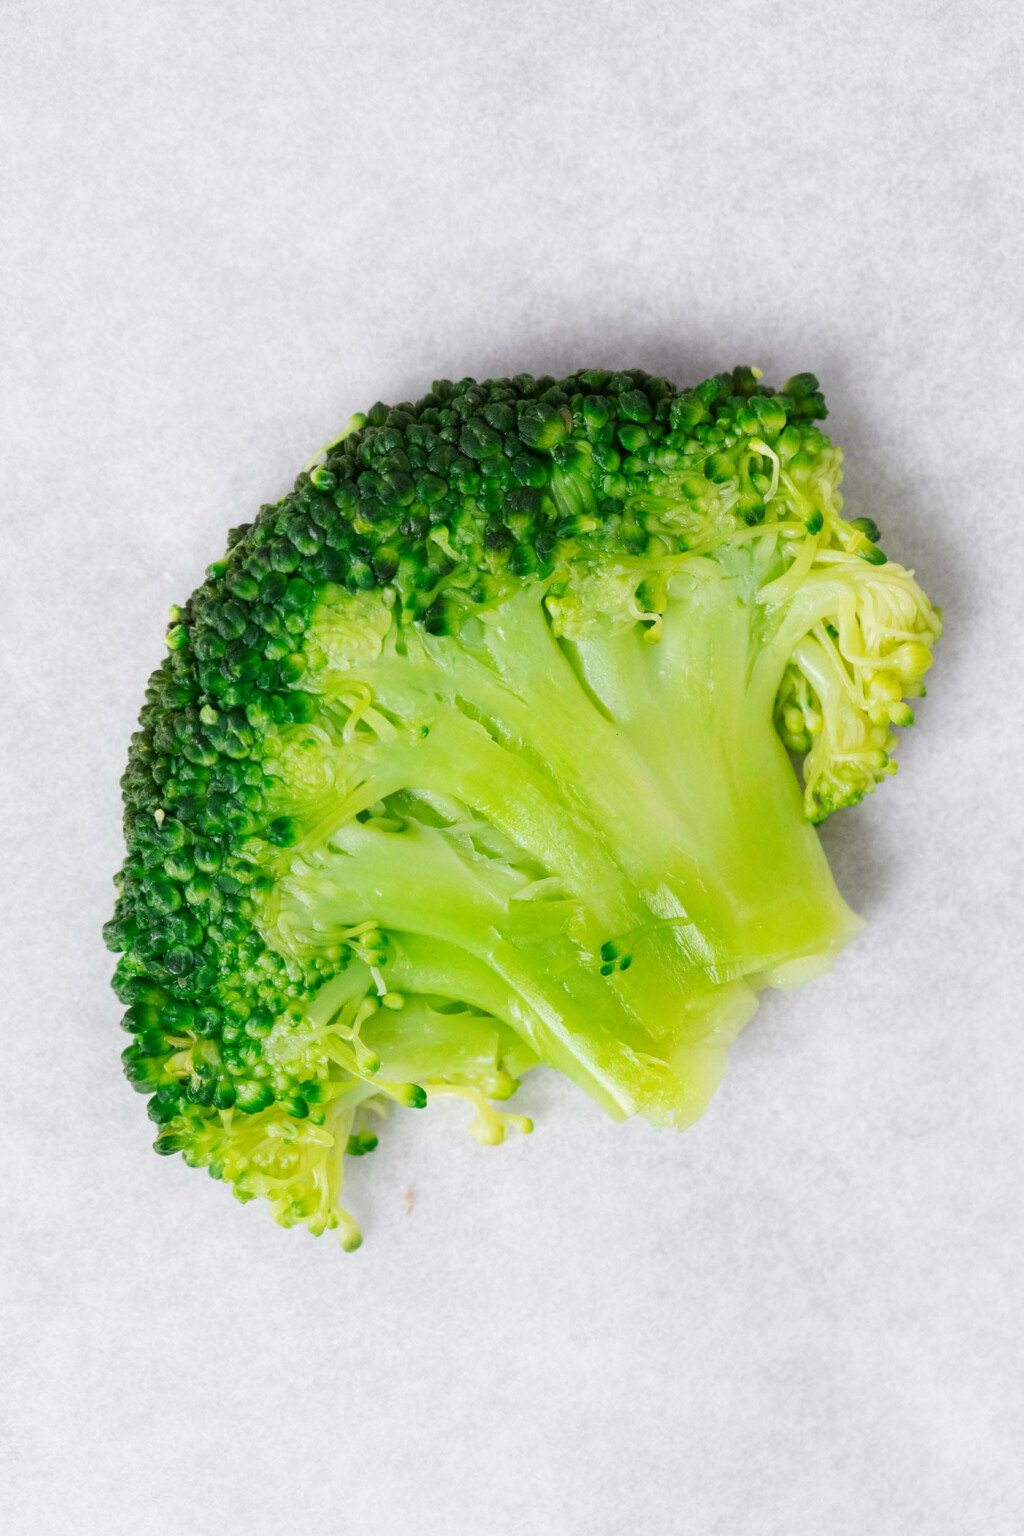
After this, you'll want to use another paper towel or tea towel to pat the flattened florets dry once again. They should be as dry as possible before you season them.
Step 3: SeasonNow it's time to season the smashed broccoli florets.
I tried doing this in a few different ways. I drizzled them with oil then used my hands to coat them; in another trial, I used cooking oil spray. After that, I sprinkled salt and garlic powder on top.
The best method I found was inspired by Nicole's recipe: to mix the olive oil with garlic powder and salt before gently brushing it onto the florets.
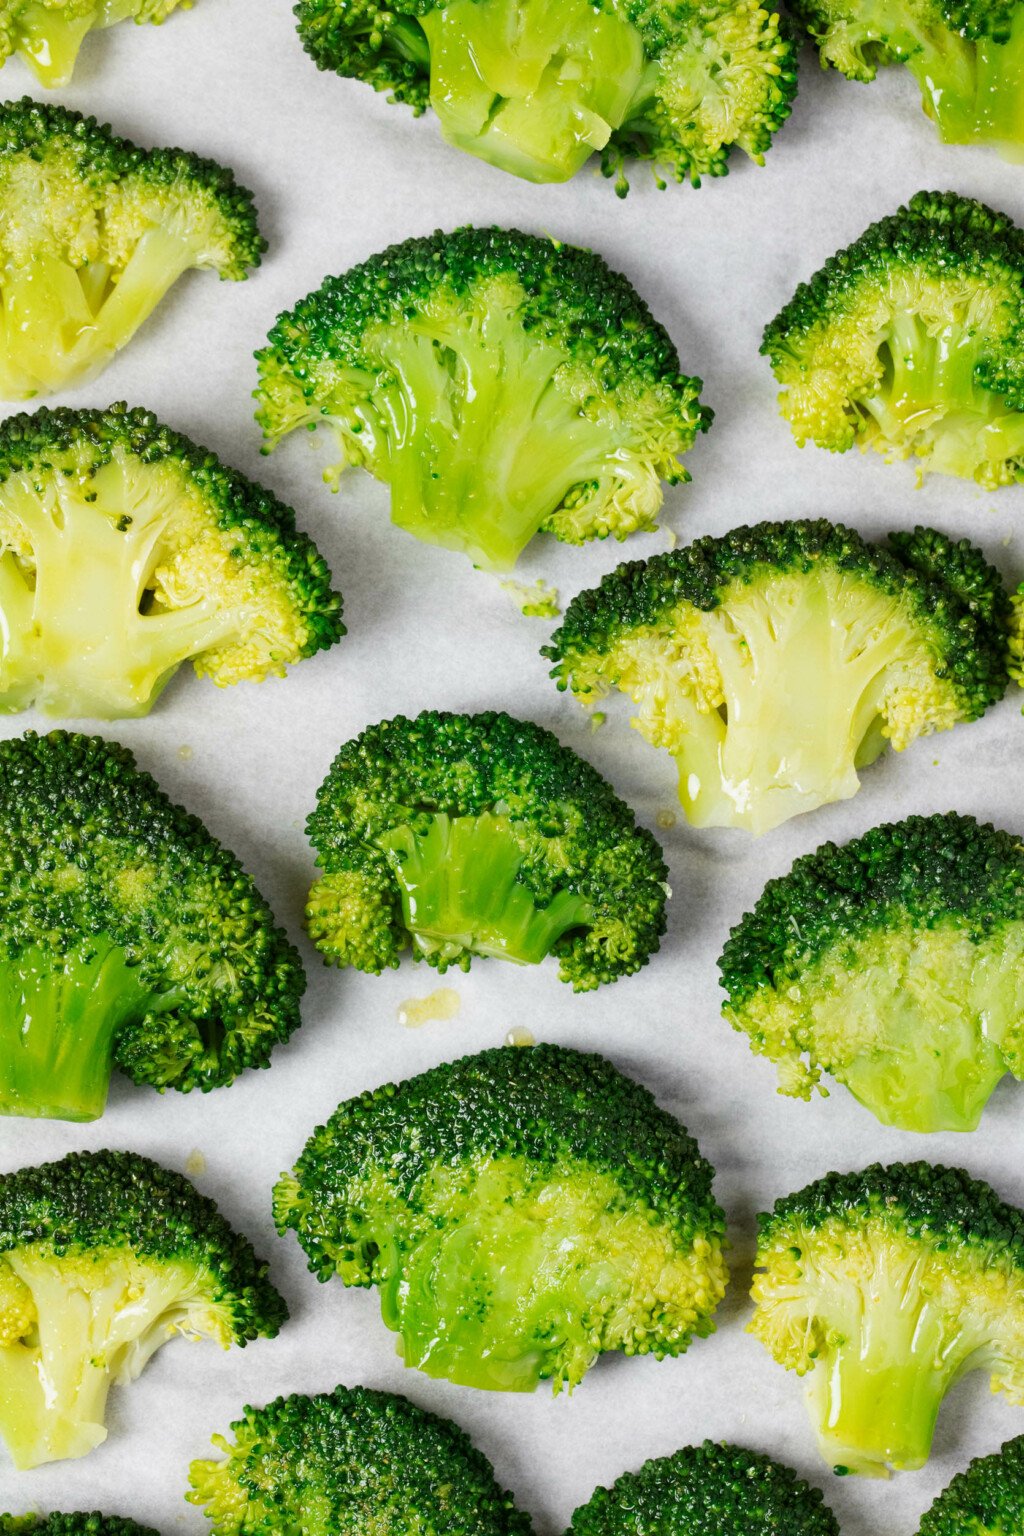
I found that this seasoned them most effectively and consistently, resulting in perfectly garlicky, salty pieces.
Step 4: RoastNext, you'll transfer the florets to a pre-heated oven for roasting.
They'll need 15-18 minutes at 400°F/200°C, or until the florets are sizzling and turning golden. But they're not quite ready yet!
At this point, you'll remove the florets from the oven and season you can season them again, this time with additional toppings of your choise.
I give three options:
- Lemon juice and zest
- Crushed red pepper flakes
- Vegan parmesan cheese
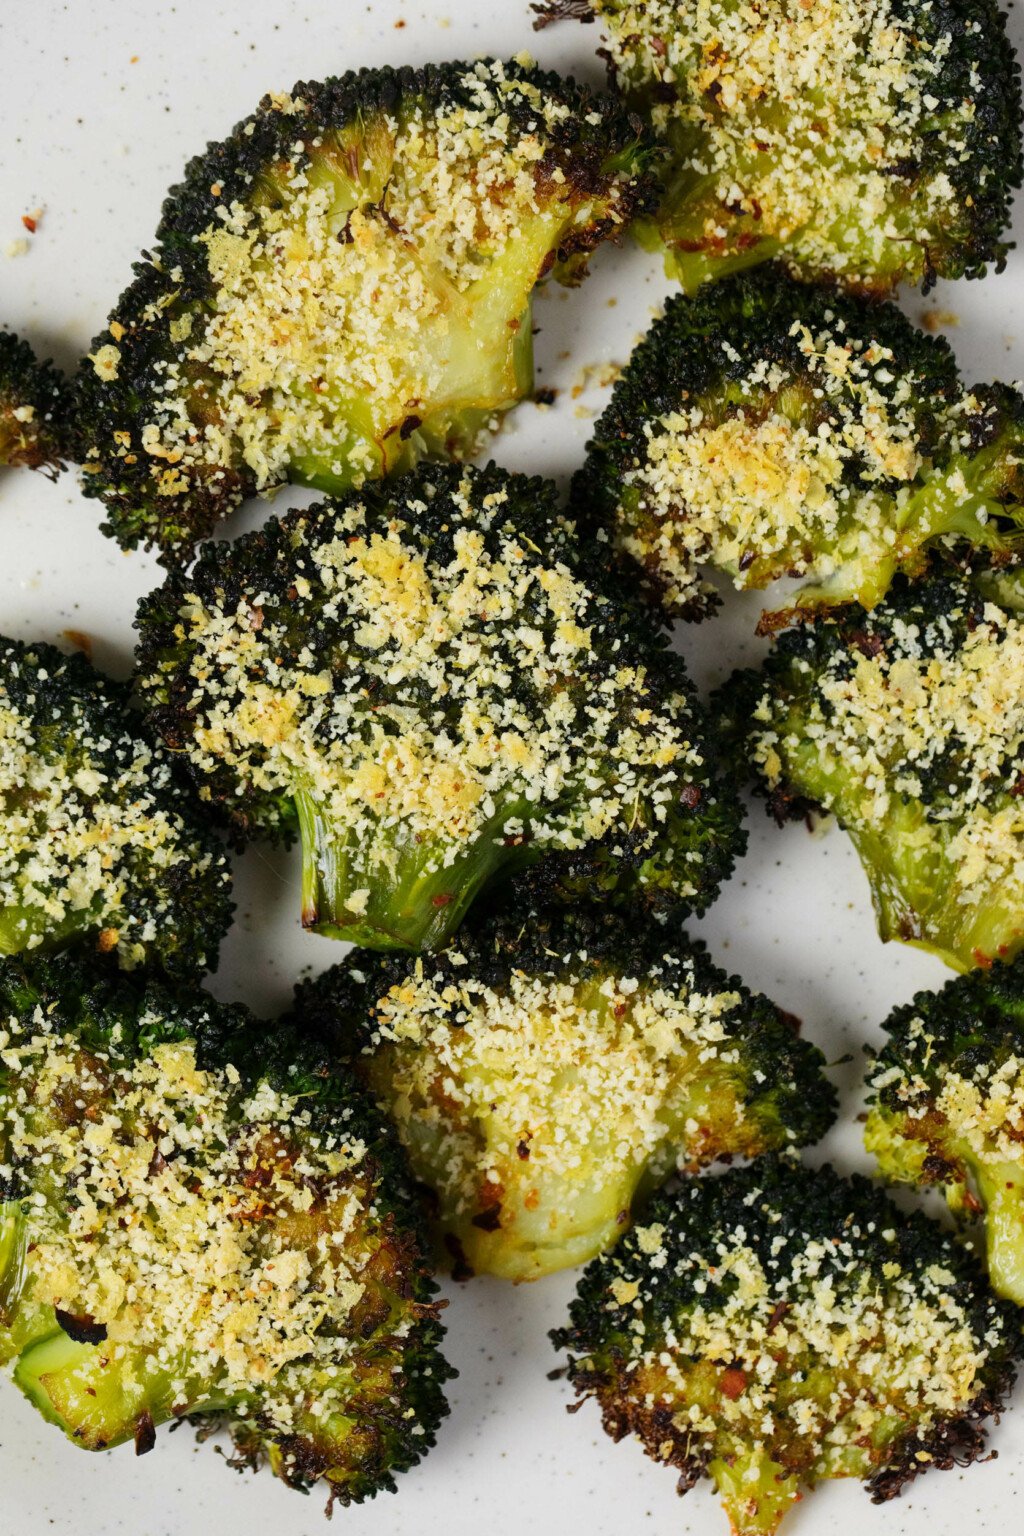

All of these options are nice in different ways. Cashew parmesan adds some texture and savoriness.
Lemon juice and zest, of course, adds brightness and acidity.
Finally, the crushed red pepper adds some heat.
If none of these flavor profiles appeals, you could of course explore some other seasonings. A few additional ideas that come to mind:
- A dusting of za'atar or dukkah
- Baste the florets with buffalo sauce or drizzle them with hot sauce
- Brush the florets lightly with harissa
- Sprinkle the florets with Italian seasoning or herbes de Provence
- Spoon vegan yellow cheese sauce generously over the broccoli
Return the florets to the oven and bake them for five more minutes, or until they're browning and quite crispy on the sides.
They should at this point also be extremely tender in the center, too.
Give the florets a finishing sprinkle of sea salt, a drizzle of extra olive oil, or any other desired touches. They're now ready to eat.
Can I prepare the recipe with frozen broccoli?It's no secret that I am a huge lover of frozen veggies. I whip up bags of frozen green beans, peas, carrots, and corn all the time, topping them simply with a little vegan butter and salt.
If frozen cauliflower is what I have, then it usually becomes roasted frozen cauliflower florets.
 The Vegan Week
Embrace the joy of eating homemade food every day with the hearty and wholesome recipes in The Vegan Week.
Whether you have three, two, or even just one hour of time to spare, The Vegan Week will show you how to batch cook varied, colorful, and comforting dishes over the weekend.
Buy The Vegan WeekAnd I'm almost never without a bag of frozen broccoli florets to play around with.
Very often, these get turned into the From-Frozen Roasted Broccoli from The Vegan Week.
For a different approach, you can cook the florets as instructed on the frozen package, dry them as much as humanly possible, then proceed with the smashing and seasoning steps above.
The results will be very similar to those achieved with using fresh broccoli. And the recipe will be doable whether you've remembered to shop for produce recently or not!
StorageYou can store the sheet-pan smashed broccoli florets in an airtight container in the fridge for up to three days.
I find that the texture is compromised through freezing and defrosting, so this is one veggie side dish that I don't recommend freezing.
 Serving suggestions
The smashed broccoli florets are really intended to be a side dish or a snack.
If you make them into a side dish, you can serve them with any vegan main dish or combination of simple proteins or grain dishes.
If you'd like to snack on the florets, then I highly recommend a dipping sauce to go along with them! Here are a few ideas:
- Yum sauce
- Homemade vegan ranch dressing
- Dijon lemon tahini dressing
- Vegan mayo (homemade!)
- Yellow cheese sauce
- Cashew queso sauce
- Vegan pesto with basil and cashews
The florets ought to be very flavorful all on their own—that's the point of adding seasoning—but the addition of a stellar sauce can't hurt.
Here's the recipe in its entirety.

- drinking glass or mason jar
- 1 large or 2 smaller crowns broccoli, cut into large florets* (2-3 inches, or 5-7.5cm)
- 2 tablespoons olive oil or avocado oil (plus any extra you might want for finishing)
- 1/2 teaspoon garlic powder
- 1/8 teaspoon fine salt (plus any extra you might want for finishing)
- Crushed red pepper flakes or freshly ground black pepper, to taste
- Optional: 1 lemon, juice and zest
- Optional: 3 tablespoons Cashew Parmesan Cheese
- Preheat the oven to 400°F/200°C and line a rimmed baking sheet with parchment paper.
- Fill a pot of water with a few inches of water and fit it with a steamer attachment. Bring the water to a boil and add the florets to the steamer. Steam the broccoli florets for 4-5 minutes, or until they're tender and can be pierced pretty easily with a fork, but not mushy. Remove the steamer basket from heat.
- Transfer the florets to a flat surface that has been lined with tea towels or paper towels. Pat the florets very dry. Transfer them to the parchment-lined baking sheet.
- Use the bottom of an average, flat-bottomed drinking glass or mason jar to smash the florets until they are considerably flattened, but not broken or falling apart. They should be 1/4-1/2 inch (6mm-1.3cm) thick. If they release any additional moisture when you smash them, use a paper towel to pat them dry again on the baking sheet. The smashed florets should be as dry as possible.
- Whisk the oil, garlic powder, and salt together in a small bowl. Use a pastry or basting brush to brush this mixture over the tops of the florets, coating them quite well. Add crushed red pepper flakes or freshly ground black pepper as desired.
- Transfer the broccoli to the oven and bake for 15-18 minutes, or until the florets are sizzling and turning golden. Remove the sheet from the oven and add finishing seasonings as desired: a squeeze of lemon juice and sprinkle of lemon zest, or a few tablespoons of cashew parmesan, sprinkled over the florets.
- Return the florets to the oven and bake for 5-7 more minutes, or until the florets are crispy and browning at the edges. If you like, finish them with one final sprinkle of salt and/or an extra drizzle of olive oil. Enjoy.
In just a moment, I'll be grabbing a bag of frozen broccoli florets from my freezer and using them to prepare the recipe.
I haven't done extensive vegan meal prep for this week, and I'm also in a phase of "shopping the pantry/freezer" in order to clear some room for new supplies.
I could very well just serve the defrosted and cooked florets with vegan butter and salt, as I have done many times before. And that would be fine.
But it's nice to have a more inspired preparation method planned. The florets will make an otherwise sort of humdrum food week feel a little zestier and more flavorful.
It's proof that small ingredient tweaks and fresh preparation methods can make a big difference! I hope you'll be similarly pleased by this idea and the tasty green vegetable that it creates.
xo
The post Sheet Pan Smashed Broccoli Florets (Crisp-Tender!) appeared first on The Full Helping.
Thu, 04 Apr 2024 18:24:30 +0000
Vegan Brown Rice Casserole with Broccoli and Beans
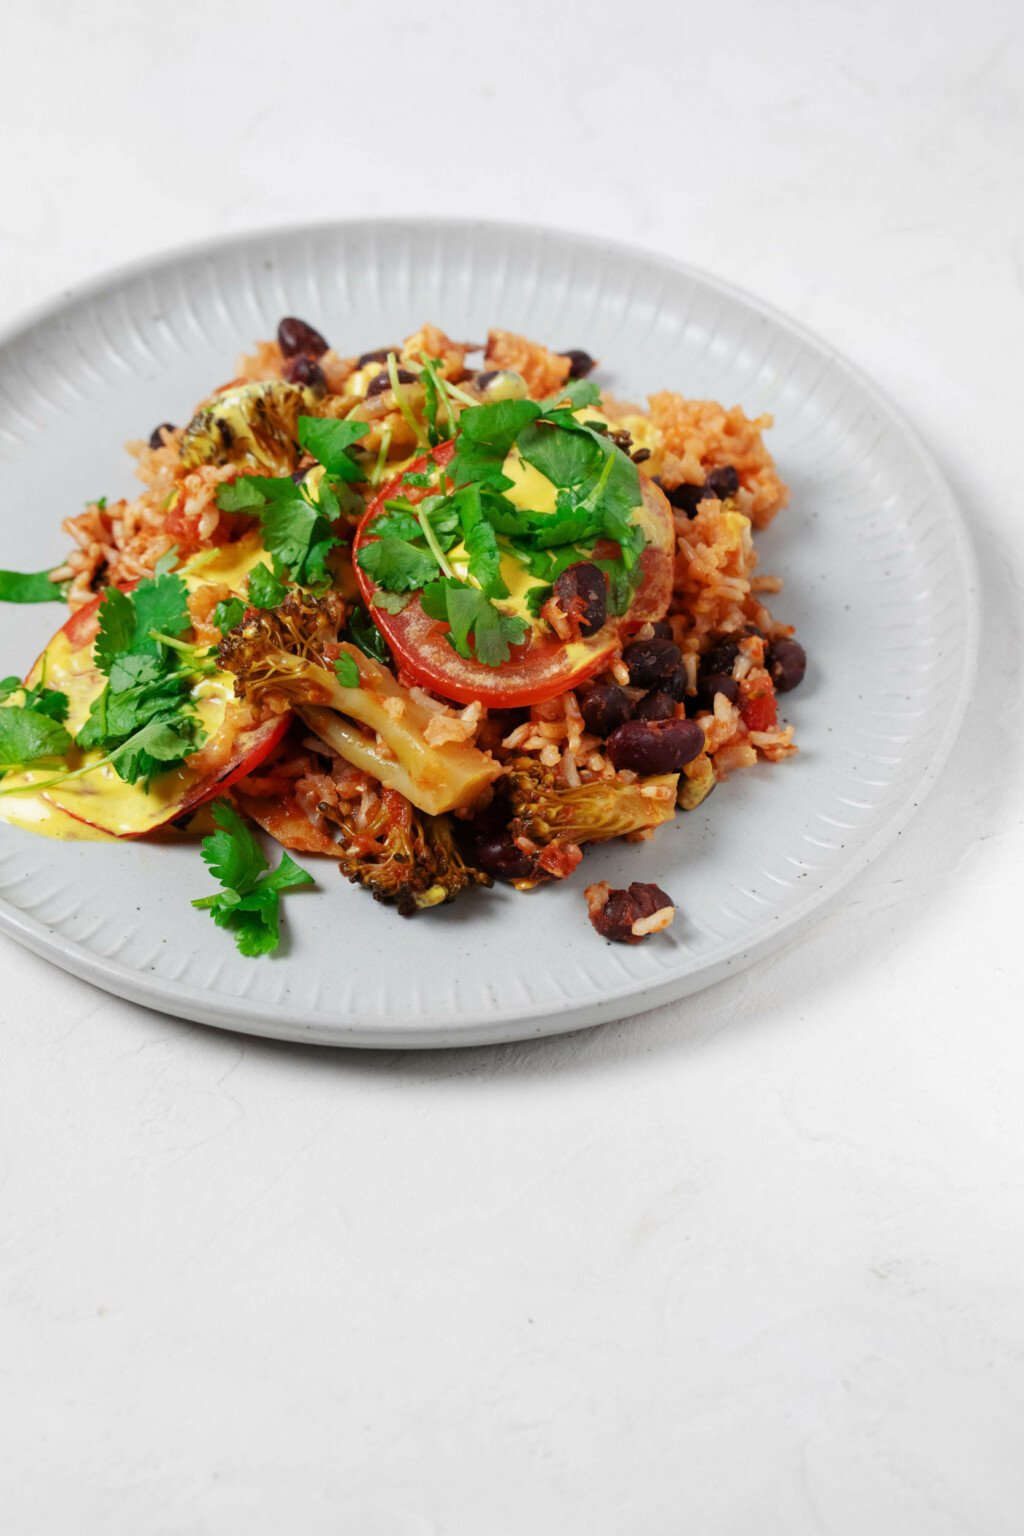
This vegan brown rice casserole with broccoli and beans couldn't be any easier. Simply place the ingredients into a baking dish, cover them tightly, and bake—this is a quintessential "dump and bake" recipe! The casserole is full of wholesome nutrition, and it's a great make-ahead recipe. A creamy topping of vegan cashew queso takes it to the next level.
I'm calling this dish of baked brown rice and beans a casserole. But "casserole" may be a bit of an overstatement.
When I think "casserole," I think about lasagna, enchiladas, gratin, or something equally involved.
This is really a "dump and bake" recipe—a meal that's created by putting a bunch of ingredients into a casserole dish, covering them, and allowing the oven to do all of the work for you.
It couldn't be easier. And, thanks to the wholesome building blocks of brown rice, black beans, and broccoli, the dish could hardly be more nutritious, either.
The beauty of baked brown riceThere probably isn't a grain that gets more use in my kitchen than rice.
I routinely make all colors—brown, white, black/purple, red—and shapes: short grain, long grain, medium grain.
Rice is hearty, healthful, and versatile. It's a source of B vitamins, folic acid, magnesium and potassium, and selenium. Brown rice is a decent source of dietary fiber.
Most of the time, I prepare rice by boiling it on the stovetop. This recipe, however, has reminded me of how stress-free and effective it is to bake rice instead.
Rice of all kinds can be baked by rinsing the grains, putting them into a casserole or square baking dish, adding liquid, covering tightly, and baking till the grains are fully cooked.
Typically, this takes a little longer than it would take to boil the rice instead: about 1 hour for brown rice and 25-30 minutes for white rice. The oven temperature that I use is 375°F / 190°C.
When baking rice on it's own, it can be helpful to use already hot water: in other words, to boil the water before adding it to your baking dish.
However, it's not strictly necessary for the water to be boiling, and for whatever reason, I've found that it becomes less necessary when the rice has mix-ins. Room temperature water or broth (not cold) is good enough.
In the case of this brown rice casserole, the rice doesn't bake on its own. It bakes along with seasonings and other ingredients that amount to a hearty and complete dish.
 A beloved ingredient pair
I don't really need to sing the praises of rice and beans. This ingredient duo is much beloved in recipes around the world, especially in the Americas and in Africa.
As is often the case with time-honored recipes or ingredient pairings, the combo of rice and beans is truly nourishing.
Together, rice and beans provide:
- Plant protein
- Fiber
- Iron
- B vitamins
- Magnesium
- Potassium
- Calcium* (this depends on the type bean)
- Phosphorus
- Vitamin E
You may have come across rice and beans being given as an example of a "complete" protein. What exactly does this mean?
I go into more depth in my post on protein-rich combinations of plant foods, but here's the summary: proteins are built from different sequences of amino acids. In a sense, amino acids are the "building blocks" of protein.
When we eat protein, our digestive systems break down protein molecules, freeing amino acids for absorption. This happens largely in the jejunum of our small intestines.
We don't only obtain amino acids from food. Rather, our bodies can produce many of the amino acids that we need for protein synthesis: for example, making peptide hormones or neurotransmitters.
However, there are nine other amino acids, called the "essential amino acids," that we can't produce endogenously. We have to obtain them from food.
A "complete protein" is a food source of protein that contains all of the nine essential amino acids.
Such proteins are sometimes called "high biological value," or HBV, proteins. An LBV, or lower biological value protein, is one that's missing one or more of the nine essential amino acids.
Animal proteins like meat, fish, whey, and eggs, are HBV proteins. So are certain plant proteins, such as quinoa, soy, or hemp hearts.
Other plant proteins are LBV proteins, which means that they contain some of the essential amino acids, but not all of them.
When I first became vegan, there was a lot of talk about the importance of putting complete plant proteins onto one's plate.
Over time, nutrition education has shifted. Today we understand that a person who eats a variety of protein sources on a regular basis will ultimately obtain all of the essential amino acids. The body will then utilize these amino acids as needed.
In other words, you don't have to stress about getting complete proteins with every meal. Instead, focus on getting enough protein overall and sourcing it from diversified foods: beans, tofu, tempeh, wheat, and so on.
Of course, when ingredients in a recipe can provide all of those essential amino acids, it's an easy win. This brown rice casserole with broccoli and beans is such a recipe.
Speaking of beans, what type of beans should I use in the recipe?When I make the brown rice casserole, I like to use a combination of black beans and kidney beans.
But this is just a suggestion. You can certainly substitute other types of beans for my choices. The casserole could be prepared with:
- Black-eyed peas
- Pinto beans
- White beans (cannellini or great northern)
- Chickpeas
- Adzuki beans
- Butter beans
No, you don't. Brown rice is my suggestion for the casserole, but the recipe can be prepared with white rice, too.
Many of my nutrition clients ask me whether brown or white rice is better. My response is that a mix of both is fine. I routinely use both brown and white rice in my cooking.
From a health standpoint, brown rice contains the bran and the germ of the rice, so it has a bit more fiber and protein than white, as well as modestly higher micronutrient content.
It's worth saying, though, that this difference in fiber is about three grams. That's not nothing—the USDA's fiber recommendation for adults is 25 grams for women and 38 grams for men—but it's not a vast difference, either.
If you love white rice, choosing to enjoy it is not some sort of make-or-break nutrition issue. Especially if you get fiber from lots of other places in your diet, which many plant-based eaters do.
With all of that said, I happen to like the nuttiness of brown rice in this particular recipe.
I also like the texture of brown rice for a casserole: when I tested it with white rice, the rice tended to clump together, so it had a mushy effect.
You can substitute an equal amount of long-grain white rice for brown. If you do this, you'll likely only need to give the casserole 30 minutes of time in the oven.
A wholesome set of toppingsA lot of casserole recipes call for melted cheese on top. I love the convenience of store-bought vegan cheese, but I also have a special love for homemade vegan cheeses.
I've made all sorts of vegan cheese recipes over the years. The one that I perfected first and still rely on most often is my go-to cashew cheese recipe.
But with cashews leading the way, I've expanded my options to include 10-minute vegan ricotta cheese, vegan yellow cheese sauce, melty vegan cashew mozzarella, cashew parmesan cheese, and versatile vegan cashew queso sauce.

It's the cashew queso that I use to top this casserole. It adds a creamy component to the recipe, some tangy and "cheesy" flavor (that's thanks to lemon juice, tomato paste, and nutritional yeast), and a decorative component as well.
Since the top of the casserole begs for a little color, I also add broiled tomato slices, which you'll read more about in the recipe steps and instructions.
I love using this method for lasagna and vegan pasta bakes as well as the brown rice casserole.
How to make brown rice casserole with broccoli and beansTired? Stressed? Going through a cooking rut?
The brown rice casserole is your recipe.
For one thing, you don't really have to cook anything. Rather, you only have to dump ingredients into an oven-safe dish and allow the oven to take it away.
Also, there's no sautéing of onion or garlic required before the casserole is transferred to the oven.
In order to incorporate alliums, I use a hack that I also rely on for the seasoned chickpeas in my chickpea burrito bowls: salsa.
Salsa, especially a roasted tomato salsa, contains onions that have already had their raw "bite" softened. Using a jar of roasted salsa in a recipe is like adding prepared onions, tomato, garlic, and other seasonings to your dish.
No chopping or sautéing required.
So, gather up your favorite, flavorful jar of salsa, two cans of beans that you have in the pantry, a bag of rice, and something green—and let's get started.
Step 1: Preheat your ovenYou'll want to keep the oven temperature at 375°F / 190°C for this recipe.
Step 2: Place your ingredients into an oven-safe dishNo fancy moves required here. Just add the rice, beans, and salsa, along with a little avocado oil, a heap of broccoli florets, and some vegetable broth, into a 9 x 13-inch / 24 x 36cm baking dish.
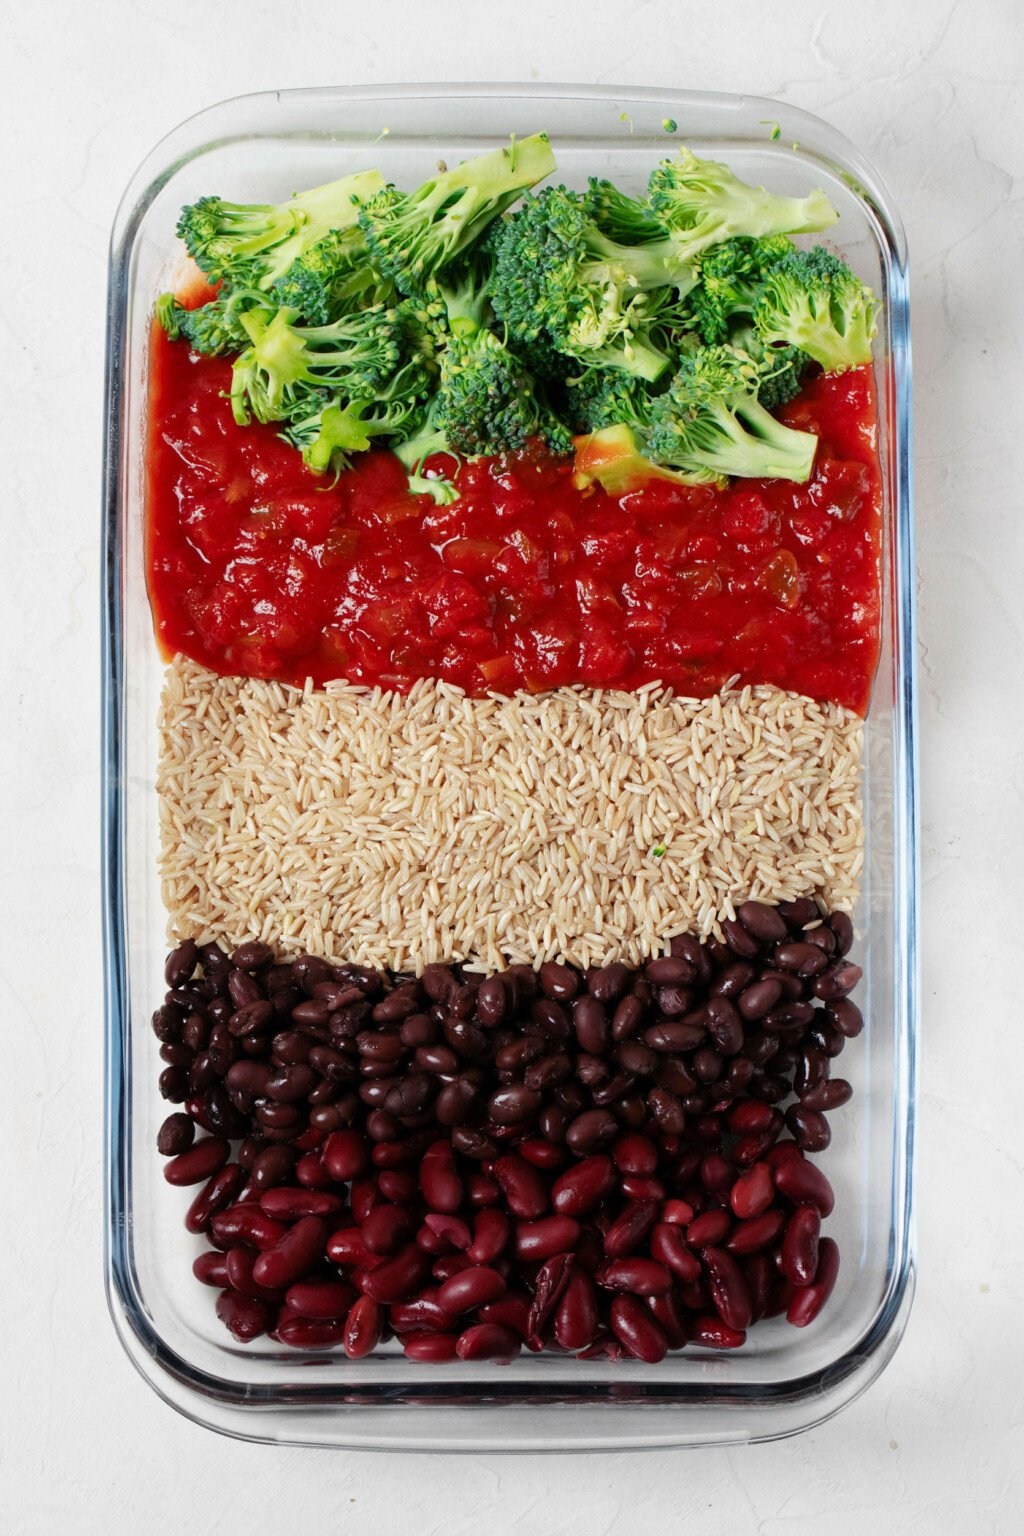
I use broccoli florets in this recipe because they're probably my favorite vegetable, they're easy to work with in fresh or frozen form, and they stand up well to baking. But you could use cauliflower florets, sliced zucchini, or cut pieces of green beans, too.
The avocado oil helps to keep the rice grains fluffy and distinct, as well as to carry flavors in the recipe.
Step 3: BakeThe brown rice casserole will need about one hour in the oven. After baking, the top ought to appear darkened. Tomato pieces and beans will both rice to the top during cooking.
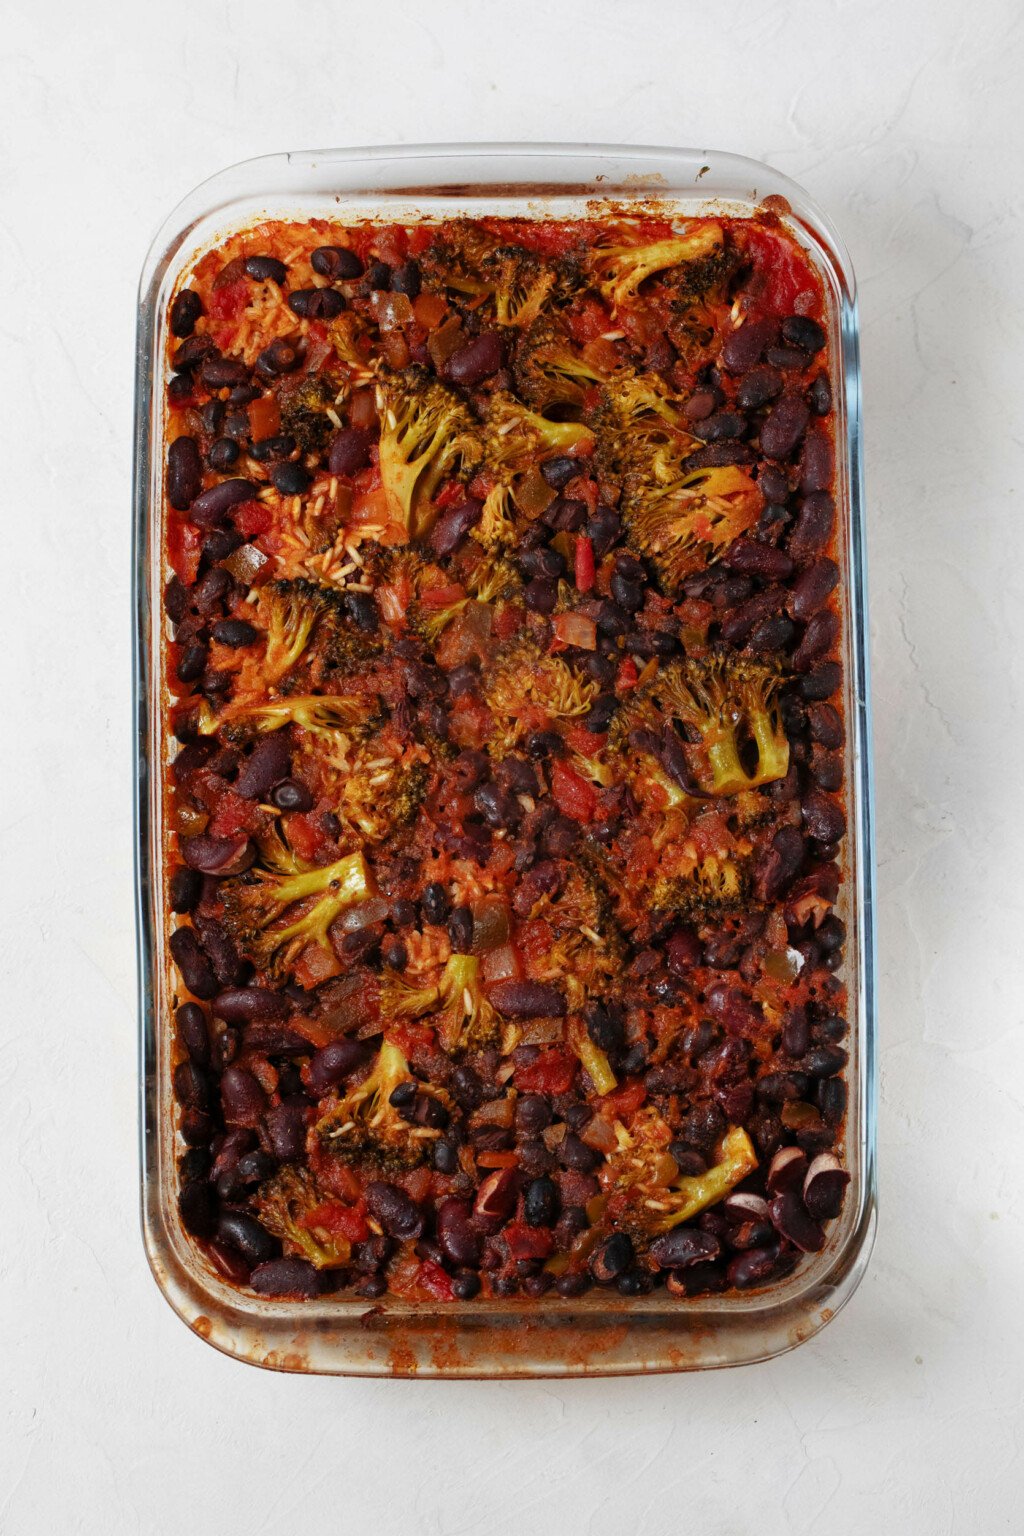
The rice should have absorbed all of the broth and be tender.
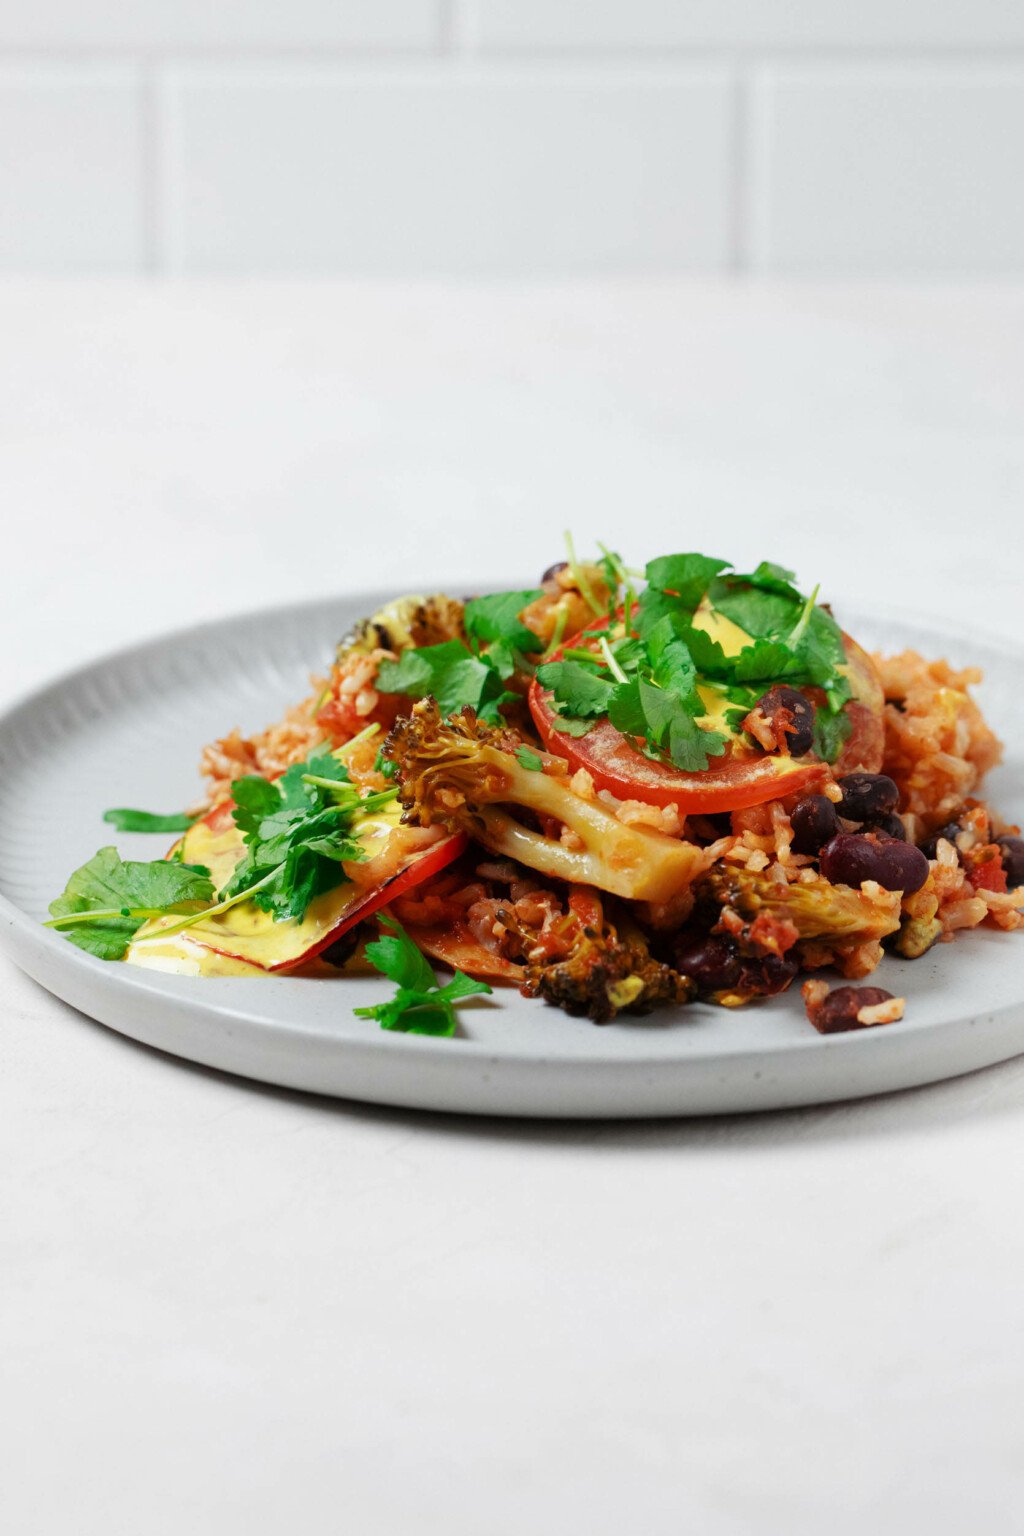
Step 4: Garnish (if you like)At this point, you can give your earthy, not-especially-photogenic brown rice casserole a little extra adornment and love.
I do this by slicing a beefsteak tomato and layering those slices on top of the freshly baked casserole. Turn the oven to it's broiler setting, on high.
Place the casserole under the broiler for 3-5 minutes, or until the tomatoes slices have shrunken a bit and appear softened, even a little browned in places.

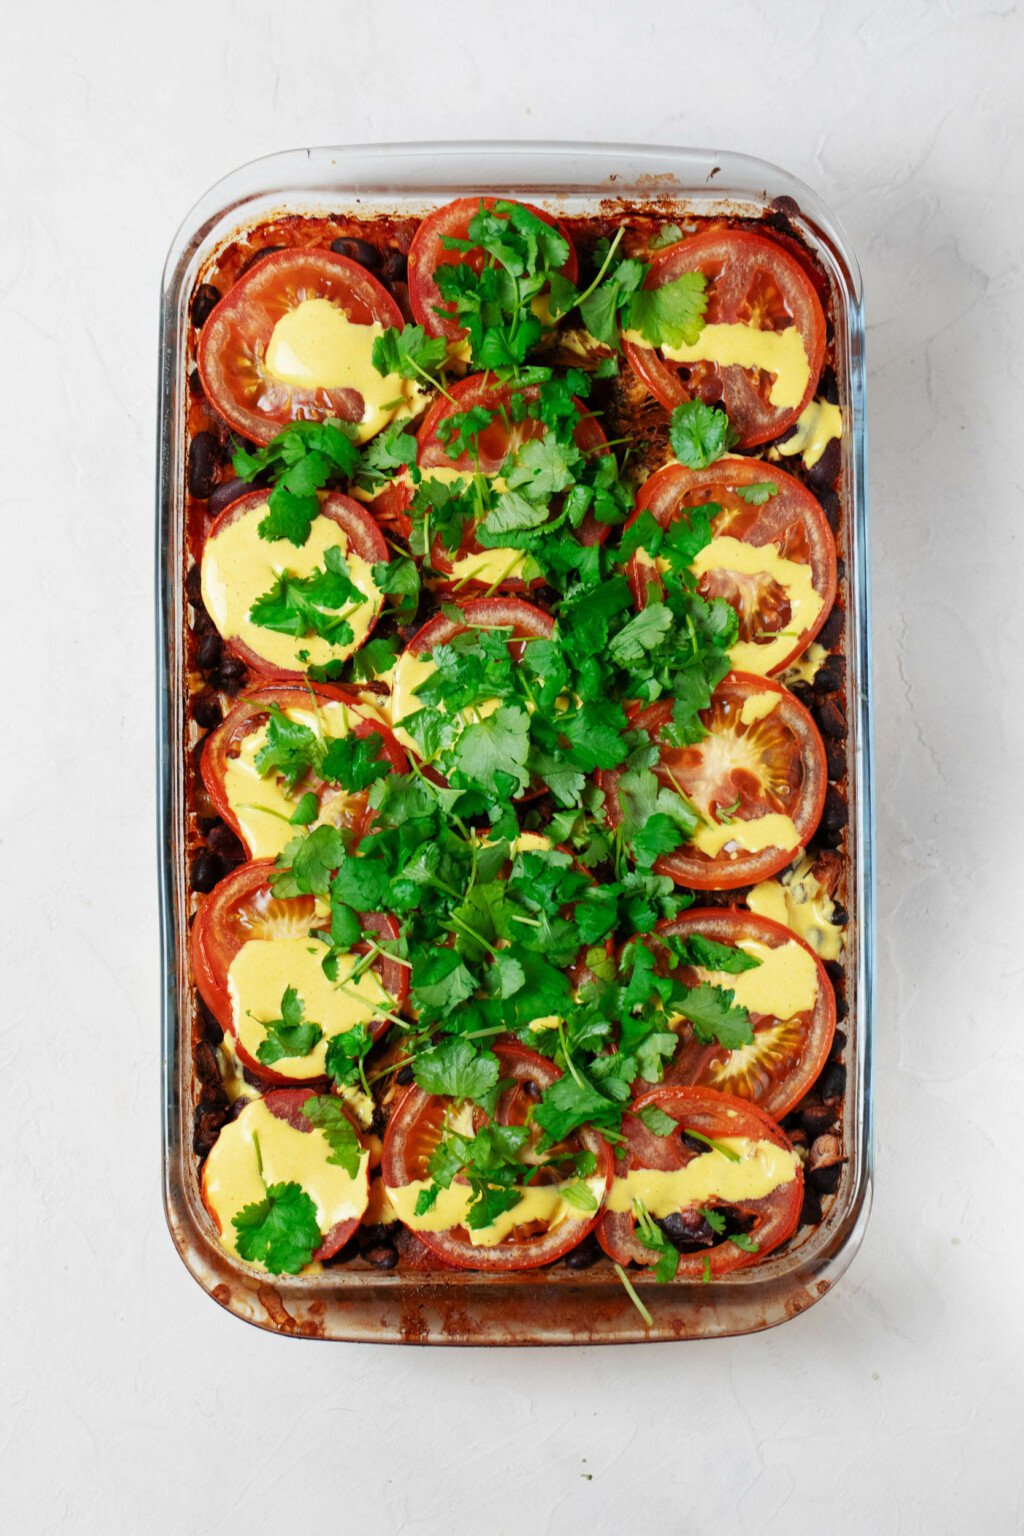
Then, drizzle your cashew queso sauce over the top of the casserole. I like to add a sprinkle of fresh, chopped cilantro after I do this for a pop of green.
If you don't have time for any of these finishing touches, that's OK. The baked rice and beans will still be nourishing and tasty.
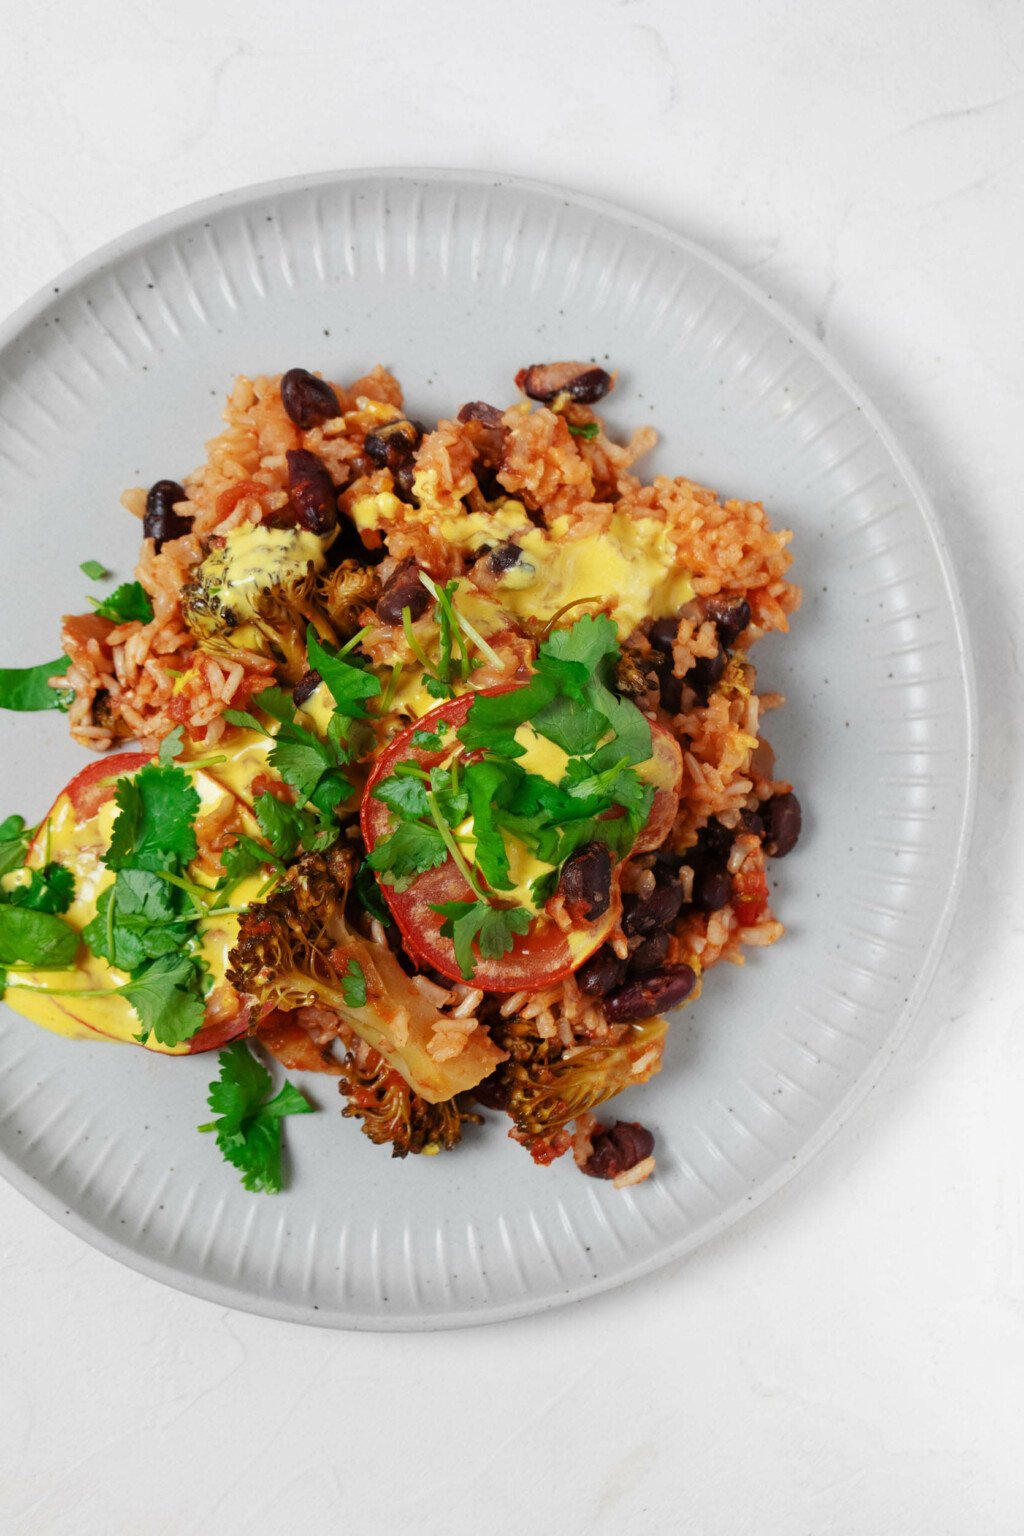
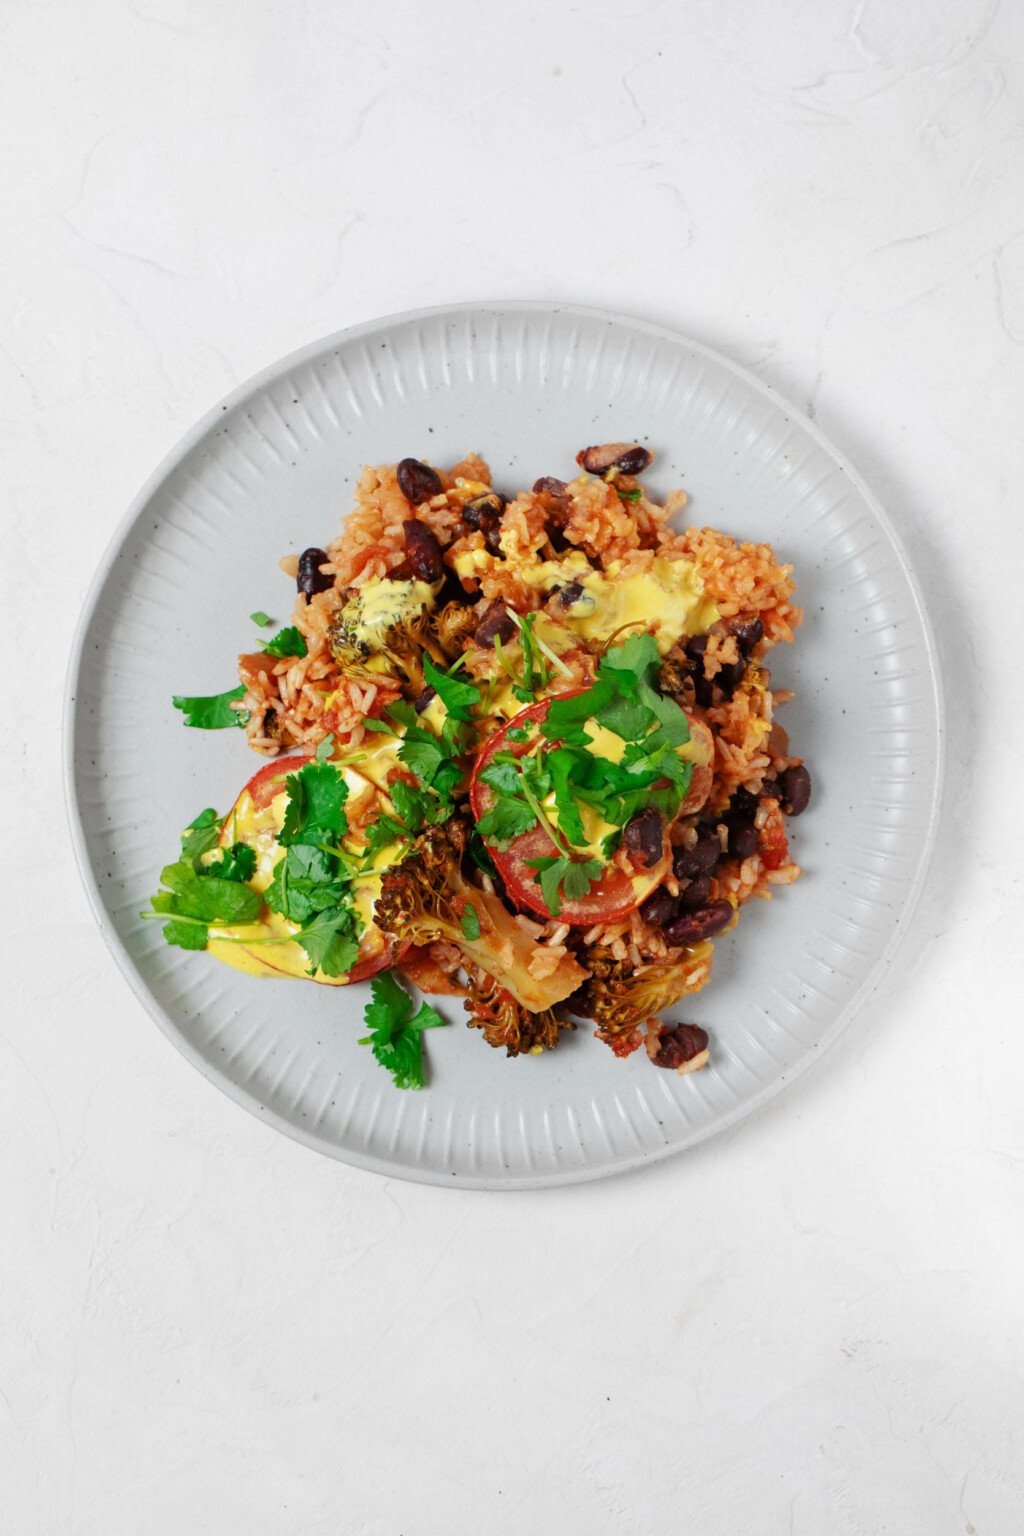
Step 5: Serve or store (freezer options included)At this point, you can cut the casserole into square slices and dig in. Serve them with your favorite side salad, slaw, or any other simple vegan vegetable side dish.
The Vegan Week
Embrace the joy of eating homemade food every day with the hearty and wholesome recipes in The Vegan Week.
Whether you have three, two, or even just one hour of time to spare, The Vegan Week will show you how to batch cook varied, colorful, and comforting dishes over the weekend.
Buy The Vegan WeekThe brown rice casserole is also an especially good option for vegan meal prep! The slices will keep well in an airtight container in your fridge for up to five days.
They can be frozen for up to six weeks and defrosted overnight in the fridge before serving.
More rice and bean dishes to savorIf you rely on the rice and bean combo as routinely as I do, I have a few ideas for you. Maybe they'll inspire you to approach this time-honored pairing in a fresh way?
- Rice, beans, tofu and greens
- Coconut sweet potato rice and beans
- One-pot turmeric rice, beans and greens
- Rice & bean collard wraps
- Black bean and cilantro rice bowls
- Lemon dill zucchini and chickpea rice
And here's my new favorite addition to that list.
It's not the fanciest or most intricately seasoned casserole you'll ever make, by any means. But it is something hearty and wholesome that you can make with almost no effort—and that's a win in my book.

- 1 1/2 cups long-grain brown rice (270g)
- 1 1/2 cups cooked black beans (240g, or one 15-ounce / 425g can, drained)
- 1 1/2 cups cooked kidney beans (240g, or one 15-ounce / 425g can, drained)
- 16 ounces salsa of choice, preferably a roasted salsa (mild, medium, or spicy) (475ml)
- 1 1/2 tablespoons avocado oil
- 2 cups broccoli florets (or a mixture of florets and cuts) (200g)
- 1 teaspoon ground cumin
- 1/2 teaspoon sweet or smoked paprika (optional)
- 1/4-1/2 teaspoon garlic powder (adjust to taste)
- 2 1/4 cups vegan chicken-style or vegetable broth, at room temperature (530ml)
- 1 beefsteak tomato, cut crosswise into thin slices
- 1 batch cashew queso sauce (substitute a store-bought vegan cheese sauce or vegan cheese shreds)
- Chopped fresh parsley or cilantro leaves (optional, for garnish)
- Preheat your oven to 375°F / 190°C.
- Place the rice, beans, salsa, avocado oil, broccoli florets, cumin, paprika if using, garlic powder, and broth into a 9 x 13-inch / 24 x 36cm baking dish. Stir well. Cover the baking dish tightly with foil. Transfer the dish to the oven and bake for 1 hour.
- Remove the baking dish from the oven. Set the broiler to high. Arrange the thin tomato slices in a layer on top of the baked rice and beans.
- Place the casserole under the broiler for 3-5 minutes, or until the tomatoes are a bit shrunken and appear cooked.
- Drizzle the casserole in a zigzag pattern with the cashew queso sauce. Finish topping it with fresh, chopped cilantro or parsley leaves. Cut the casserole into slices and serve with additional queso sauce tableside.
- The casserole will keep in an airtight container in the fridge for up to 6 days and can be frozen for up to 6 weeks.
Look forward to hearing what you think about this low-stress formula, friends. It's a good reason to double up on your favorite jar of salsa the next time you spot it at the store!
Have a great wrap-up to the week.
xo
The post Vegan Brown Rice Casserole with Broccoli and Beans appeared first on The Full Helping.
Sat, 30 Mar 2024 23:03:38 +0000
4-Ingredient Vegan Cream Cheese Frosting
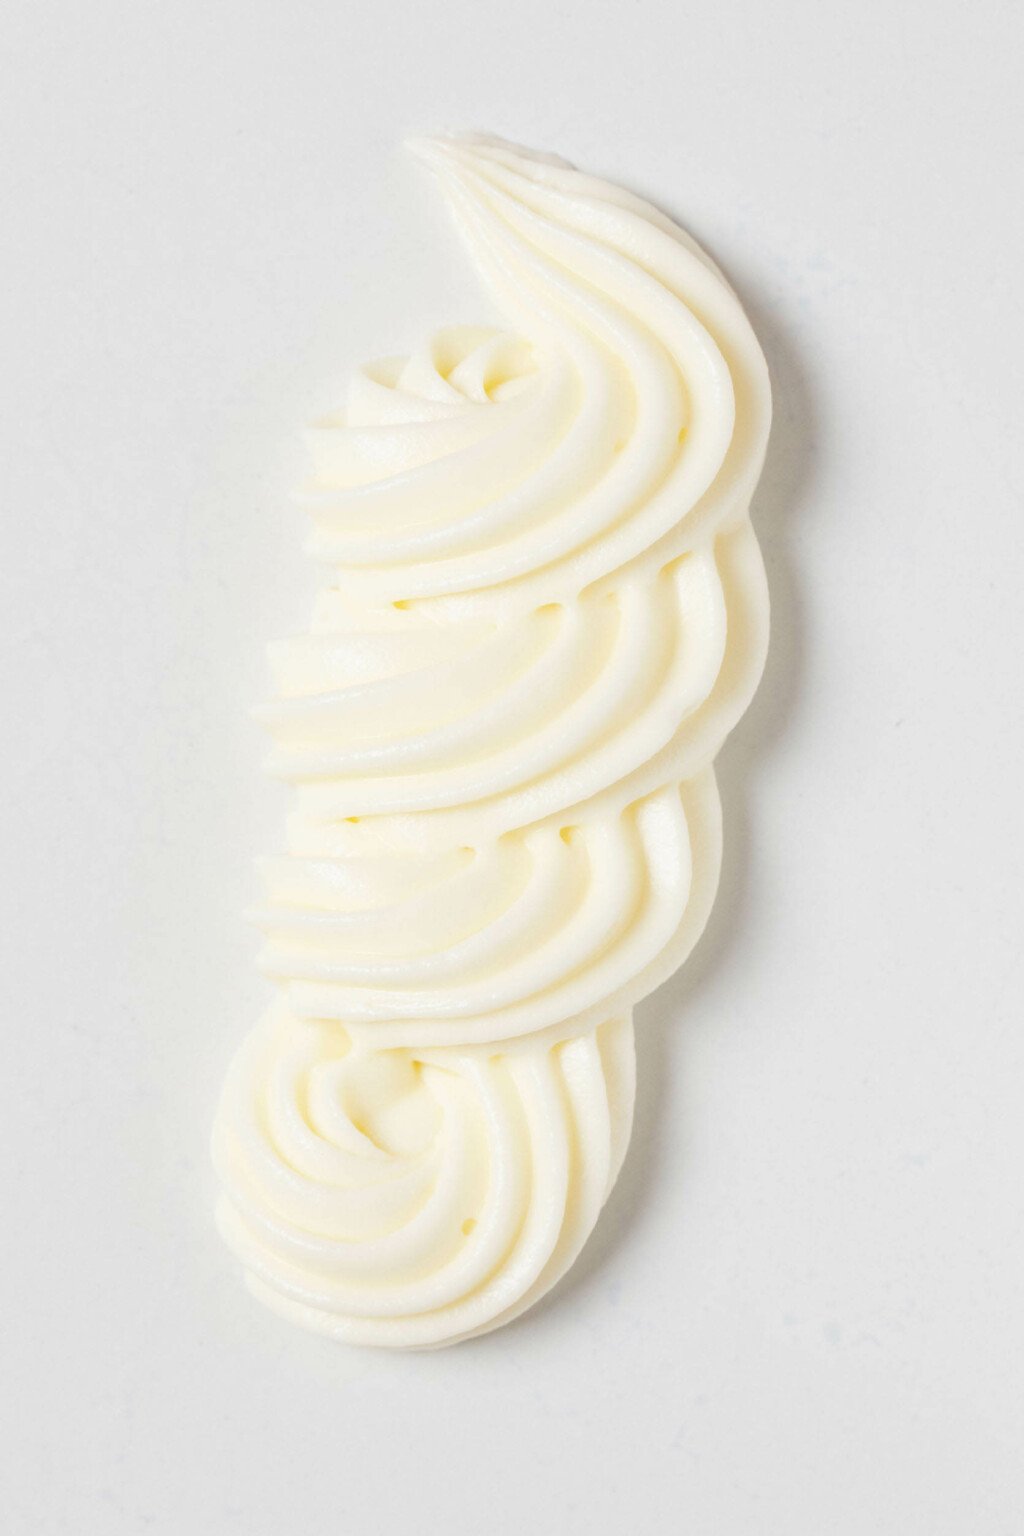
This vegan cream cheese frosting calls for only four ingredients, and it makes one small batch. It's the perfect amount for a dozen cupcakes or a single-layer square snack cake! The frosting is tangy, sweet, and an ideal accompaniment to vegan carrot cake.
It's springtime, the season of blossoming foliage, longer days, and gentler temperatures.
Green things are starting to pop up at the farmer's market: snap peas, asparagus spears, fava beans, and shelling peas.
There are holy days to observe and celebrate within many different faiths and spiritual traditions.
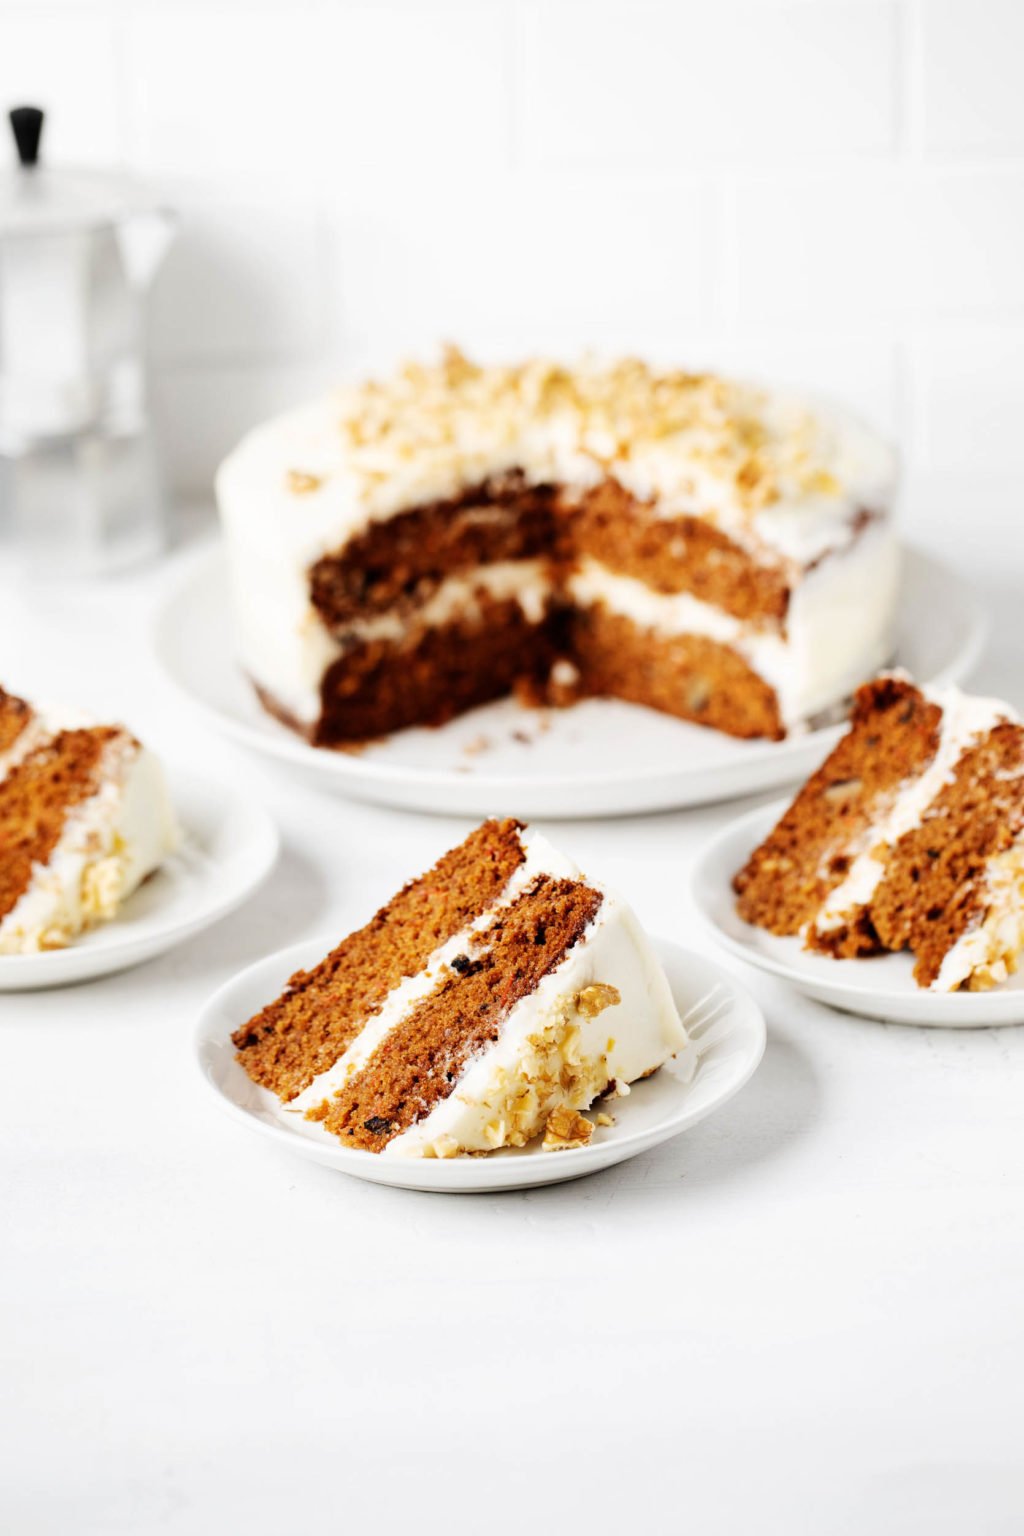
Perhaps least importantly—yet very happily—it's also carrot cake season.
I've said it many times before, but I'm always happy to declare: vegan cake is my all-time favorite dessert, and carrot cake is my all-time favorite cake!
No vegan carrot cake is complete without swirls of vegan cream cheese frosting.
Cream cheese frosting is also the perfect go-to frosting for any person who likes a frosted cake, yet finds traditional buttercream to be a little sickly sweet.
In that spirit, I'm sharing my favorite recipe for vegan cream cheese frosting. It has a perfect consistency for piping or spreading, it's super easy to make, and it's enough for one small batch.
If you need enough frosting for a layer cake or a large sheet-pan cake, don't worry: the frosting recipe can be doubled or even tripled.
What is cream cheese frosting?Most frosting that's used for piping calls for a foundation of butter.
To the butter—or vegan butter, for a plant-based frosting recipe—one adds powdered sugar and any necessary add-ins, such as artificial color or flavor extracts.
Cream cheese frosting, on the other hand, uses a mix of butter and cream cheese as the creamy base.
The result of this change-up is frosting that's a little less sweet than traditional buttercream. Because cream cheese is tangy, it adds some brightness and acidity to a potentially cloying icing.
I also find that cream cheese frosting, in spite of its rich consistency, has a lighter quality overall than buttercream.
For both of these reasons, and especially because I like acidic flavors, vegan cream cheese frosting is my number one choice for all of my frosted cakes and cupcakes.
A dairy-free spin on a dessert classicTo make cream cheese frosting vegan, it's necessary to use two non-traditional, dairy-free alternatives: vegan butter and vegan cream cheese.
The best vegan butter for frostingA number of different vegan butters will work well for the frosting. I've tested the recipe with all of the following:
- Earth Balance
- Miyoko's Creamery
- Country Crock
- Om Sweet Home Non-Dairy Butter Alternative
- For:A Butter
- Wegmans
My feeling is that the butters with lower melting points are optimal. I've had the most stable and consistent results with Earth Balance and For:A.
However, I've yet to try a solid, commercial vegan butter that simply doesn't work in the recipe.
If you use a vegan butter that seems to soften quickly in a warm-ish room, be aware of the fact that it will be best to prepare the frosting quickly and in cool conditions. That way, you can avoid a batch of overly soft or melting frosting.
Otherwise, you can use your favorite vegan butter brand here.
What type of cream cheese should I use?Once again, I've tried to test and sample a range of options. I've made batches of this vegan cream cheese frosting with:
- Tofutti Better Than Cream Cheese
- Kite Hill plain Cream Cheese Alternative
- Violife Just Like Cream Cheese Original
- Miyoko's plain Plant Milk Cream Cheese
Among these, I have two clear favorites: Tofutti and Kite Hill.
The former has a nice, firm texture, and it's a good option for those with nut allergies.
The latter, Kite Hill, is my favorite for flavor. Its tanginess is unmatched, which leads to a balanced frosting.
However, as with the choice of butter, I haven't yet tested a vegan cream cheese that was a disaster or simply didn't work in the recipe.
Be aware that both the butter and the cream cheese that you choose should be at room temperature before you make the frosting.
This doesn't mean hot or practically melting! Aim for butter and cream cheese that are each solid, yet not cold.
The advantage of a small batchListen, I love frosting, but there are very few scenarios in which I need to have a ton of it on hand.
Specifically, I need a larger volume of frosting when I'm making a layer cake or a larger sheet pan cake.
The rest of the time, I tend to make simple snack cakes and batches of cupcakes. For those purposes, a modest amount of frosting really does the trick.
The vegan cream cheese frosting that I'm sharing today will give you enough for a dozen cupcakes or for icing an 8-inch / 20cm or 9-inch / 23cm square snack cake.

You can easily double the recipe for frosting a layer cake, such as my beloved vegan carrot cake with cream cheese frosting.
How to make vegan cream cheese frostingThe steps for making this frosting are quite simple.
Before I describe them, I should note that I usually make this recipe in my stand mixer, but the recipe works well with a handheld mixer, too.
Here's what you'll do.
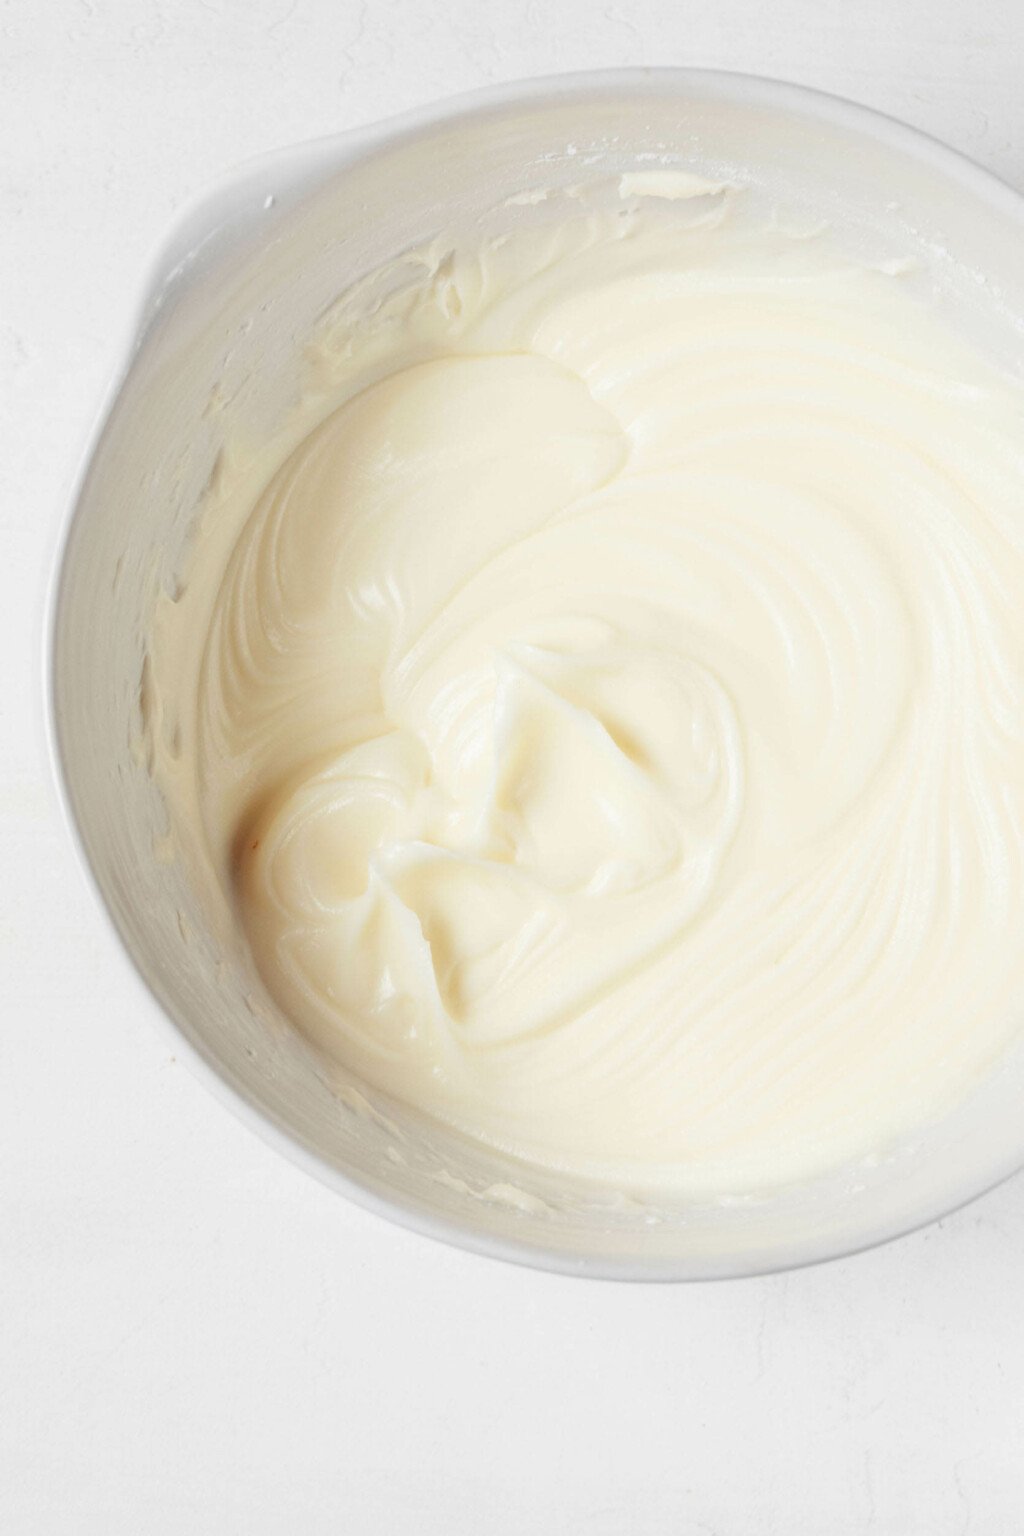
Step 1: Beat the butter and cream cheeseFirst, you'll beat the butter and cream cheese together for 3 minutes, or until they're very smooth and just becoming fluffy.
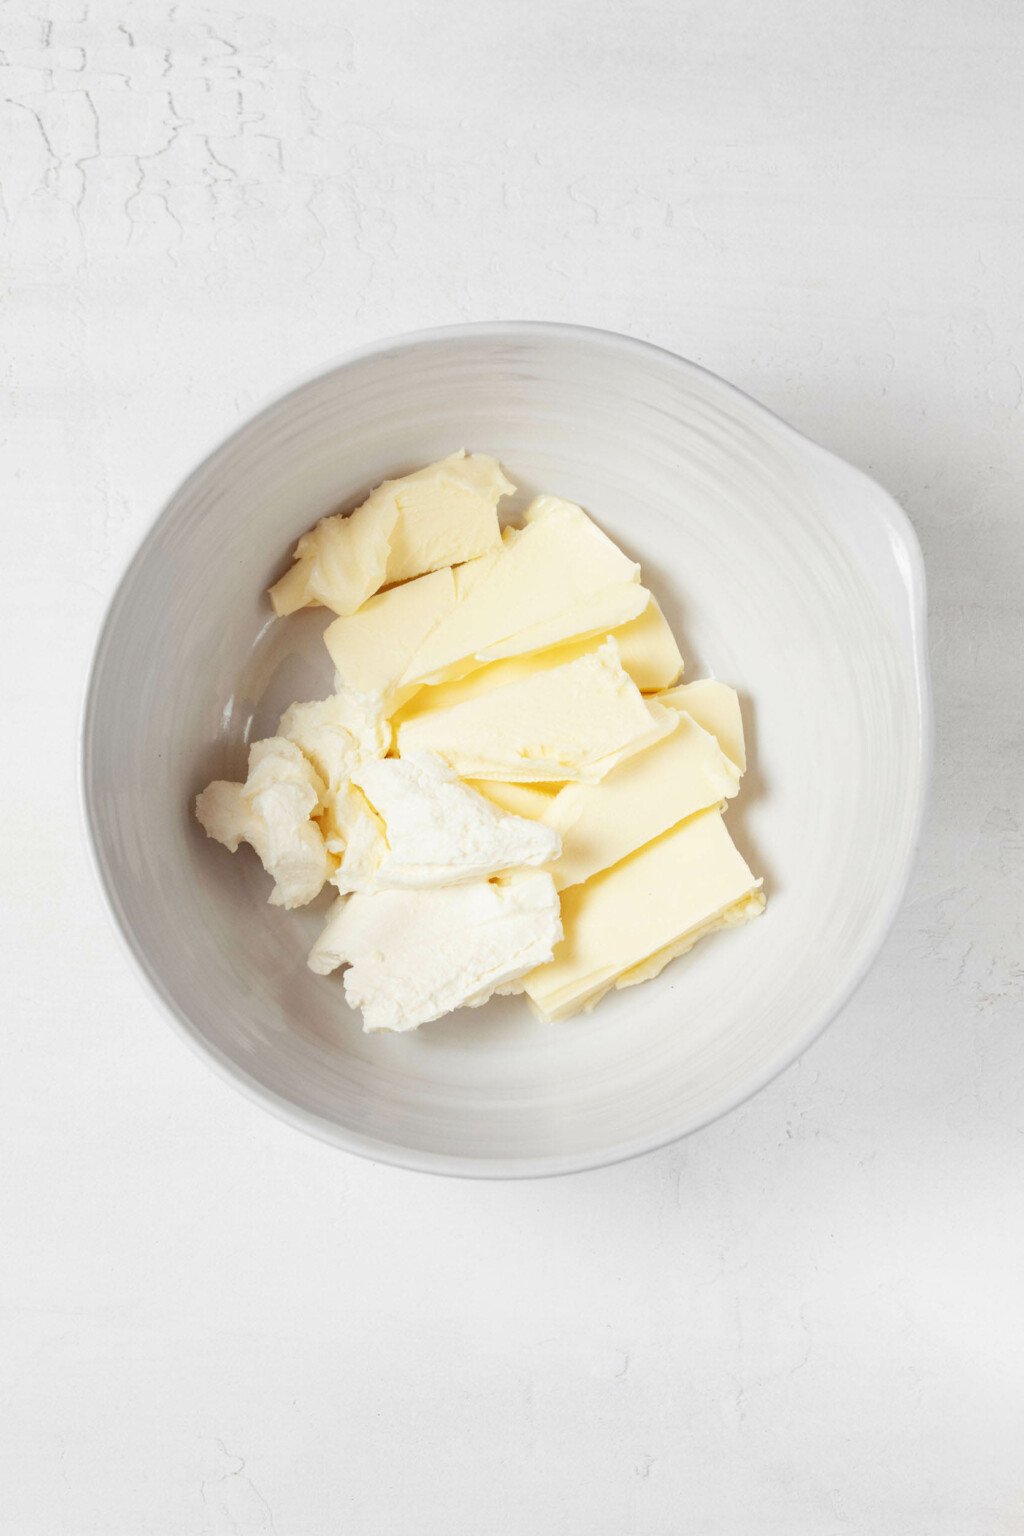
You should do this on medium low speed, regardless of the type of mixer that you're using. If you use a stand mixer, be sure to use the paddle attachment for this job.
Step 2: Add confectioner's sugarNext, you'll add two cups of confectioner's sugar (aka powdered sugar) to the bowl. Mix the sugar together with the butter and cream cheese on low speed for two minutes.
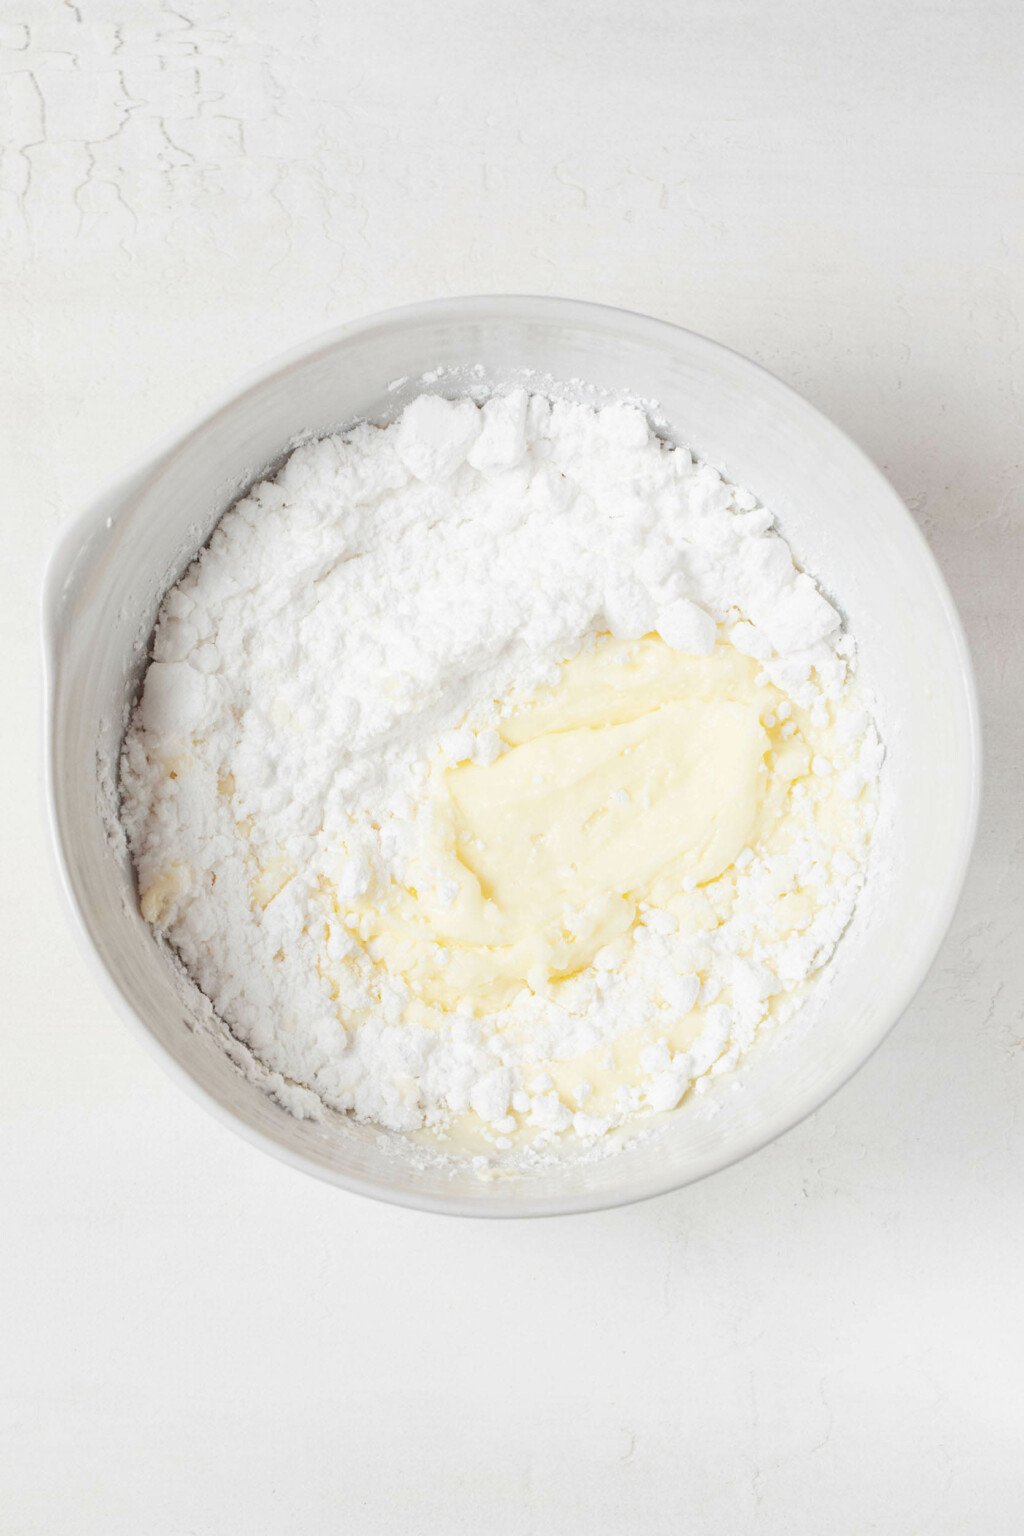
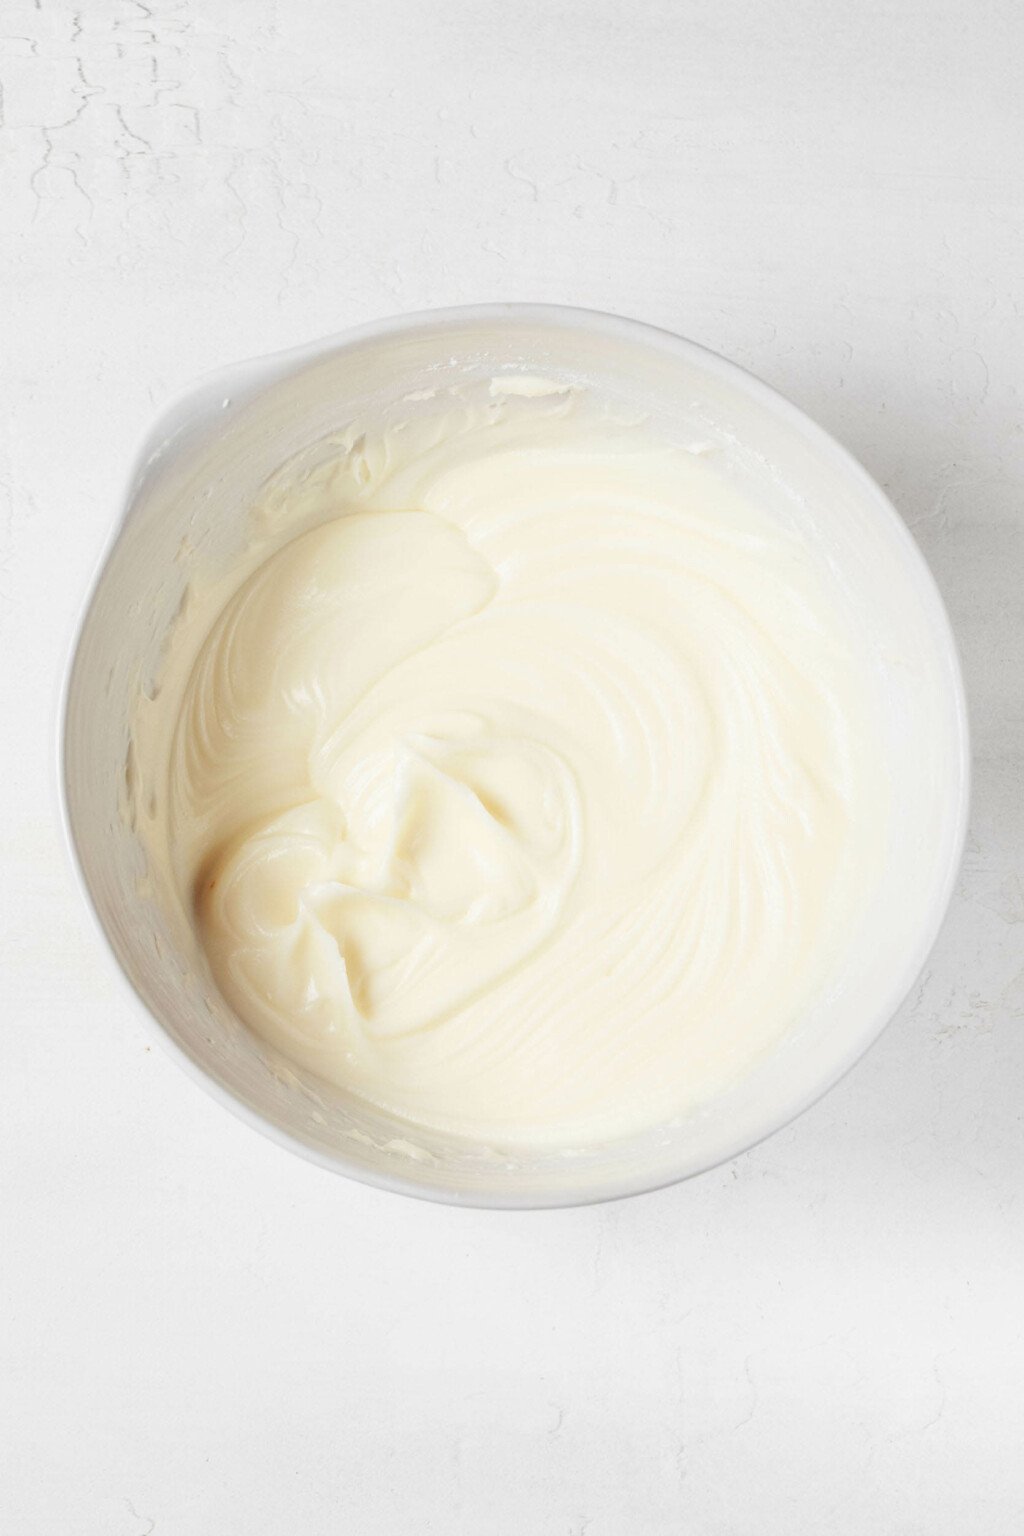
Then, raise the speed to medium low and continue mixing for 2-3 minutes, or until the frosting is very smooth and light. Add your vanilla extract, then mix for 30 seconds more: just enough to incorporate the vanilla fully.
Step 3: Use or storeAt this point, you can use the frosting immediately or store it for future use.
If you plan to frost a cake or cupcakes soon (within 2 hours), you can cover the frosting and leave it in on a countertop until you're ready to use it. However, you should be sure that your room is relatively cool, so that the frosting doesn't get overly soft.
If you'd like to use the frosting within a few days, you can transfer it to an airtight container and store it in the fridge for up to 1 week. Be sure to bring the frosting to room temperature before you work with it.
Finally, you can freeze the frosting for up to 8 weeks. Defrost it in the fridge overnight, then allow it to come to room temperature before you use it for decoration.
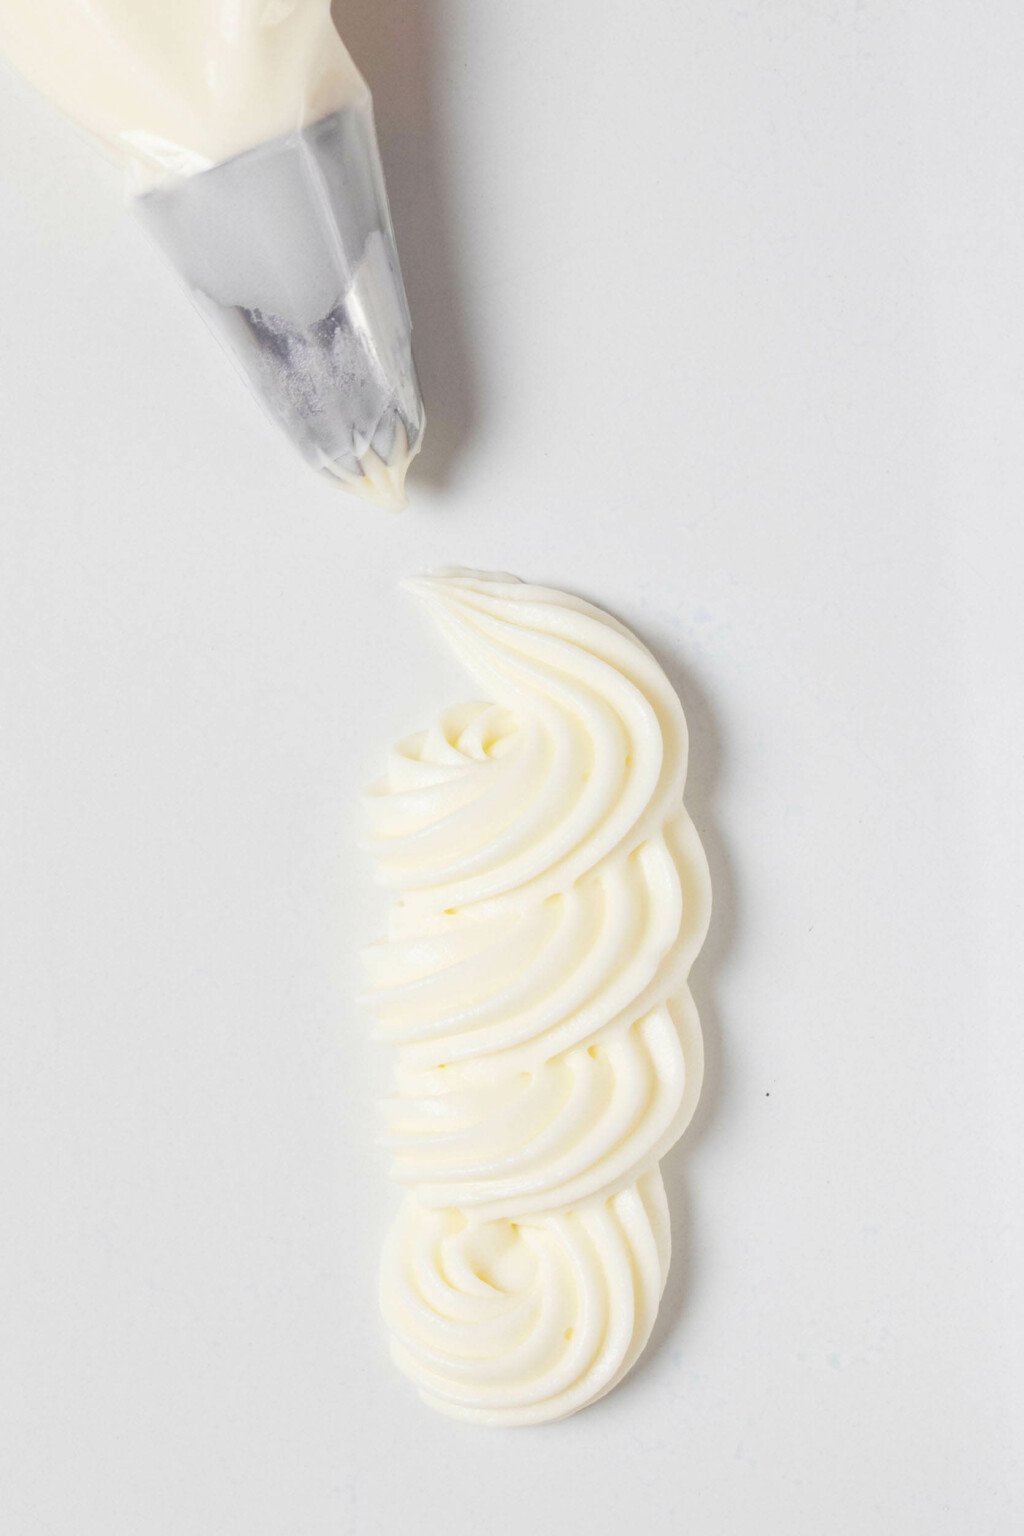
This frosting works beautifully for swirls and spreading—I like to use a small, invert spatula for this—or for piping.
This blog post captures some of my favorite tips and tricks for getting comfortable with piping and cake decorating!
Which recipes would work well with the frosting?To be honest, I love this cream cheese frosting with so many different cakes and cupcakes. But here are a few of the ones that I think it's best suited for:
- Vegan carrot cake with cream cheese frosting
- Vegan carrot cake cupcakes
- Pumpkin carrot cake
- Cinnamon spice sheet cake
- Vegan apple cider cupcakes
I'm sure that you'll think of lots of great treats to adorn with this creamy, tasty frosting. Here's the recipe.

- 1/4 cup vegan cream cheese (60 g; make sure the cream cheese is at room temperature)
- 8 tablespoons vegan butter (112 g, or 1 stick; make sure the butter is at room temperature)
- 2 cups confectioner's sugar (230g)
- 1/2 teaspoon vanilla extract
- Place the butter and cream cheese in a stand mixer fitted with the paddle attachment, or place them into a large mixing bowl and use a hand mixer.
- Mix on medium speed for 3 minutes, or until the butter and cream cheese are very smooth and well incorporated.
- Stop the mixer and add the sugar to the bowl. Mix the frosting on low speed for 2 minutes, then raise the speed to medium low. Beat for another 2-3 minutes, or until the frosting is very smooth and a bit fluffy.
- Add the vanilla extract to the bowl, then beat the frosting for another 30 seconds to incorporate the vanilla fully.
- Use the frosting right away, or store it in the fridge for up to 1 week. Be sure to bring it to room temperature before using it for decoration.
Easter Sunday, which is a hopeful celebration, is tomorrow. For me, desserts and sweet things are always intertwined with the appreciation of life, and appreciation helps to sustain my hope.
So, here's to moist and fluffy spring cakes as a celebration of life's sweetness—and a wonderful frosting to adorn them! Hope you enjoy it.
xo
The post 4-Ingredient Vegan Cream Cheese Frosting appeared first on The Full Helping.
Sat, 23 Mar 2024 21:35:25 +0000
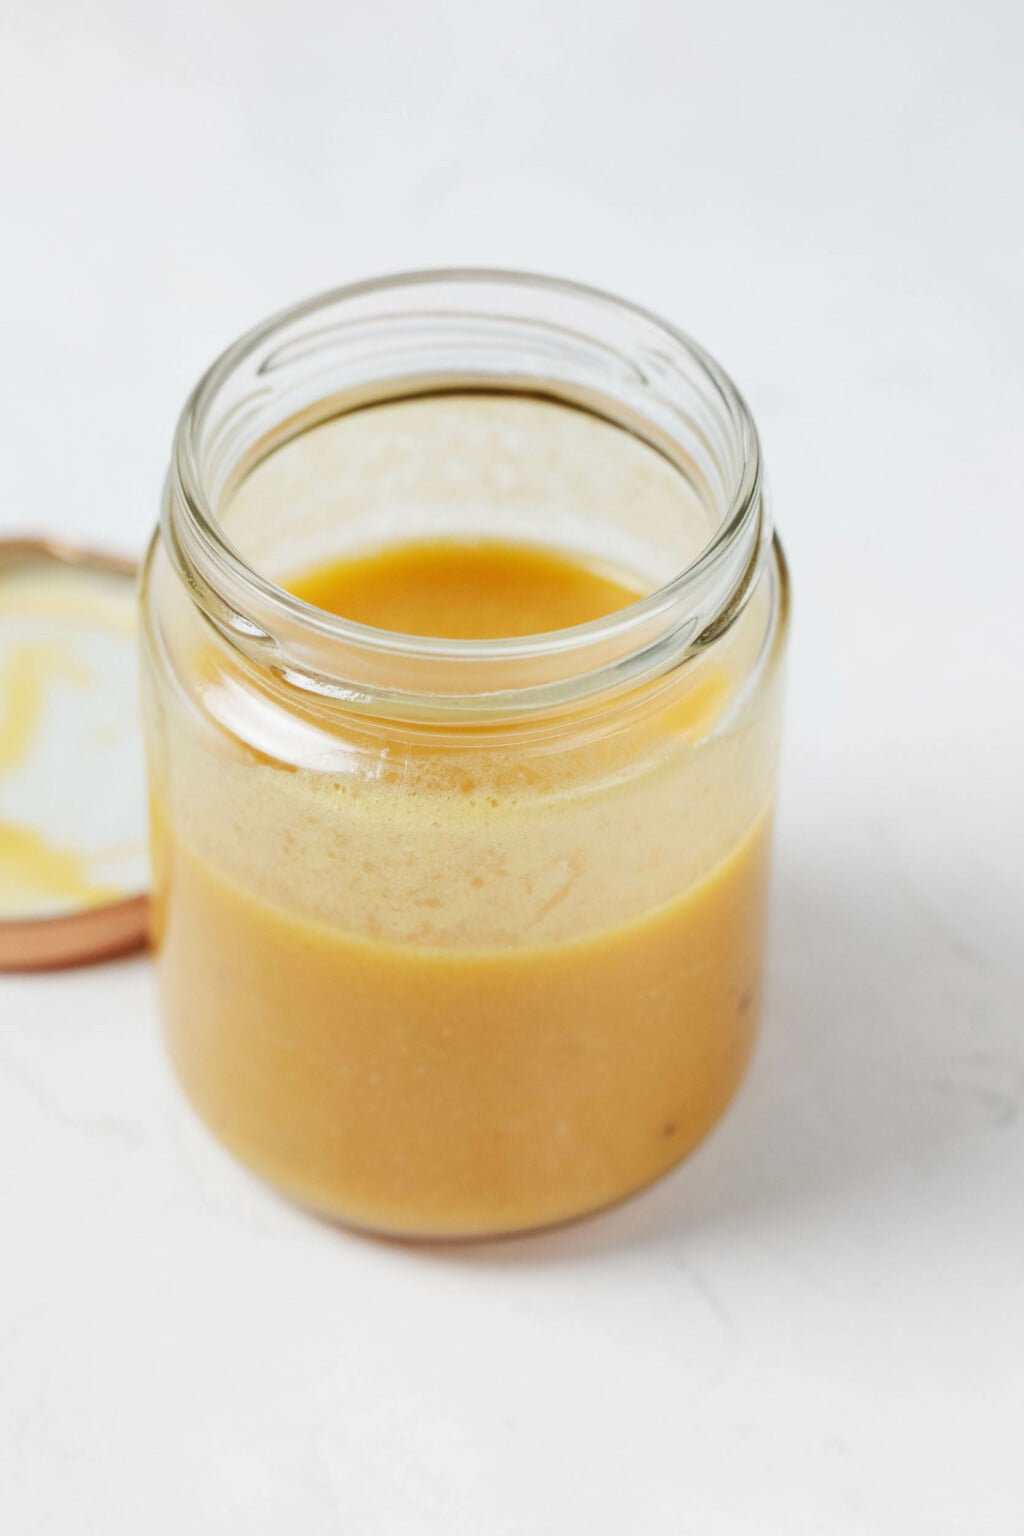
Orange Miso Vinaigrette
This orange miso vinaigrette is bright and acidic, yet also savory and rich. White miso paste helps to create a salad dressing that has complexity and depth. This is a perfect vinaigrette for greens, grains, and roasted vegetables.
About a year ago, I got a great radicchio salad at a restaurant. It featured a miso salad dressing—specifically, a miso vinaigrette.
Had the vinaigrette not been labeled as "miso dressing" on the menu, I might not have immediately guessed that the miso was there.
When I tasted the salad, though, it made sense. The vinaigrette had a savoriness and richness that was unusual and memorable.
As is usually the case when I taste something that inspires me in a restaurant, I immediately got to thinking about how I might recreate the vinaigrette at home.
Then I remembered that I had actually experimented with a miso vinaigrette years ago. My homemade version had included some freshly squeezed orange juice, so there was brightness to balance the salty and savory qualities of the miso.
This past effort gave me a mental roadmap to build on.
Now, I've experimented with a few more batches of orange miso vinaigrette, and I'm so happy with what I've landed on.
What is miso?Miso is fermented soybean paste. Typically, it's made with soybeans, water, salt, and koji.
Koji, which is essentially the base culture used in miso (and sake) preparation, can be made from fermented rice, barley, or soybeans.
There are many types of miso. The two varieties of miso paste that are sold commonly in US grocery stores are red miso and white, or shiro, miso.
Red miso contains a higher proportion of soybean, rather than rice, koji. It has a deep, reddish brown color and an intensely salty and savory flavor.
White miso, or shiro miso, is also salty, but it has faintly sweet undertones as well. White miso has a higher proportion of rice koji, rather than soybean koji, and its color can range from beige to pale yellow.
I tend to use white miso more often than red in my recipes. I like its versatility; white miso is assertive enough to season soups and roasted vegetables. Yet it's also mellow enough to work in dips, spreads, or dressings.
This orange miso vinaigrette is a good example.
Is miso gluten free?It depends. Some types of miso are made exclusively with soybeans, chickpeas, or other legumes. These varieties can be truly gluten-free.
Many varieties of miso use koji that contains barley or rice that has cross-contamination. In these cases, the miso isn't gluten free. People with celiac disease should be especially careful about checking labels when they select a brand of miso to work with.
The Miso Master brand of white miso, which is what I use at home, is apparently NSF gluten-free certified.
Working with miso pasteMiso paste isn't a difficult ingredient to work with, but it is a little delicate.
If you boil miso aggressively in a soup, for example, the heat may affect the miso's flavor or aromas. It's best to simmer soups with miso gently.
Miso is a thick paste, so it's also helpful to turn it into a slurry or whisk it gradually when adding it to liquids.
When I add miso to soup, I always create a slurry with about a half cup of hot broth or water (or another cooking liquid) before transferring it into my pot.
When I'm whisking miso into a sauce, as I do to make his miso vinaigrette, I usually whisk the miso with a small amount of liquid—about a quarter cup—first.
Once that mixture is smooth, I gradually whisk in more liquid until I've created the smooth dressing or sauce that I want.
The magic of miso in dressing (or sauce)Miso's primary flavor qualities are saltiness and savoriness. White miso is also a little sweet, while red miso can be a little funky.
Most vinaigrette recipes call for a good amount of salt. This is necessary to season salad and balance the acid and fat in a dressing.
Miso vinaigrette doesn't only rely on salt for salinity. The miso contributes saltiness of its own, yes, but the it's not a flat, straightforward salty quality. Instead, it feels rich and dimensional.
How to make orange miso vinaigretteMany of my favorite vinaigrette recipes, including my simple Champagne vinaigrette, Italian dressing, and Greek vinaigrette, can be made simply by putting ingredients into a mason jar and shaking vigorously.
The citrus miso vinaigrette is a little more involved in that there should be some stepwise whisking. Yet it's still quite easy to prepare.
Here are the steps.
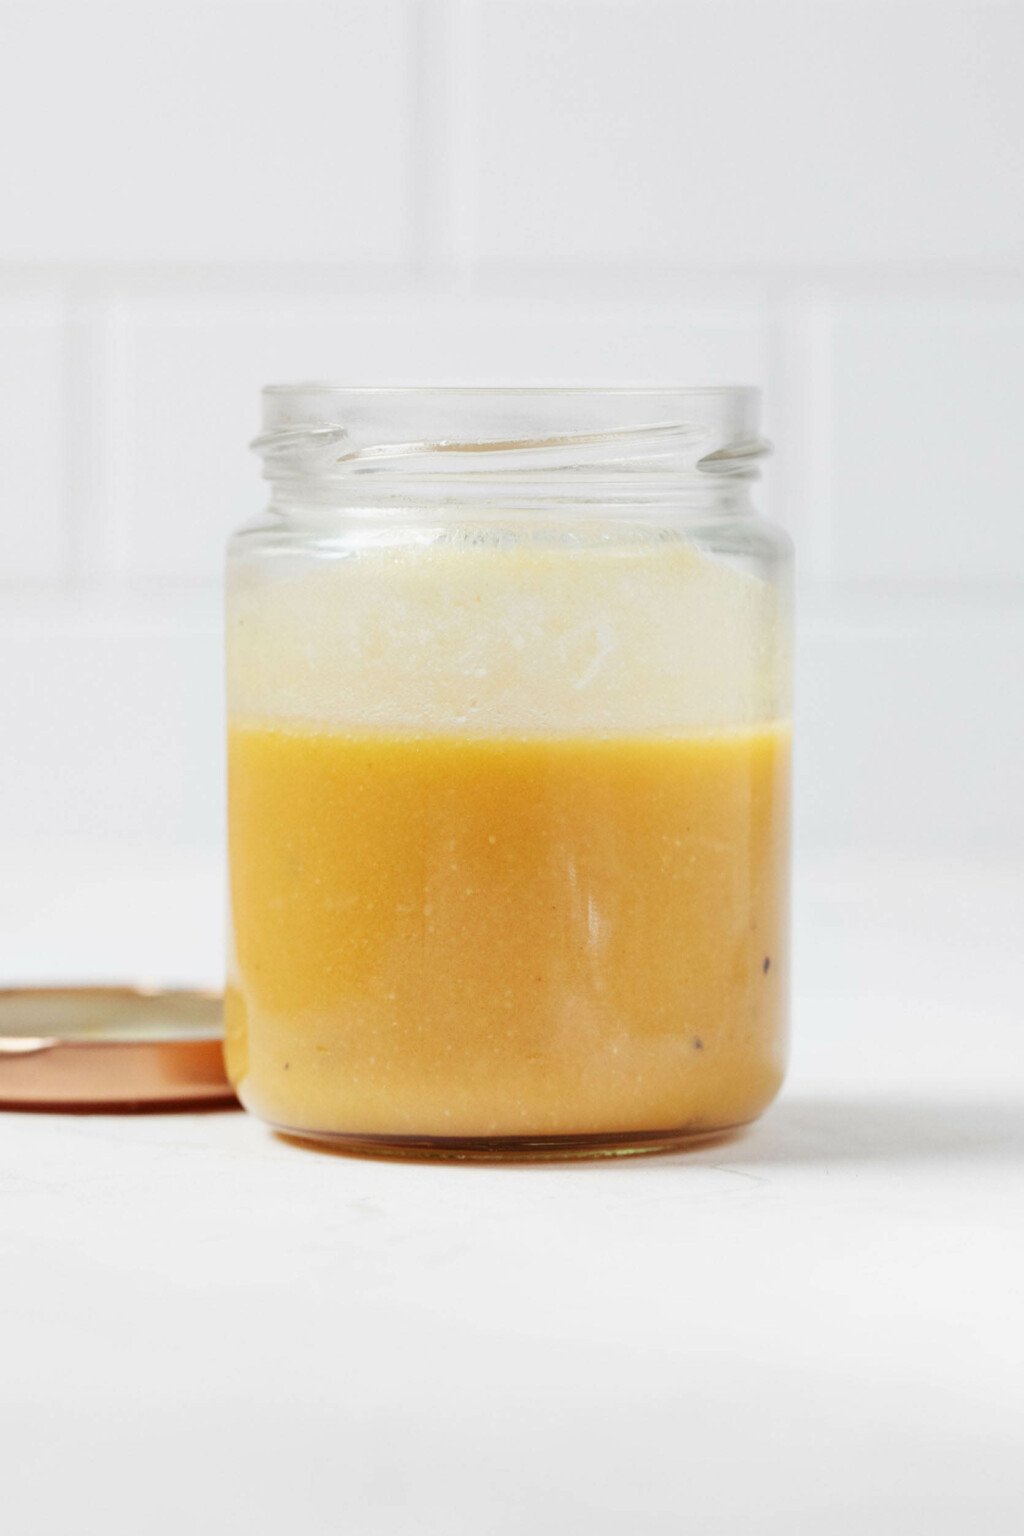
Step 1: Whisk together the miso and orange juiceFirst, you'll whisk together two tablespoons of white miso and a quarter cup of orange juice.
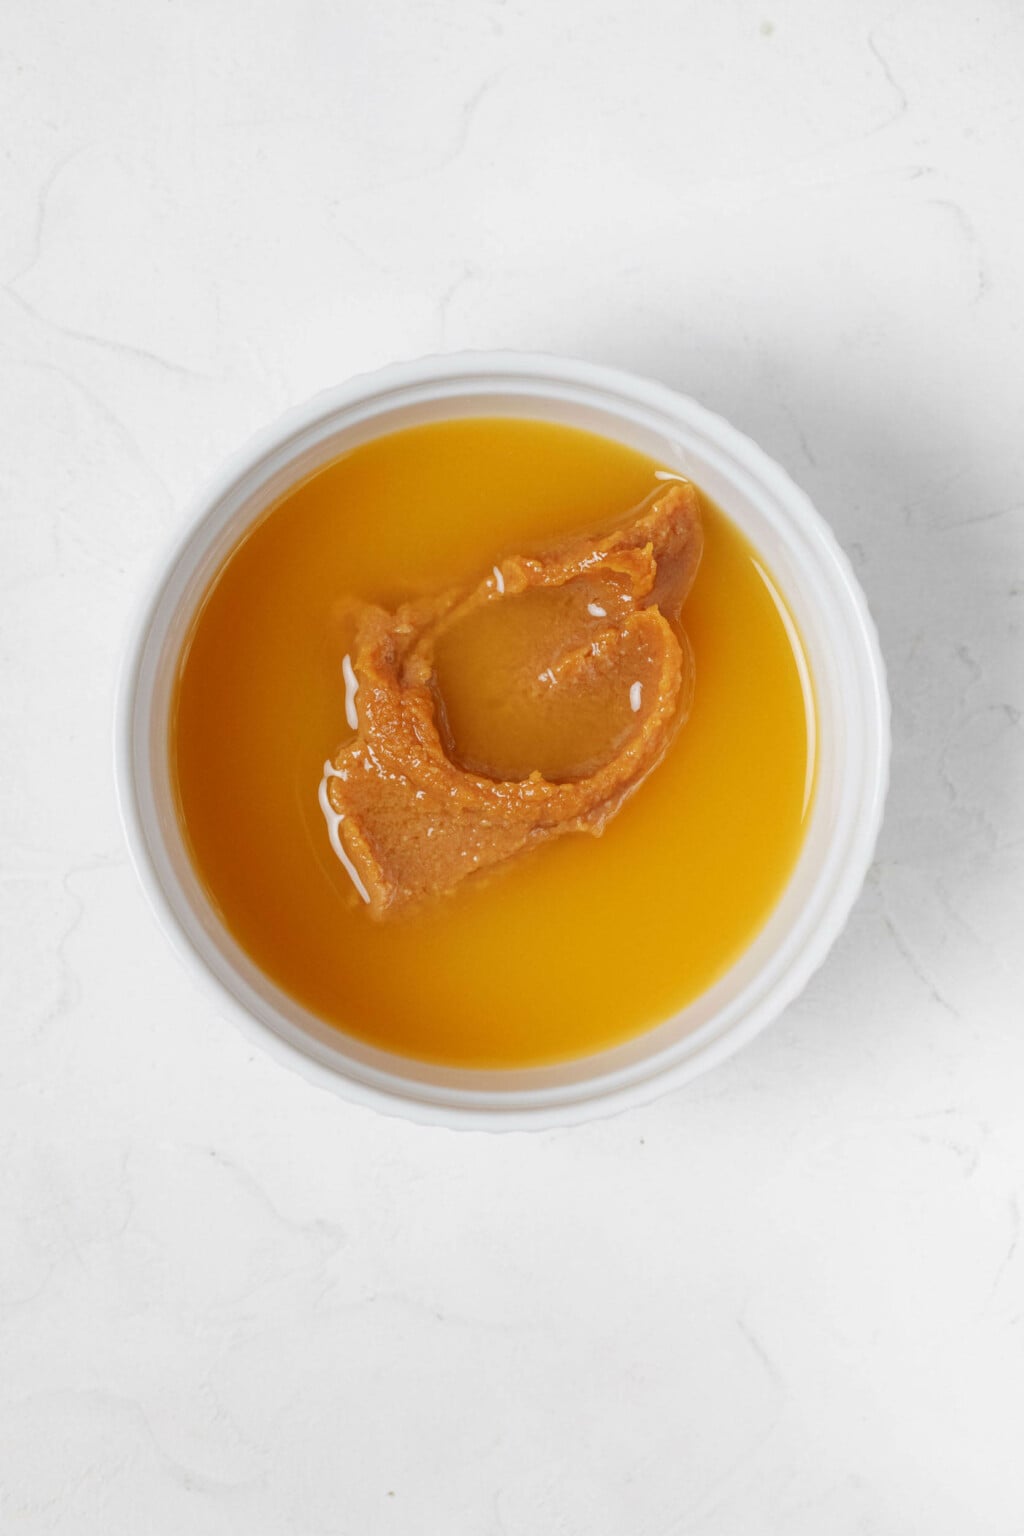
The miso won't dissolve in the OJ right away. Rather, it will take two or three minutes for a smooth liquid to form. Simply be patient and keep whisking!
As far as orange juice goes, you can use freshly squeezed or pasteurized. I like the flavor of freshly squeezed better, but both options are fine.
Step 2: Whisk in the remaining ingredients.Once you have a smooth liquid base for the vinaigrette, you can whisk in the remaining ingrdients.
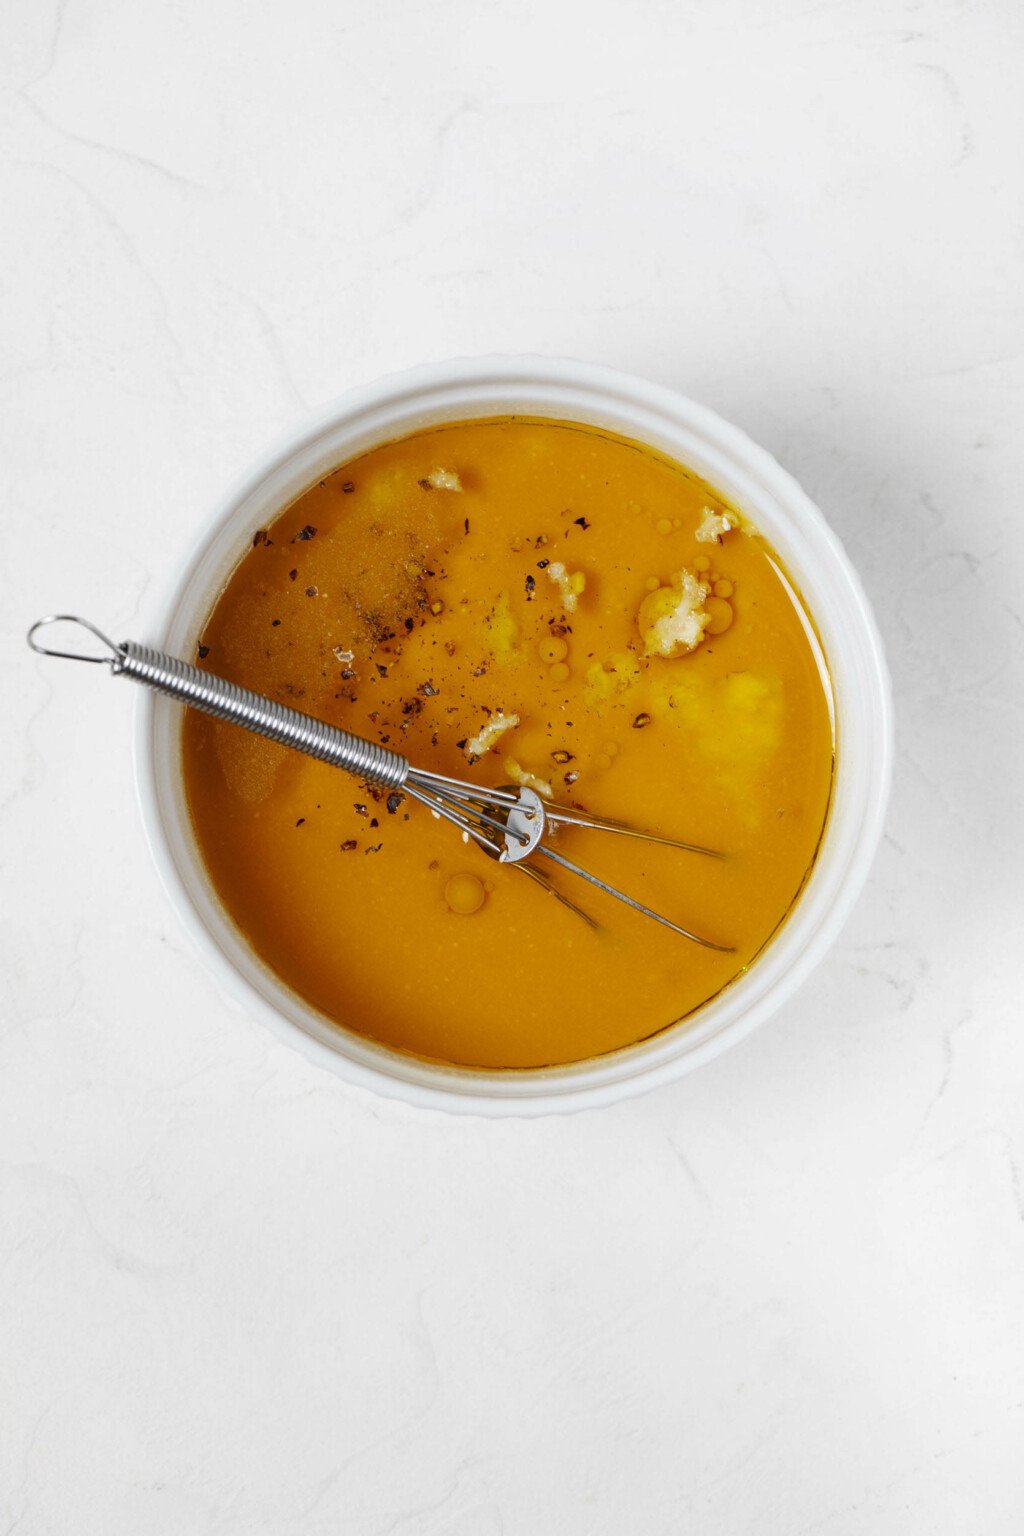
These are freshly squeezed lemon juice, olive oil, minced garlic, salt, and pepper. Whisk vigorously, so that the orange and miso mixture turns into a nice emulsion with the oil.
For this vinaigrette and other homemade salad dressings, I like to use a mini whisk. It's inexpensive and so useful.
However, any small-ish whisk is fine for this job. A long fork will work well, too.
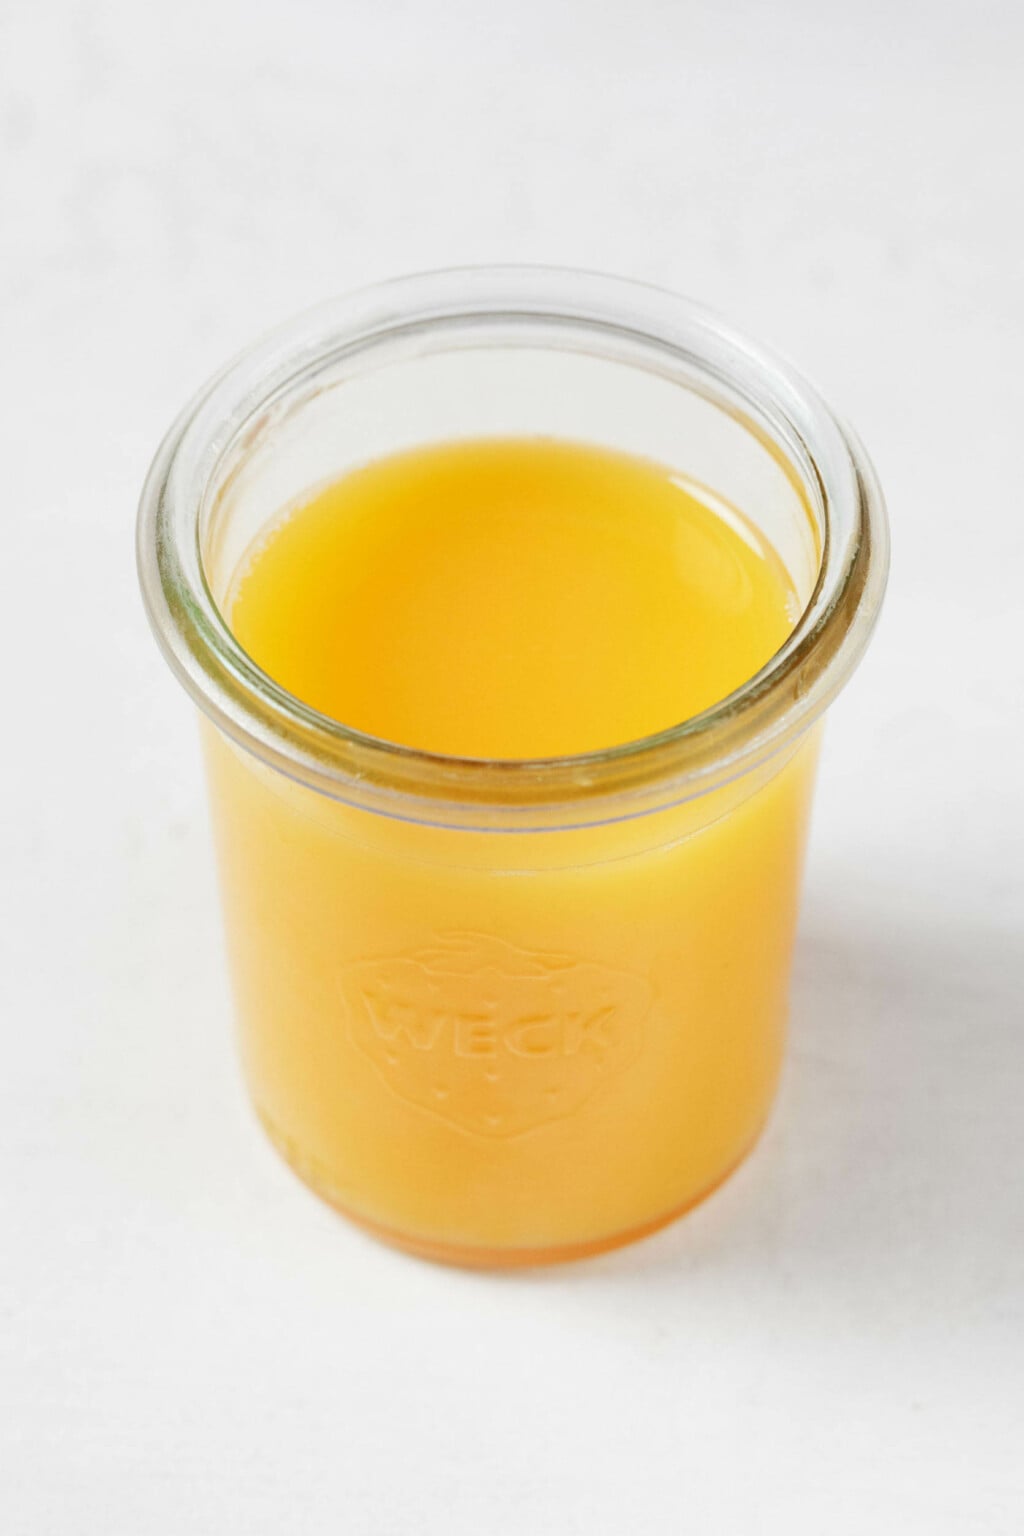
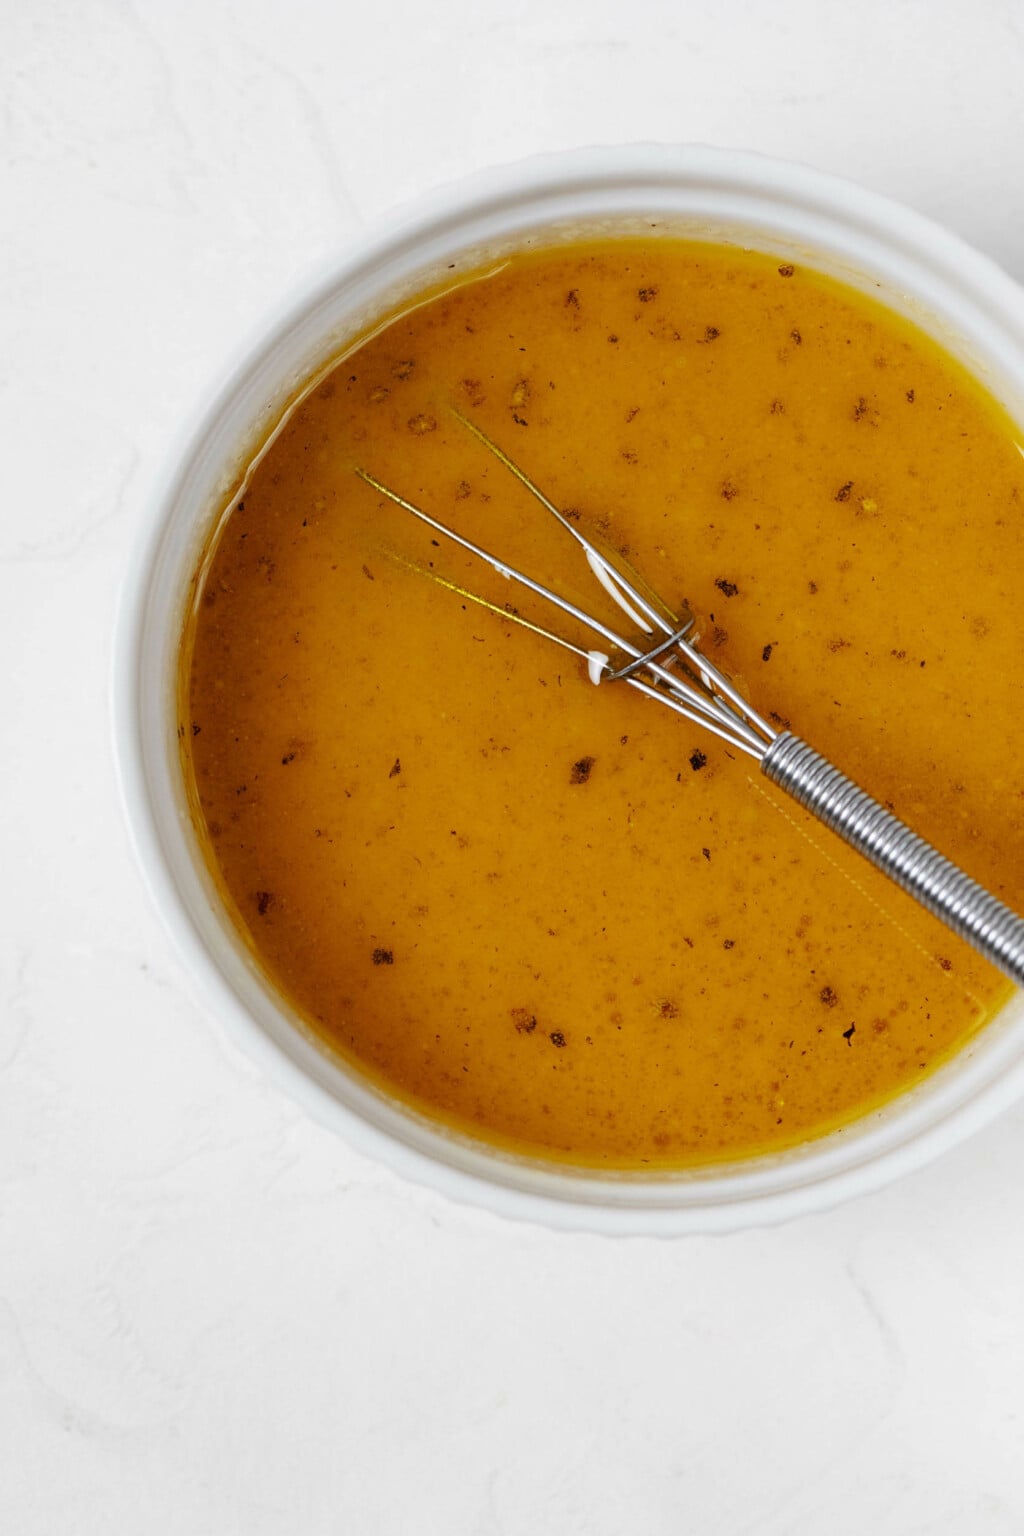
Step 3: Store or useOnce you've whisked the orange miso vinaigrette together, you can store it or use it right away.
The dressing can be stored in an airtight container in the fridge for up to one week.
Uses for orange miso vinaigretteI really can't think of many salads that wouldn't be great with this dressing. You could use it to dress my simple butter lettuce side salad, in place of the champagne vinaigrette that's called for.
The dressing would also be great on a raw, kale salad, thinly sliced cucumbers, or shaved carrots.
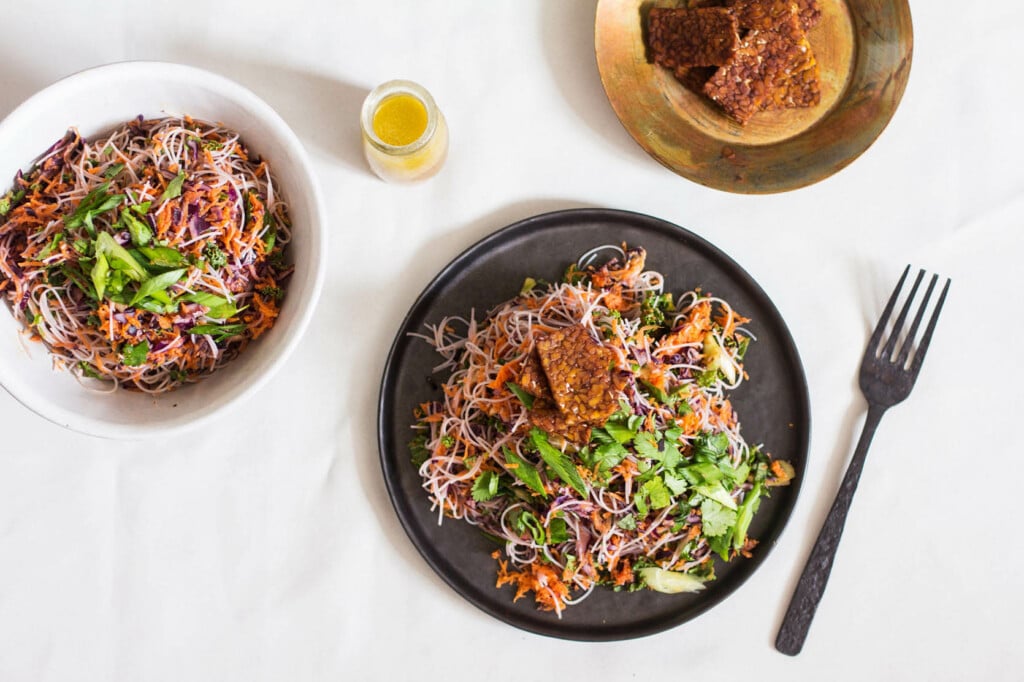
I can imagine that the miso vinaigrette would be a good dressing for a cold, soba or Udon noodle salad in the summer months.
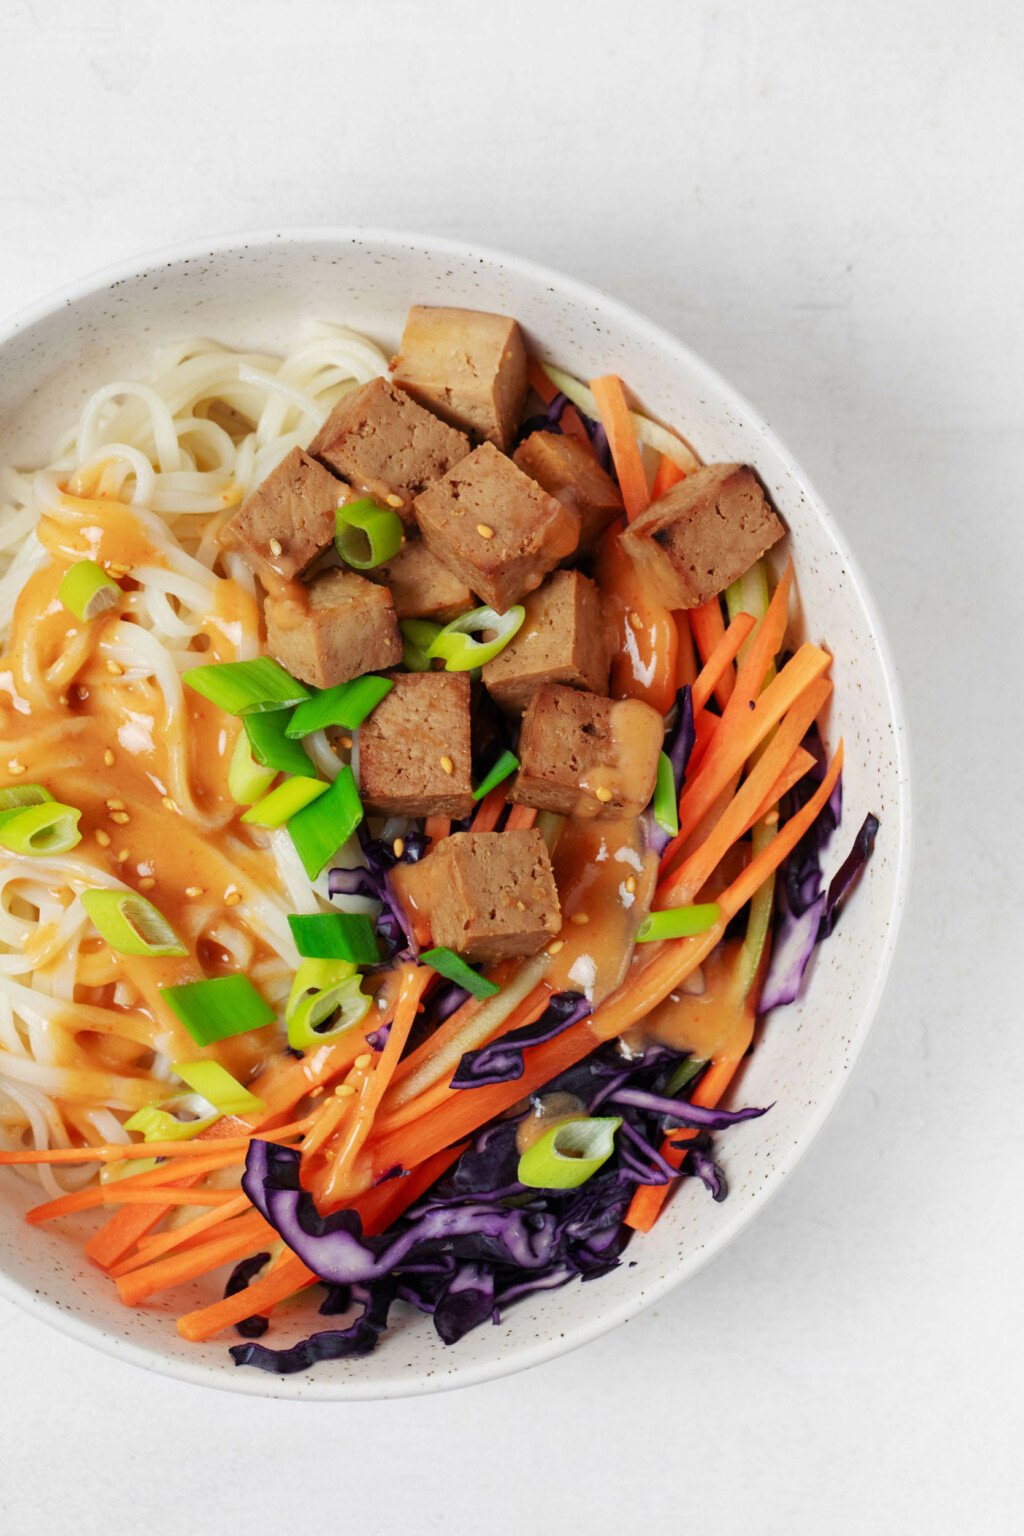
Speaking of noodles, I use this dressing in my kelp noodle salad with seared tempeh.
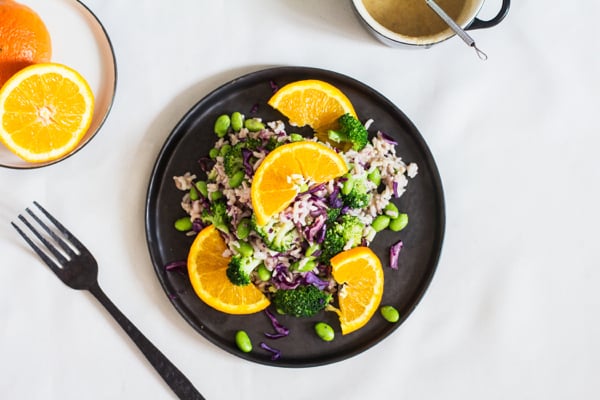
It's also the perfect choice for my brown rice broccoli salad with edamame—a meal that's half grain bowl, half salad, and so nourishing.
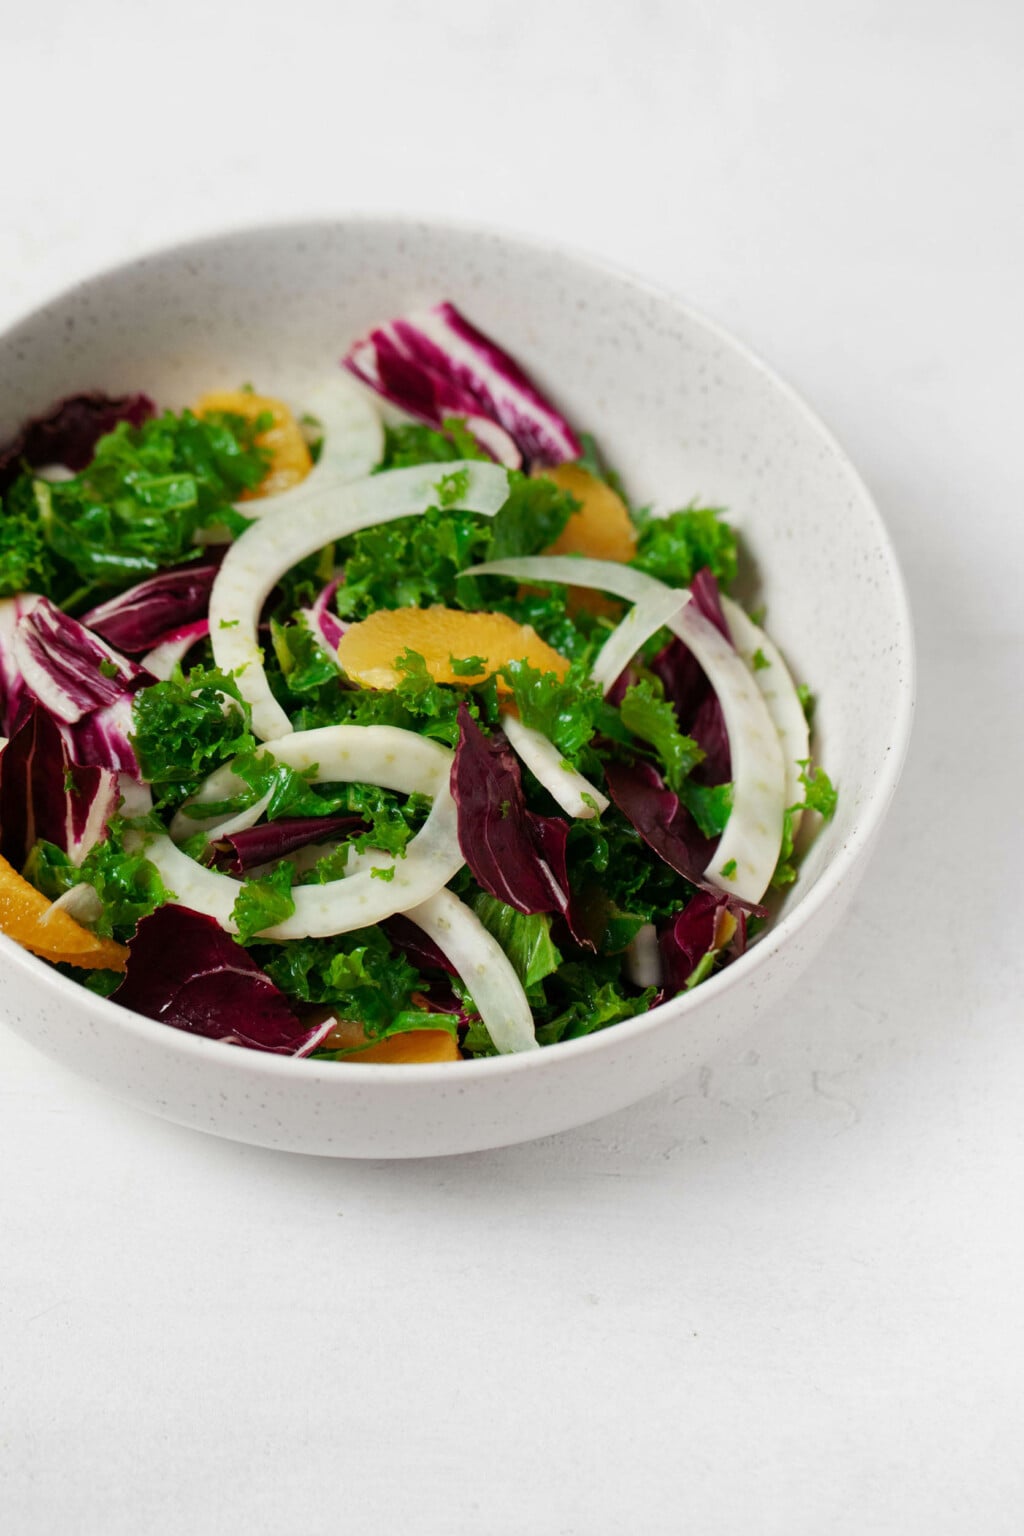
Finally, the miso vinaigrette is my go-to for a vibrant and colorful mixture of kale, radicchio, fennel, and orange.
This is one of my favorite side salads for winter, and I ate it a lot this year.
If none of these uses are calling to you, then try drizzling the orange miso vinaigrette over your next batch of roasted root vegetables.
I can promise that its balance of tart, sweet, and savory notes is a perfect compliment to oven-roasted carrots, parsnips, or turnips.
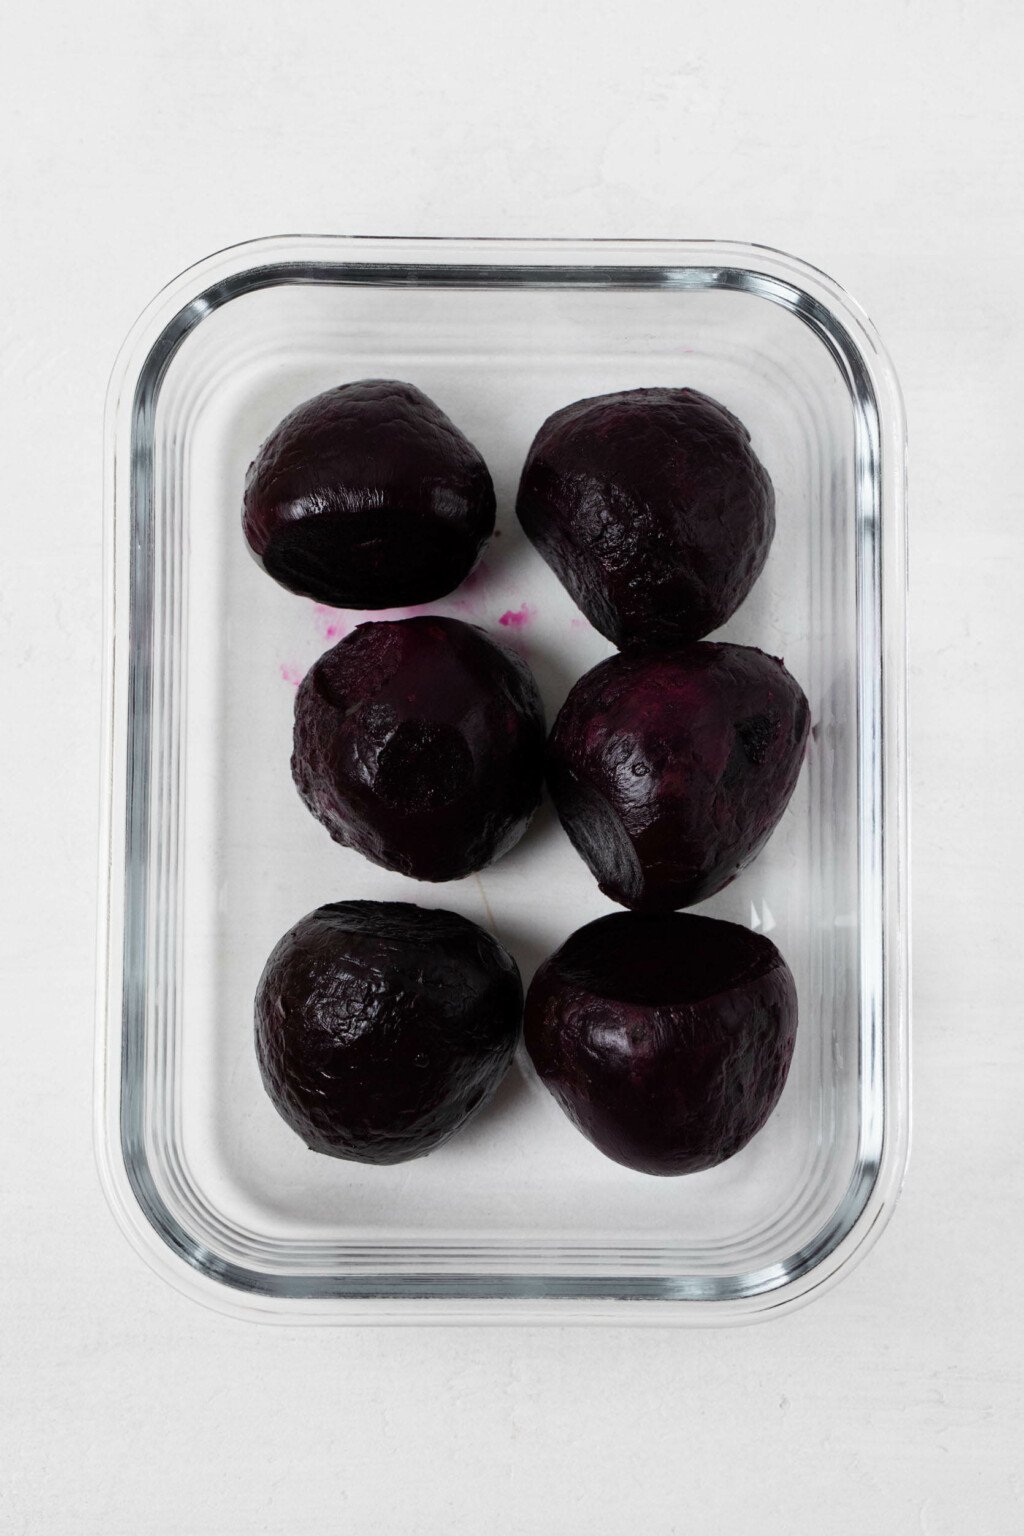
It would also be a brilliant dressing for your next batch of oven-roasted beets!

- whisk
- 2 tablespoons white miso (30g)
- 1/4 cup orange juice (freshly squeezed or pasteurized) (60ml)
- 2 tablespoons freshly squeezed lemon juice
- 1/2 cup olive oil (120ml)
- 2 cloves garlic, minced or grated on a microplane zester
- 1/4 teaspoon fine salt
- 1/8 teaspoon freshly ground black pepper
- In a medium small mixing bowl, Pyrex liquid measuring cup, or a mason jar that can hold at least a cup of liquid, whisk together the miso and orange juice till smooth. This may take a couple minutes; just be patient and keep whisking until the miso has broken down and you have a creamy, thick liquid. There may still be a few tiny clumps of miso visible, which is OK, but the aim is for the liquid to be as smooth as possible.
- Add the lemon juice, olive oil, garlic, salt, and pepper to the miso and orange mixture. Whisk again until smooth and emulsified. Serve or store the vinaigrette in an airtight container in the fridge for up to 1 week.
This is my second weekend in a row of getting back into the habit of impactful vegan meal prep.
I always make something on Saturday or Sunday, but work projects and social disruptions have kept me from prepping a substantive amount of food.
A batch of this miso vinaigrette is one of the first things that I plan to make, and I know that I won't be sorry. I can see it giving life to lots of cooked grains and salads and bowls this week.
I hope that you'll find it useful, too!
xo
The post Orange Miso Vinaigrette appeared first on The Full Helping.
Fri, 15 Mar 2024 17:59:55 +0000
Lemon Marinated Baked Tofu Slices
These lemon-marinated, baked tofu slices are perfect for sandwiches or for serving as a protein source with any simple vegan meal. The slices are tangy and seasoned with herbs. I like to use super firm tofu in this recipe, so that the slices are especially dense and chewy!
Yesterday evening, I put a batch of these lemon-marinated baked tofu slices into the oven.
It had been one of those days when I felt resistant to any amount of cooking. I didn't even want to whisk up a marinade.
But whisk it I did, and after that marinade had a few hours to work its magic, I popped my lemony, seasoned tofu slices into the oven.
Within ten minutes, my apartment smelled nicely of garlic and rosemary. I breathed a sigh of relief, knowing that when the tofu slices came out of the oven, I'd have a wholesome vegan protein to work with for the next few days.
I already used the slices for a sandwich on my lunch break today.
A simple meal with the baked tofu slices, a grain of some kind—maybe mushroom farro?—and my simple steamed broccoli with tahini dressing will happen for dinner at some point this weekend.
As is usually the case when I overcome my inertia and manage to do just a small amount of meal prep, I'm grateful.
While I sit down and plan the tasty uses that I'll find for these baked tofu slices, I might as well share the recipe with you!
A many-sided marinadeI've created many kinds of marinades for tofu and tempeh.
Balsamic marinade is always a favorite, and I love making teriyaki tofu cubes for bowls and noodle dishes.
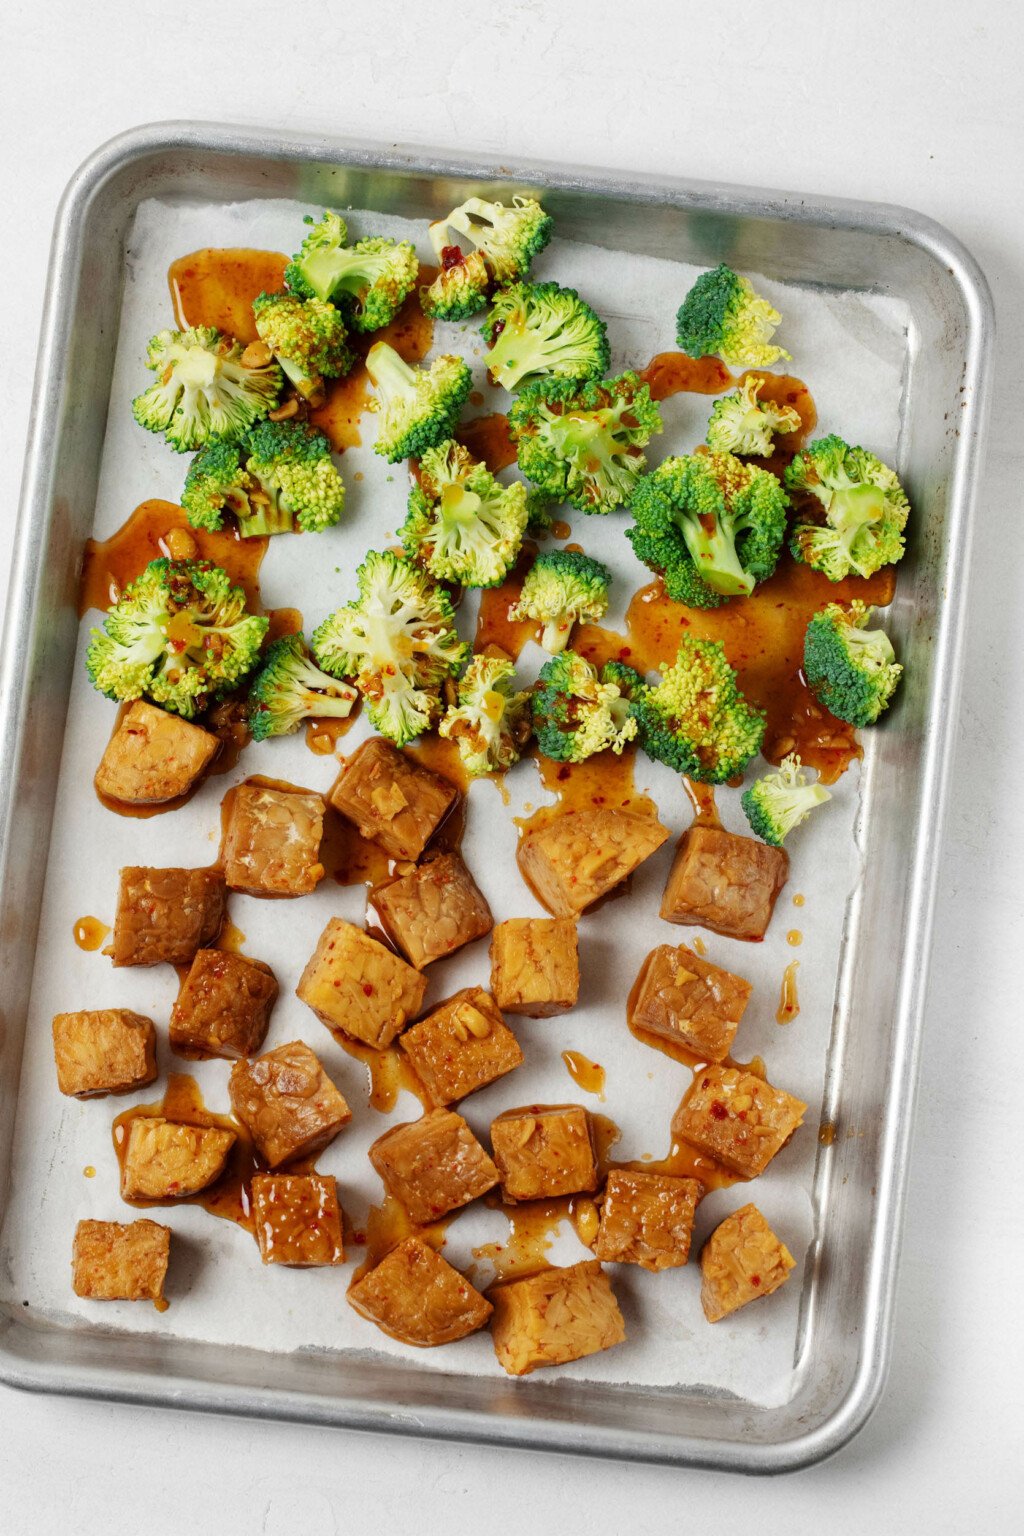
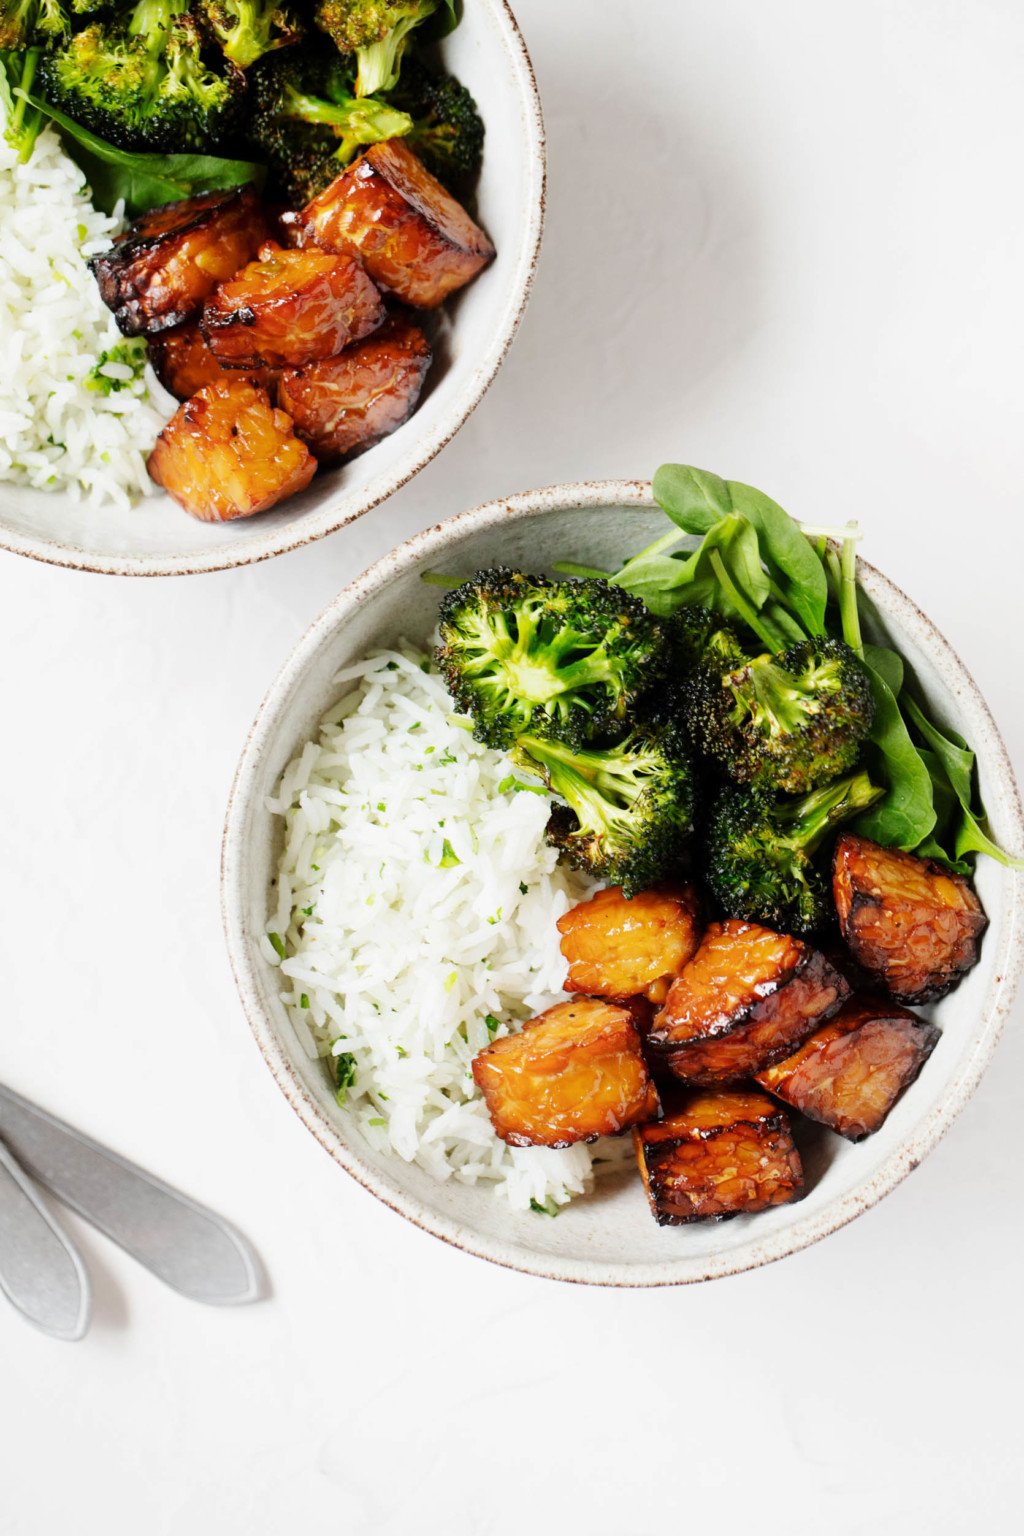
The tamari glaze for my sheet pan tempeh and broccoli is a favorite as well.

Somehow, however, I keep coming back to lemony marinades.
The lemon pepper tempeh cubes that I posted years ago are still the most popular tempeh recipes on this site, and I can't say that I disagree.
The bright acidity of lemon can elevate so many kinds of dishes. A lemony protein works well with creamy pasta, with whole grain pilafs, in crispy, colorful salads or Mediterranean-inspired grain bowls.
My mother likes to joke that she knew I was part Greek when I would get caught sucking on lemon wedges and asking for triple portions of tomatoes as a kid.
I love acidic flavors, and there are very few dishes that I don't think could be improved with a big squeeze of fresh lemon juice to finish.
It's no surprise, then, that I love the marinade for this recipe. Lemon—lots of it—is the predominant flavor, along with subtle garlic and herbs.
I use soy sauce, rather than salt, for saltiness, as I think that the soy sauce adds a bit of umami and complexity.
The herbs that I suggest are thyme and rosemary, but you could use oregano as well.
As excellent as the marinade is for tofu, you also could use it for tempeh, seitan, or even roasted chickpeas.
Why tofu slices?I've posted a few recipes for tofu cubes, so why do I choose slices here?
The main reason is that I think the lemon marinated tofu is especially good for sandwiches. It's much easier to layer a slice of tofu between slices of bread than a bunch of cubes.
Slices can also be quickly sliced into spears, which are then easy to layer into wraps.
Slabs or slices of tofu work well for when you're serving tofu as the central protein on a dinner plate.
Sometimes I organize my dinner plate around a grain, a vegetable, and a protein, in a style that's reminiscent of the non-vegan dinner plates that I grew up with.
When I create a dinner plate like this, I like the idea of cutting into slices of tofu, rather than poking around my plate for smaller pieces.
Long story short, I think that the baked tofu slices have versatility and usefulness. But if you have a special love of tofu cubes, then you can certainly adapt this recipe to work for cubes, rather than slices.
Super firm tofu for super firm slicesYou may be very familiar with tofu that's labeled as "firm" or "extra firm."
"Super firm" tofu is a type of tofu that's even firmer. Even more moisture has been removed from the bean curd than usual, resulting in tofu that's especially dense.
Thanks to that density, super firm tofu also packs more protein into each slice. In fact, you may see this type of tofu labeled as "high protein" tofu, rather than super firm.
In the United States, the Nasoya and Wildwood brands both distribute super firm tofu. I really love this type of tofu for the baked tofu slices; I think its dense, chewy texture is ideal for sandwiches in particular.
If you can't find super firm tofu, however, it's not a problem. Extra firm tofu, which is available in many major grocery stores, will work in the recipe as well.
How to make lemon marinated baked tofu slicesThis is an easy recipe to meal prep. You can count on it for those days when cooking really feels like a chore.
The only thing you should know about making the tofu slices is that they'll need time to marinate. I suggest a minimum of four hours, but up to overnight is fine.
Sometimes I find it easier to break a recipe into steps over two days, rather than one. So, if an overnight marinating time suits you, go for it.
Step 1: Slice your tofuTofu slices for this recipe should be about 1/4-inch / 6mm. You'll want to slice the tofu width-wise.
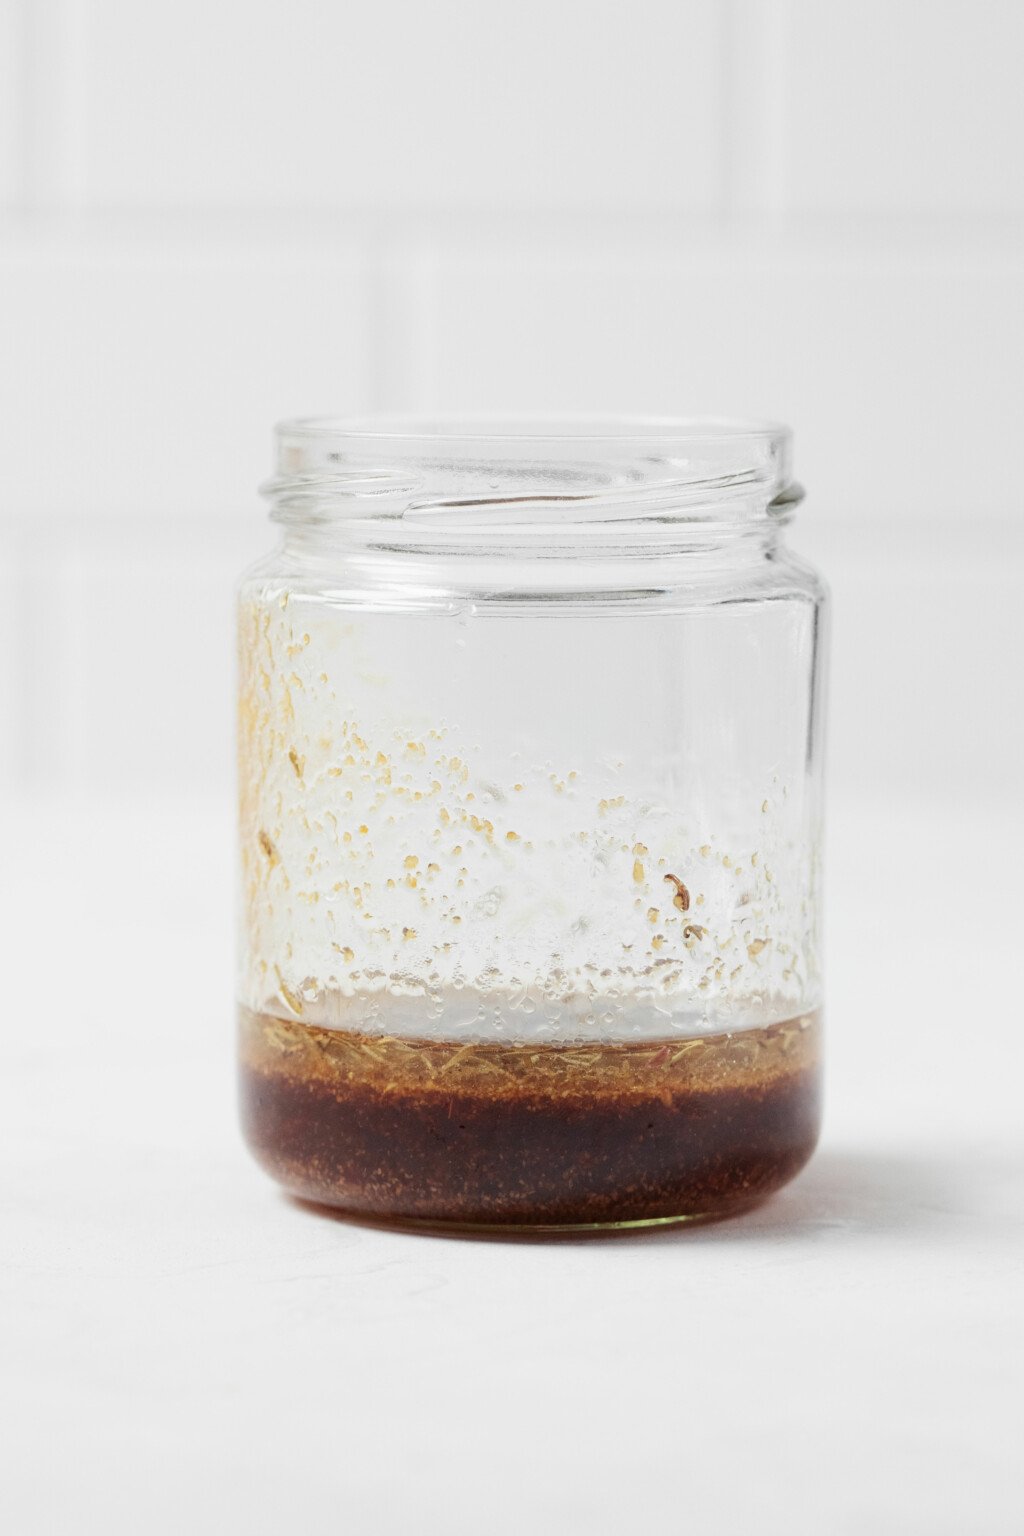
Step 2: Whisk together your marinadeThe ingredients for the lemon marinade are straightforward:
- Lemon juice
- Soy sauce
- Olive oil
- Garlic powder
- Dried or ground, dried thyme
Can you use fresh, minced garlic? Yes, but since garlic powder flavors the marinade well, and mincing garlic creates more mess, I opt for the powder (or garlic granules, which are similar).
You can also trade dried oregano, Italian seasoning, or herbes de Provençe for the thyme.

I like to arrange my slices of tofu in a single or double layer in a flat, rectangular container. The container becomes the vessel that you'll marinate the tofu slices in.
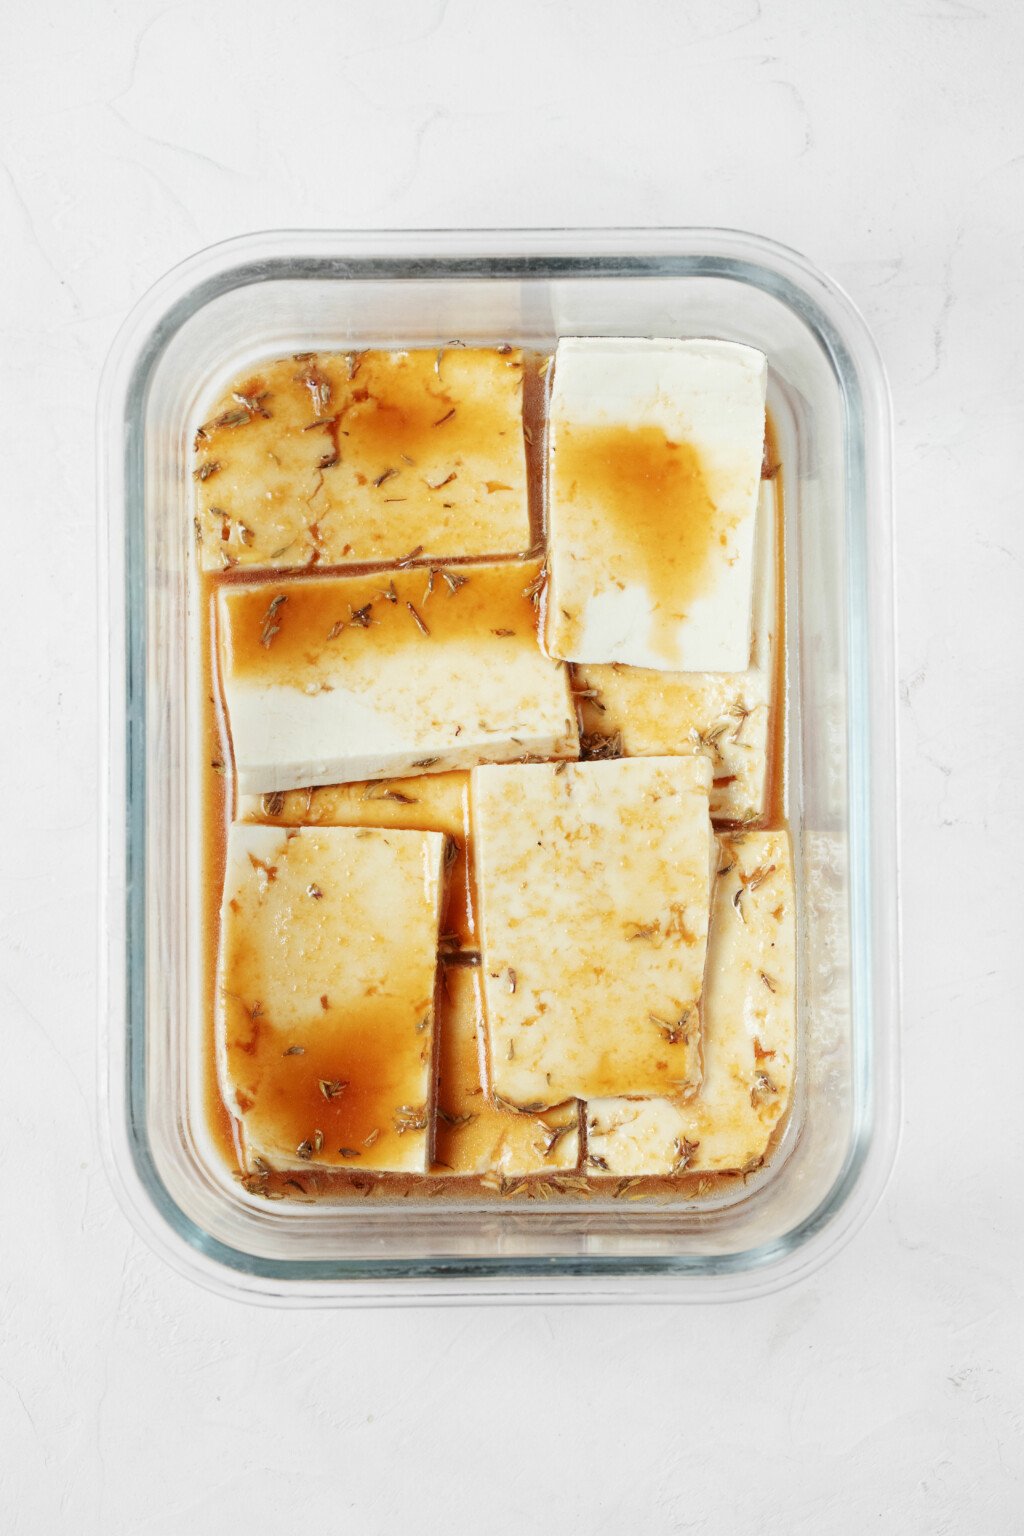
Pour the marinade over your slices, cover the container, and then transfer it to the fridge.
The slices should remain in the fridge for at least for hours, or up to twenty-four hours.
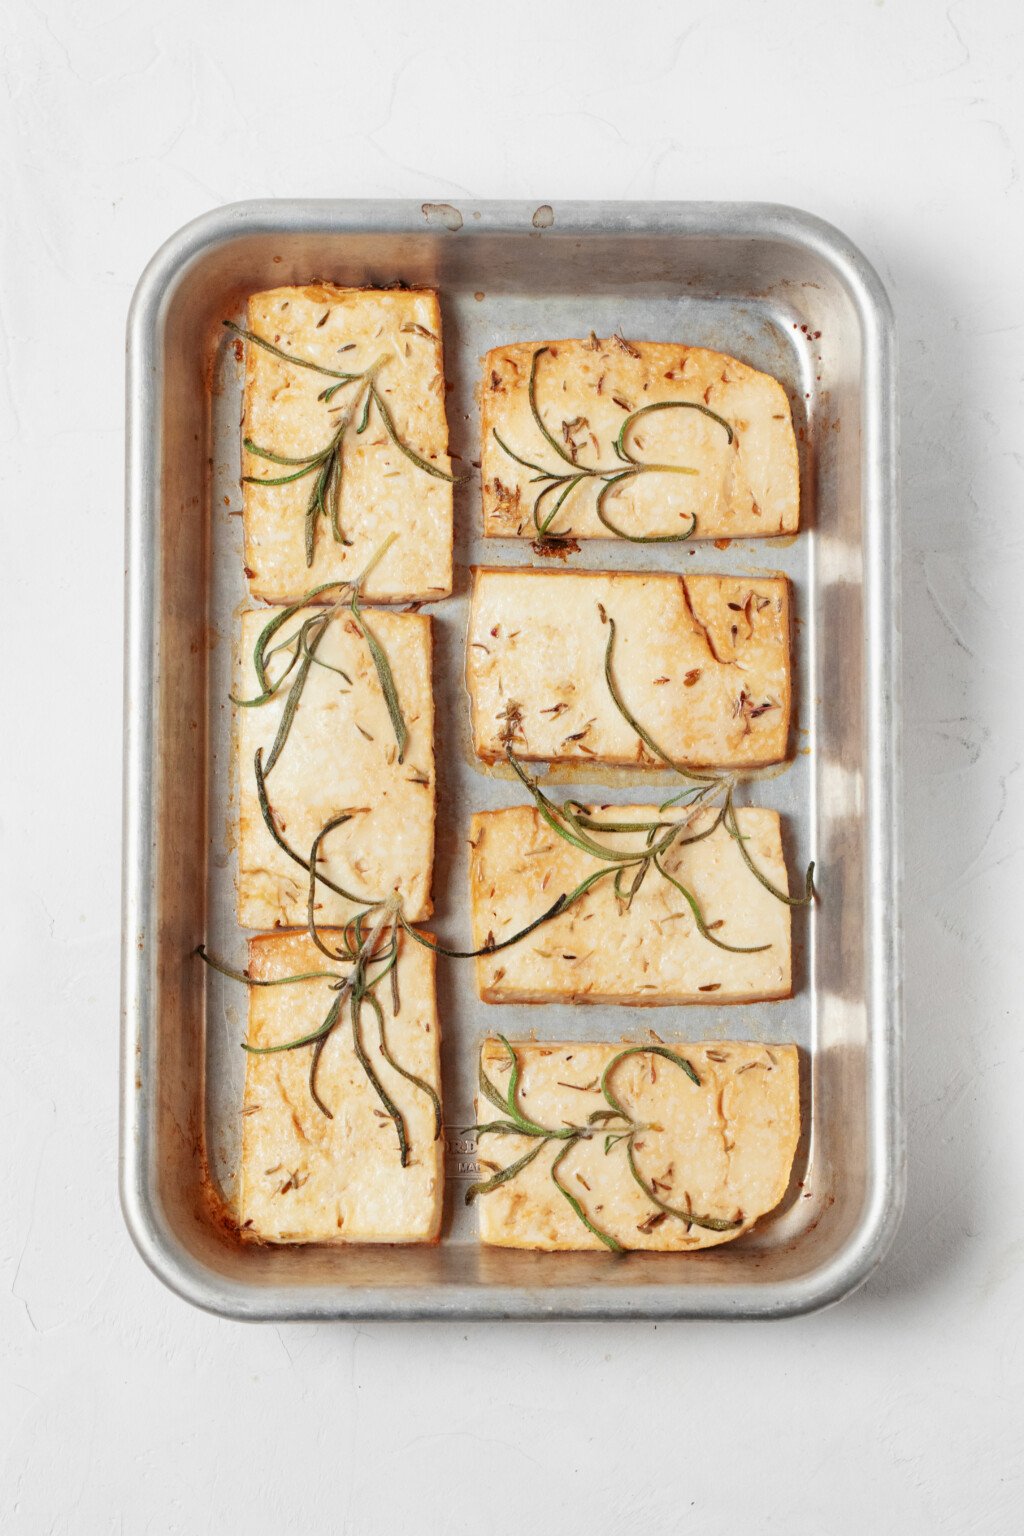
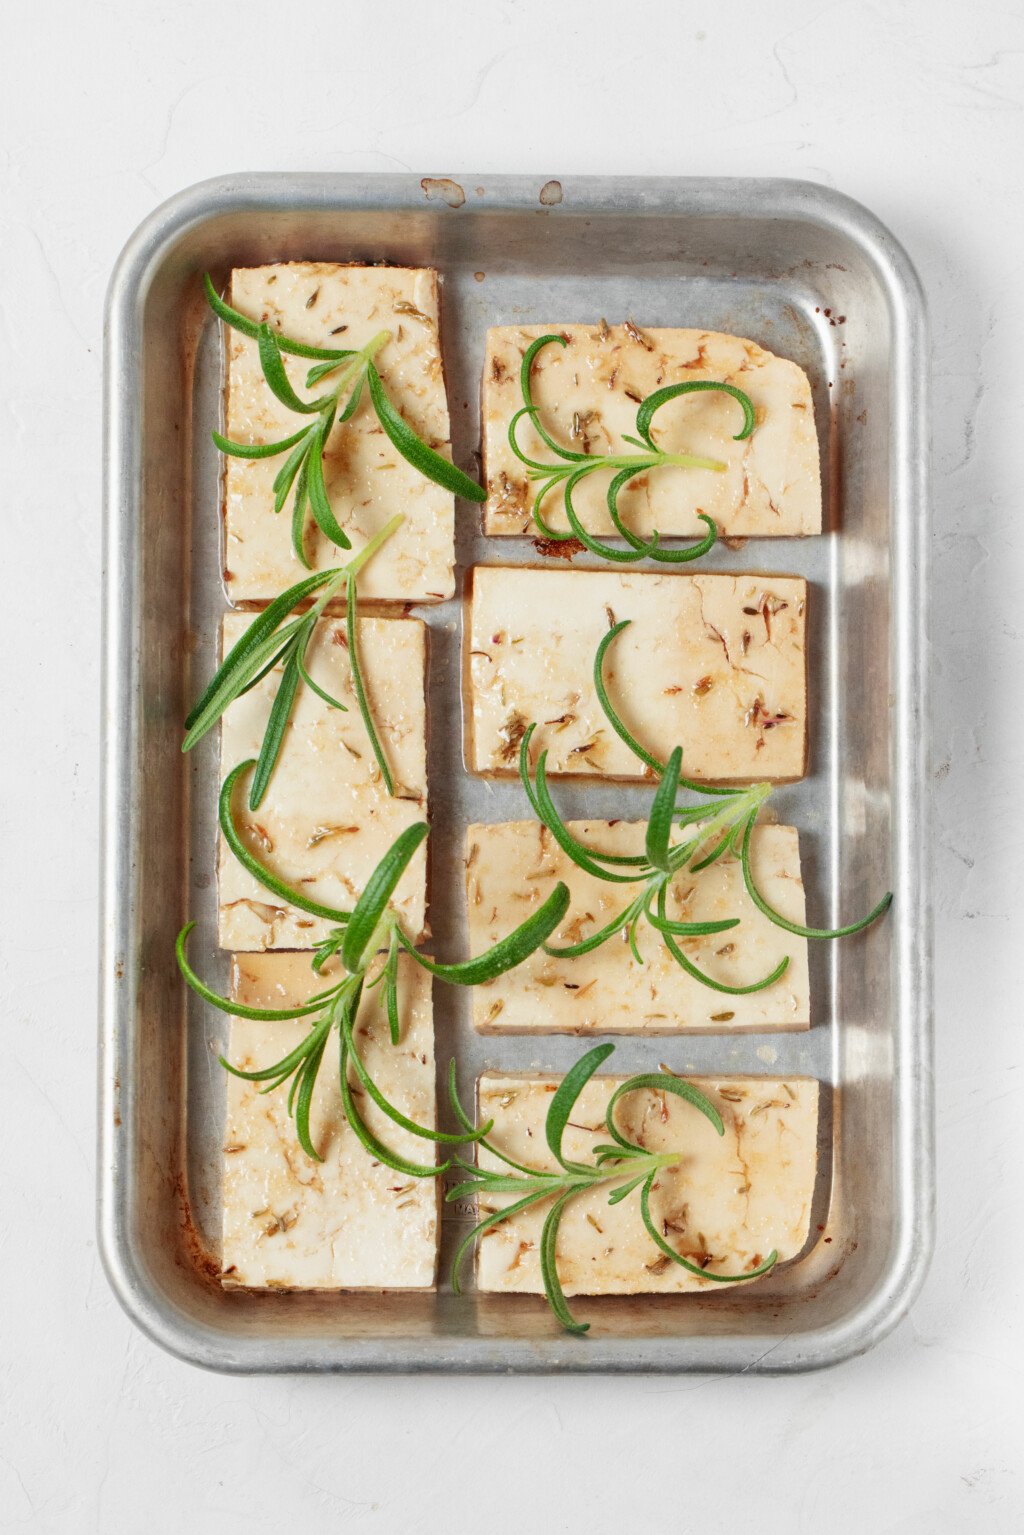
Step 4: Prepare the tofu for bakingFirst, remove the tofu slices from their marinade, reserving the marinade. Transfer the tofu slices to a nonstick, rimmed baking sheet or a baking sheet that has been lined with foil.
Use a pastry or basting brush to brush the tops of the slices lightly with some of your reserved marinade.
Distribute some rosemary sprigs or leaves over the tofu—this will season the baked tofu slices lightly. If you have dried rosemary, it's fine to sprinkle that over the slices, too.

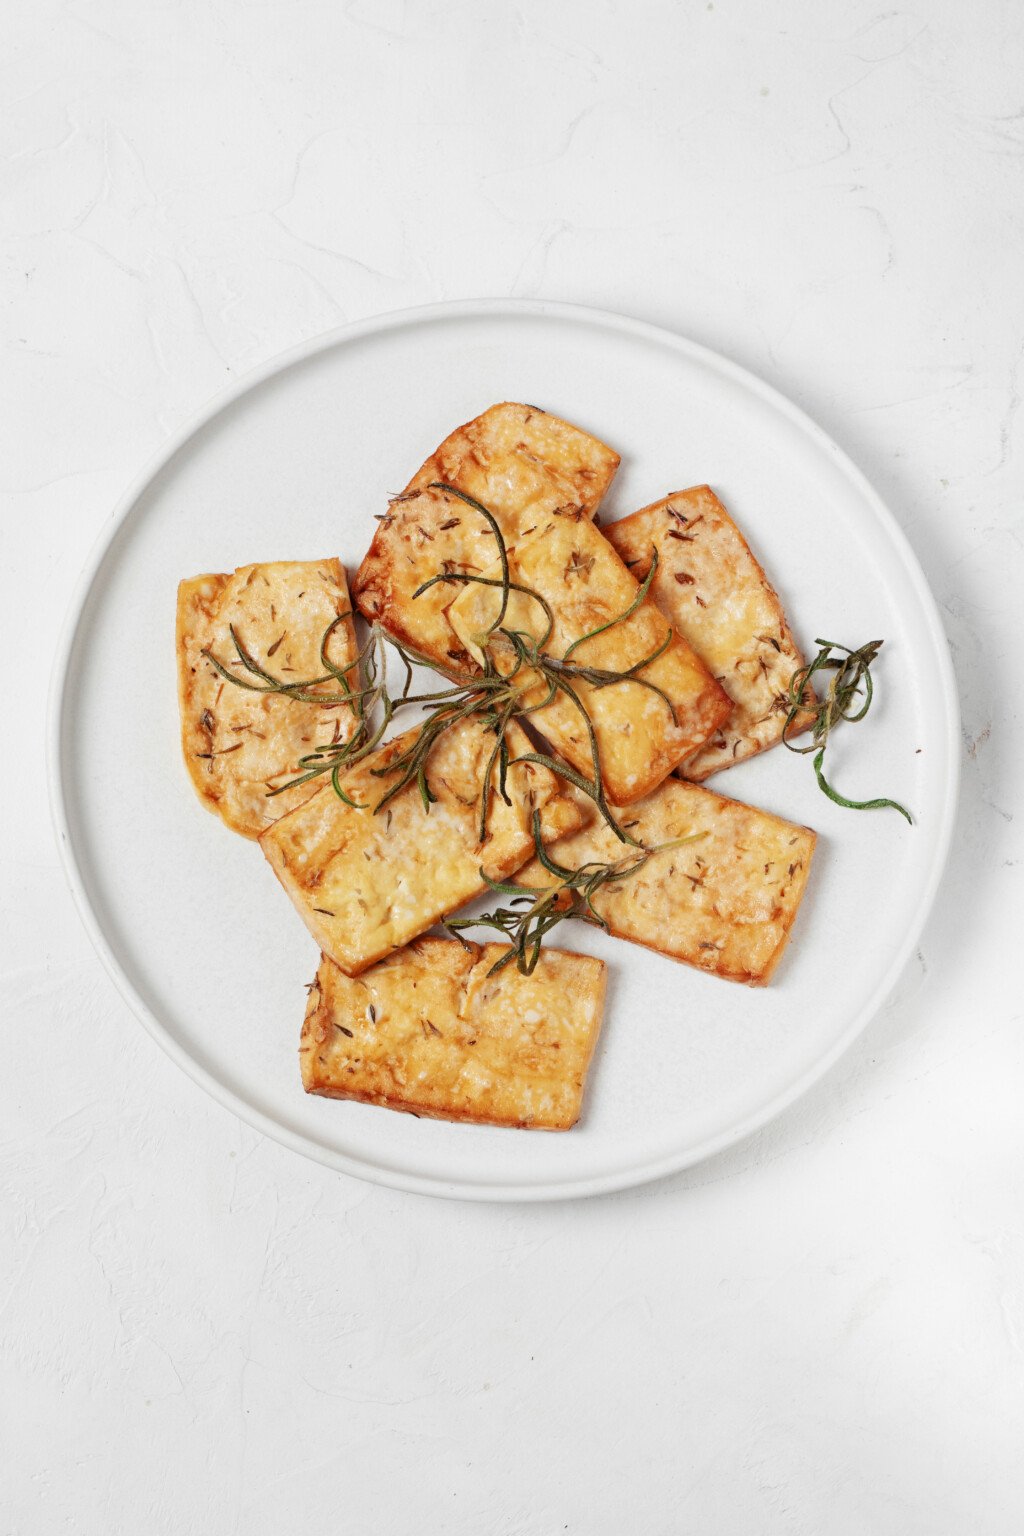
Transfer the slices to a 375°F / 190°C oven and bake them for fifteen minutes. Then, remove the sheet from the oven. Push the rosemary to the side and flip the slices over.
Brush the new top sides of the tofu with a little more of the reserved marinade, then re-arrange the rosemary on top.
Return the tofu to the oven and bake it for another 15-20 minutes, or until the tofu is crisping and browning at the edges.
That's it!

I've already shared some of the ways in which I like to enjoy these simple slices. But here are a few more recipes that I think the tofu would make an especially nice addition to:
- As an accompaniment to one-pot creamy mushroom spinach orzo or simple baked bulgur and chickpeas
- As a higher protein boost for vegan chickpea Caesar wraps or quinoa chickpea Caesar salad
- An accompaniment to cauliflower alfredo sauce and pasta
- Chop the baked tofu slices and fold them into vegan mac and cheese
- Add some slices to my miso tahini vegetable sandwich
The Vegan Week
Embrace the joy of eating homemade food every day with the hearty and wholesome recipes in The Vegan Week.
Whether you have three, two, or even just one hour of time to spare, The Vegan Week will show you how to batch cook varied, colorful, and comforting dishes over the weekend.
Buy The Vegan Week Meal prep & storageThe lemon-marinated baked tofu slices are exactly the kind of recipe that I like to meal prep when I don't have much time or energy to meal prep.
Why? Because versatile vegan basics, and especially vegan proteins, can be used in many kids of meals.
Moreover, you can rely on any protein as an "add-on" to an existing meal.
The baked tofu slices can be stored in an airtight container in the fridge for up to five days. It's also fine to freeze them; the slices can be frozen for up to six weeks.
When you're ready to enjoy them, just defrost them in the fridge overnight before serving.
- 16 ounces super firm (high protein) tofu, cut width-wise into 1/4-inch / 6mm slices (450g)
- 6 tablespoons freshly squeezed lemon juice
- 3 tablespoons soy sauce
- 1 1/2 tablespoons olive oil
- 1/2 teaspoon garlic powder
- 1 teaspoon dried or ground thyme
- Fresh rosemary sprigs (substitute two teaspoons dried rosemary)
- Transfer the tofu to a wide airtight storage container, preferably in a single layer. Whisk the lemon juice, soy sauce, olive oil, garlic powder, and thyme together, then pour this mixture over the tofu. Cover the container and transfer the tofu to the fridge.
- Allow the tofu to marinate for at least 4 hours or up to 24. If possible, flip the tofu over at one point during marinating so that the sides marinate evenly.
- Preheat the oven to 375°F. Remove the tofu slices from the marinade, reserving the marinade for basting. Transfer the tofu pieces to a nonstick or foil-lined, rimmed baking sheet and top them with the fresh rosemary sprigs. Use a pastry or basting brush to lightly brush some of the reserved marinade over the tops of the tofu slices. Transfer the baking sheet to the oven.
- Bake the tofu for 15 minutes. Push the rosemary to the side, flip the slices over, and then use your pastry brush to brush some additional marinade over the new top sides of the tofu. Rearrange the rosemary on top. Return the sheet to the oven and bake the tofu for another 15-20 minutes, or until the tofu the slices are darkened and crisp and browning at the edges.
- Serve or store in an airtight container in the fridge for up to five days.
On a Friday afternoon, I always get to thinking about the one or two simple things that I can prepare over the weekend for ease in the following week.
I feel happy to have gotten a tiny head start on that process. Perhaps you can find some time for this simple, nutritious protein this coming weekend, too. If so, I hope you'll be happy with the effort.
xo
The post Lemon Marinated Baked Tofu Slices appeared first on The Full Helping.
Tue, 12 Mar 2024 18:50:21 +0000
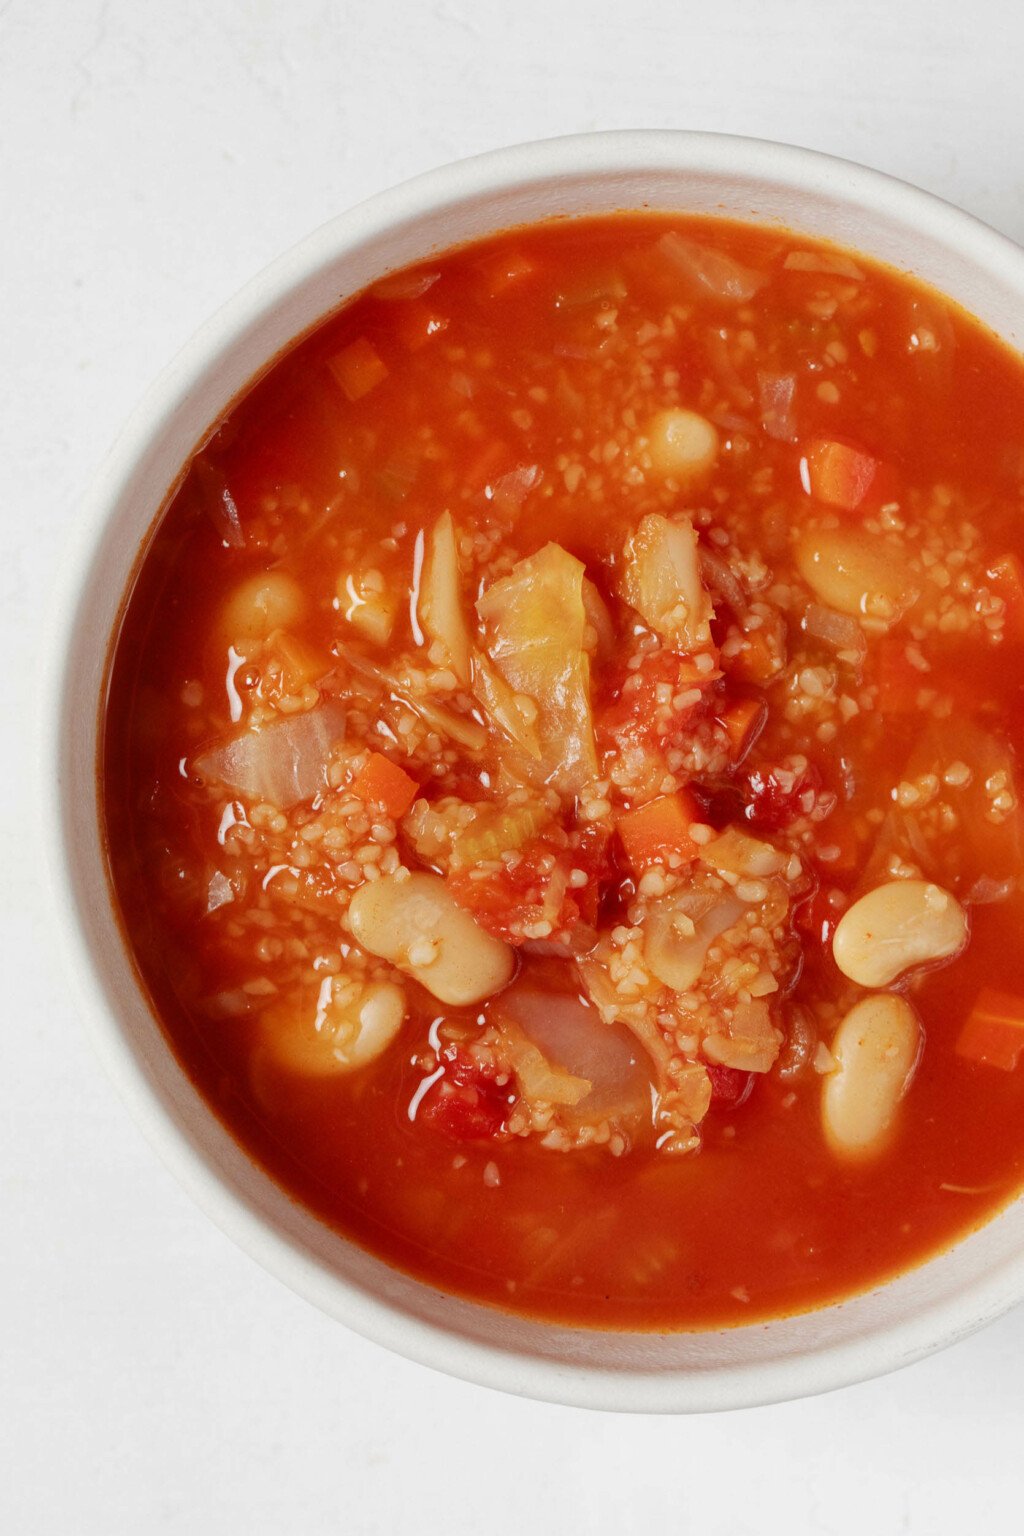
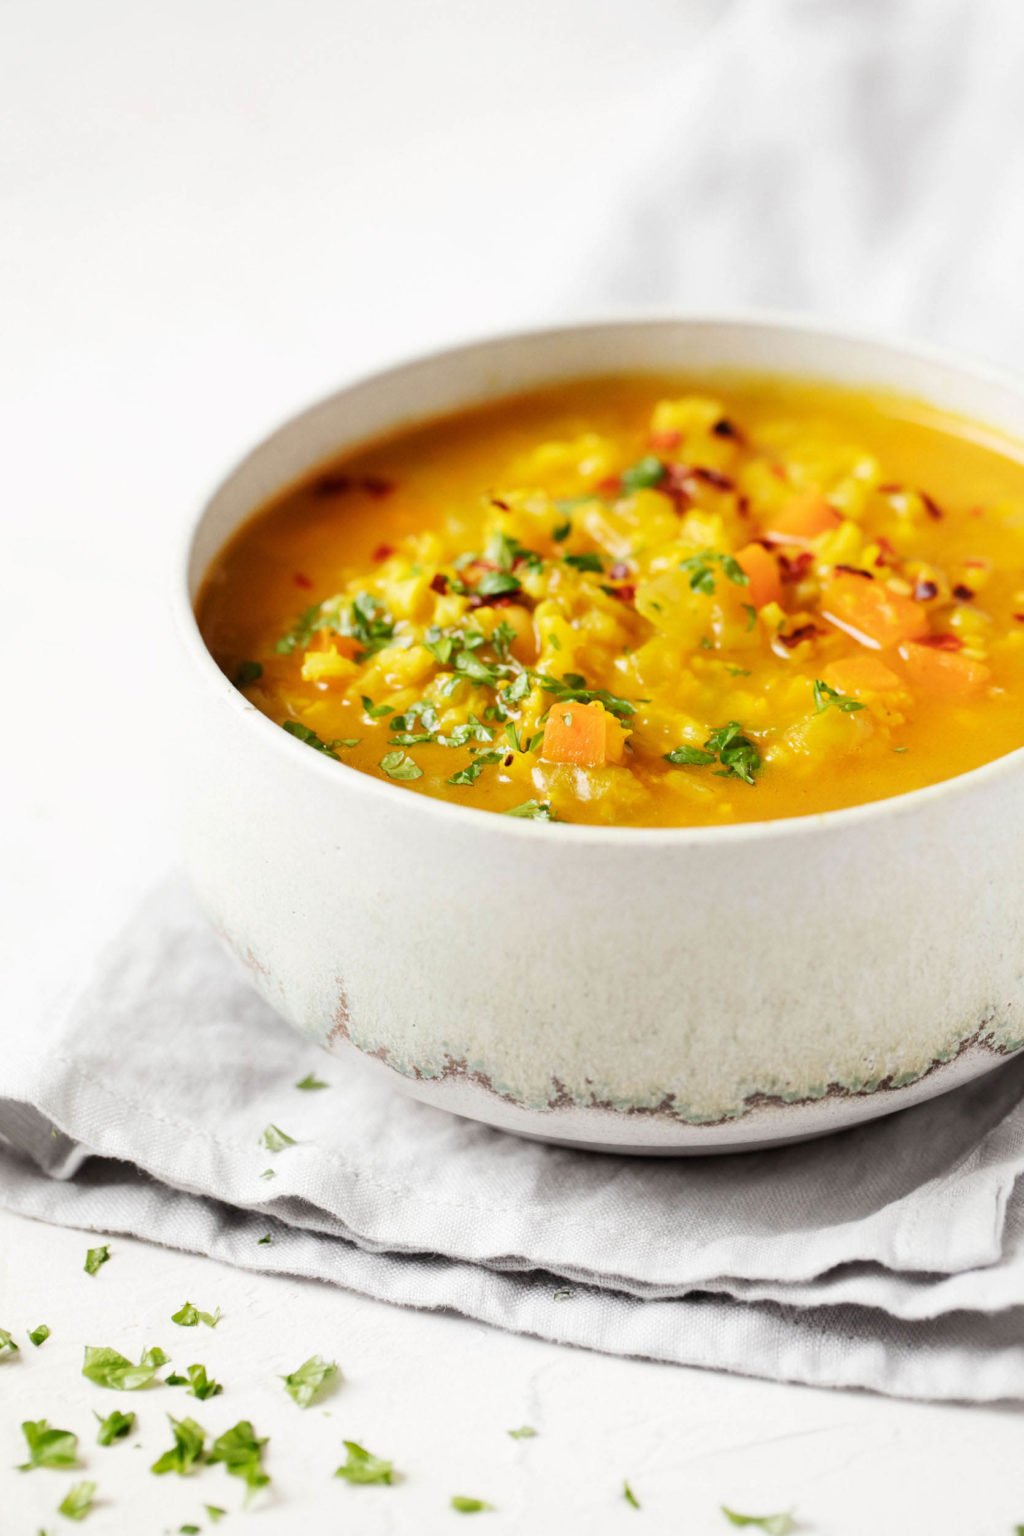
Vegan Cabbage Stew with Bulgur and Navy Beans
This vegan cabbage stew with bulgur and navy beans is hearty, wholesome, and comforting. It has a brothy tomato base and lots of texture from chopped cabbage, white beans, and cracked bulgur wheat. This is a great soup to make ahead—it becomes even more flavorful after a couple days!
We sprang forward into springtime this week.
No sooner had we set the clocks an hour earlier (or woken up wondering why it seemed so late), than the weather got very chilly for a day.
And now, suddenly, it's warm again.
Such are the unpredictable ups and downs of spring!
In any case, there's still a chill in the air, and for as long as that remains true, it'll be soup season for me.
And isn't it nearly always soup season? It has to be blazing hot outside for me to turn down a cozy, nutritious bowl, warm bowl of vegan soup.
This particular soup is filling and full of texture, which is how I like my soups to be. It also features one of my favorite—and, I think slightly underrated—vegetables: cabbage.
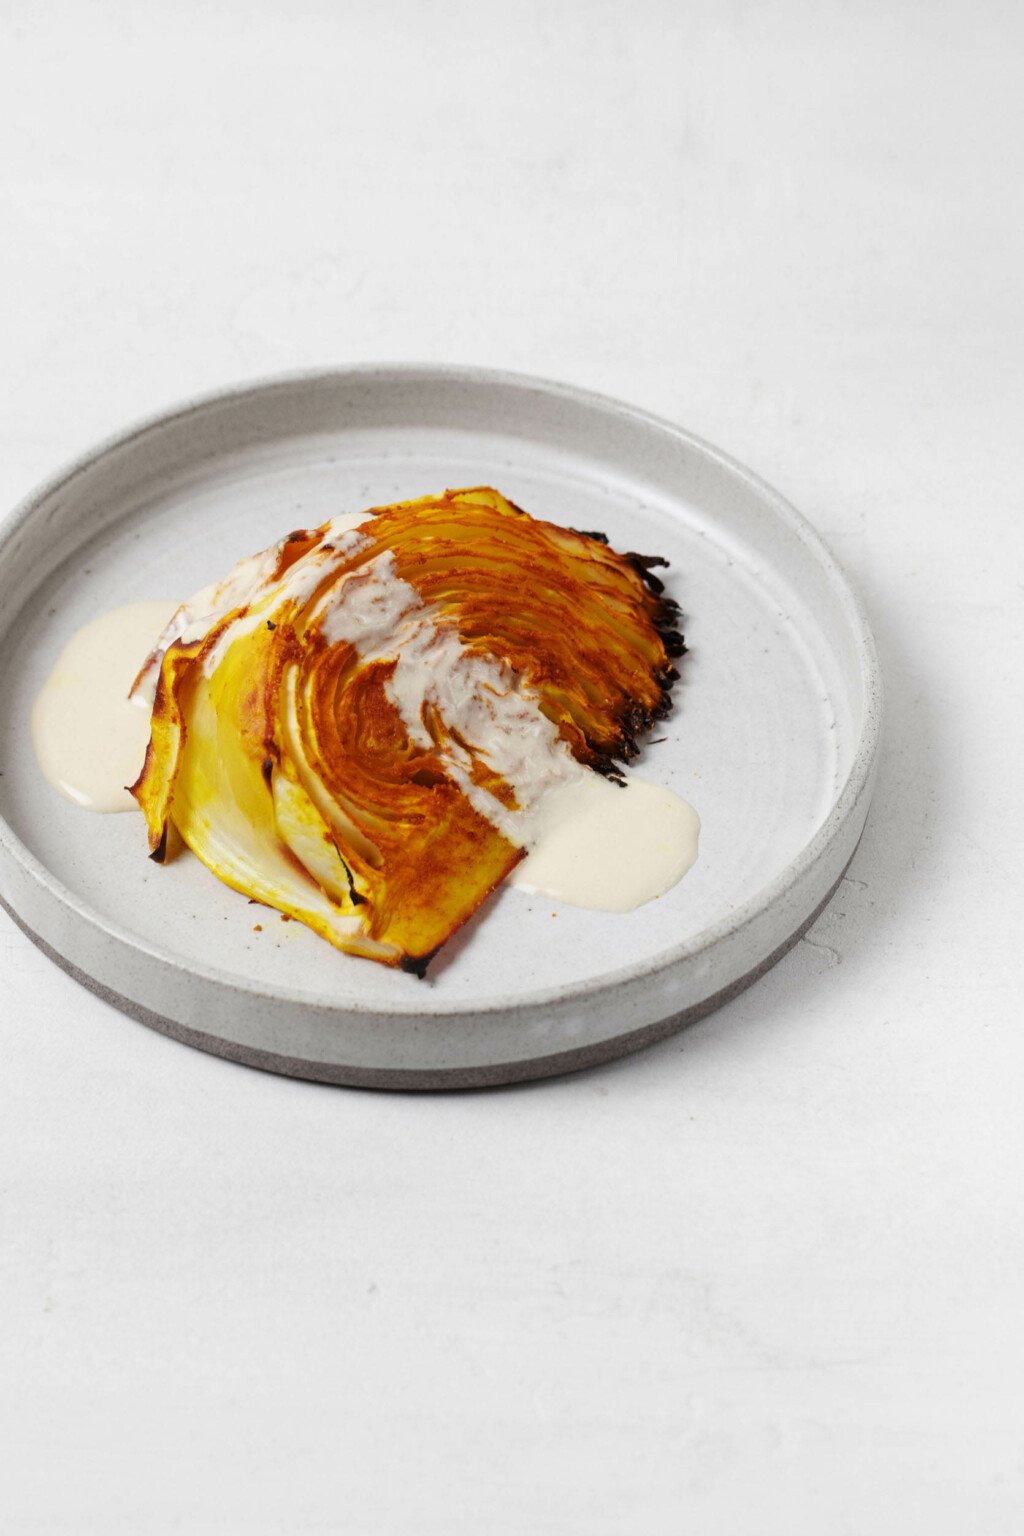
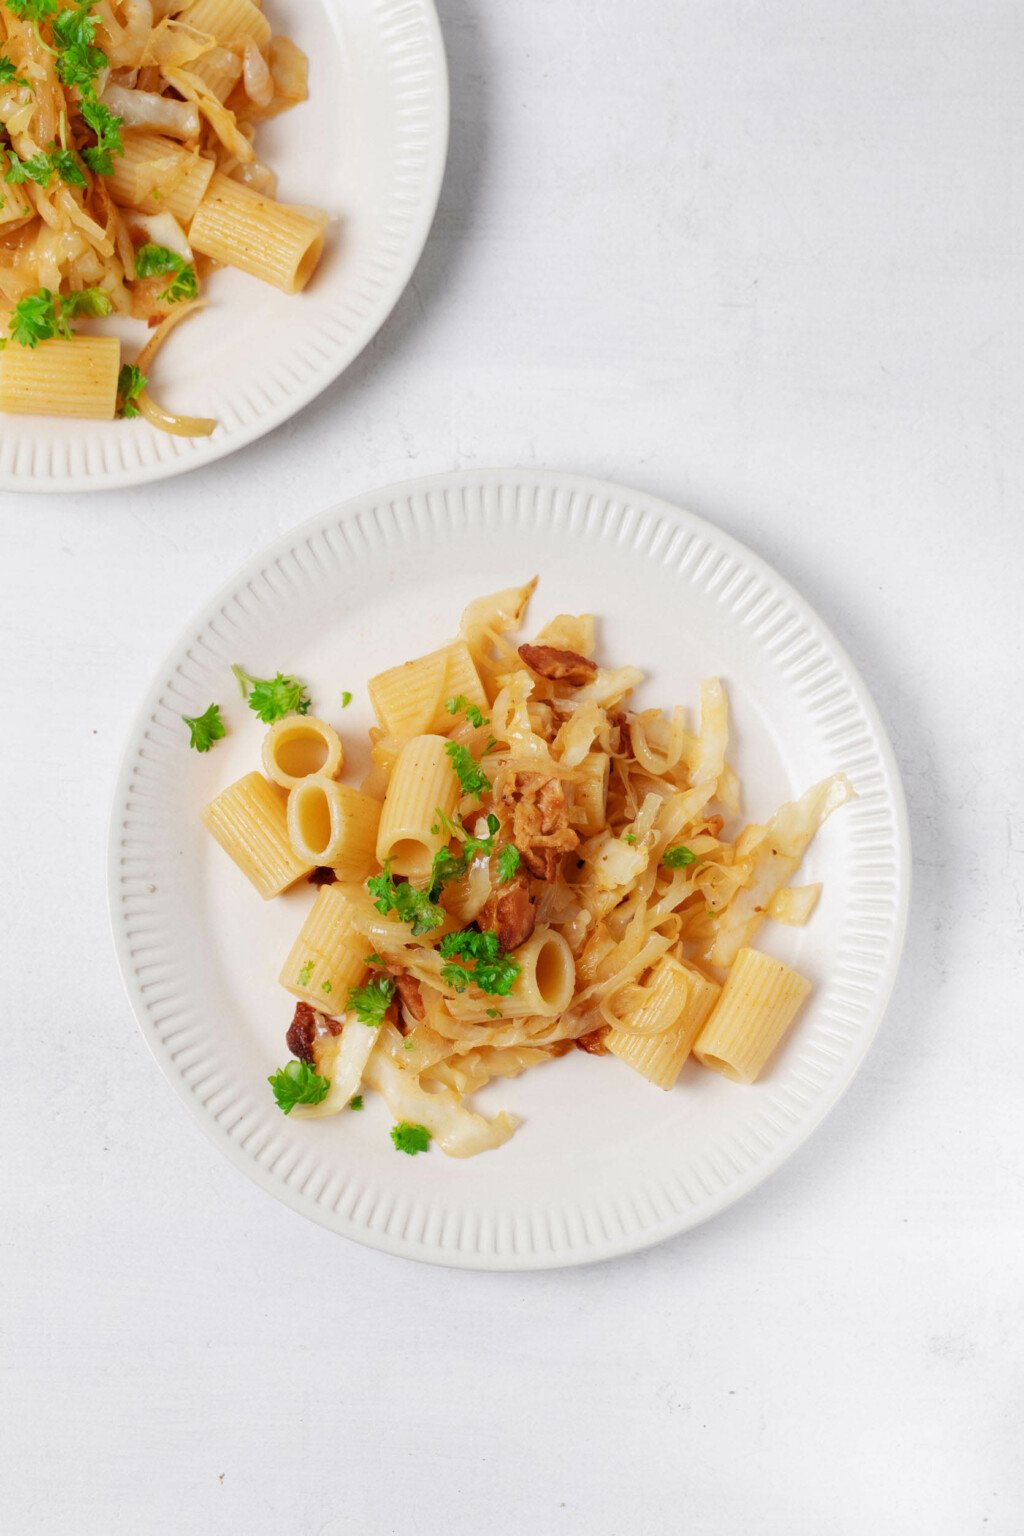
Cabbage soups for the soulThere are so many ways that I like to enjoy cabbage: in cabbage pasta, slaw, vegan colcannon, as roasted cabbage steak wedges, and in the form of a good, old-fashioned pot of braised red cabbage.
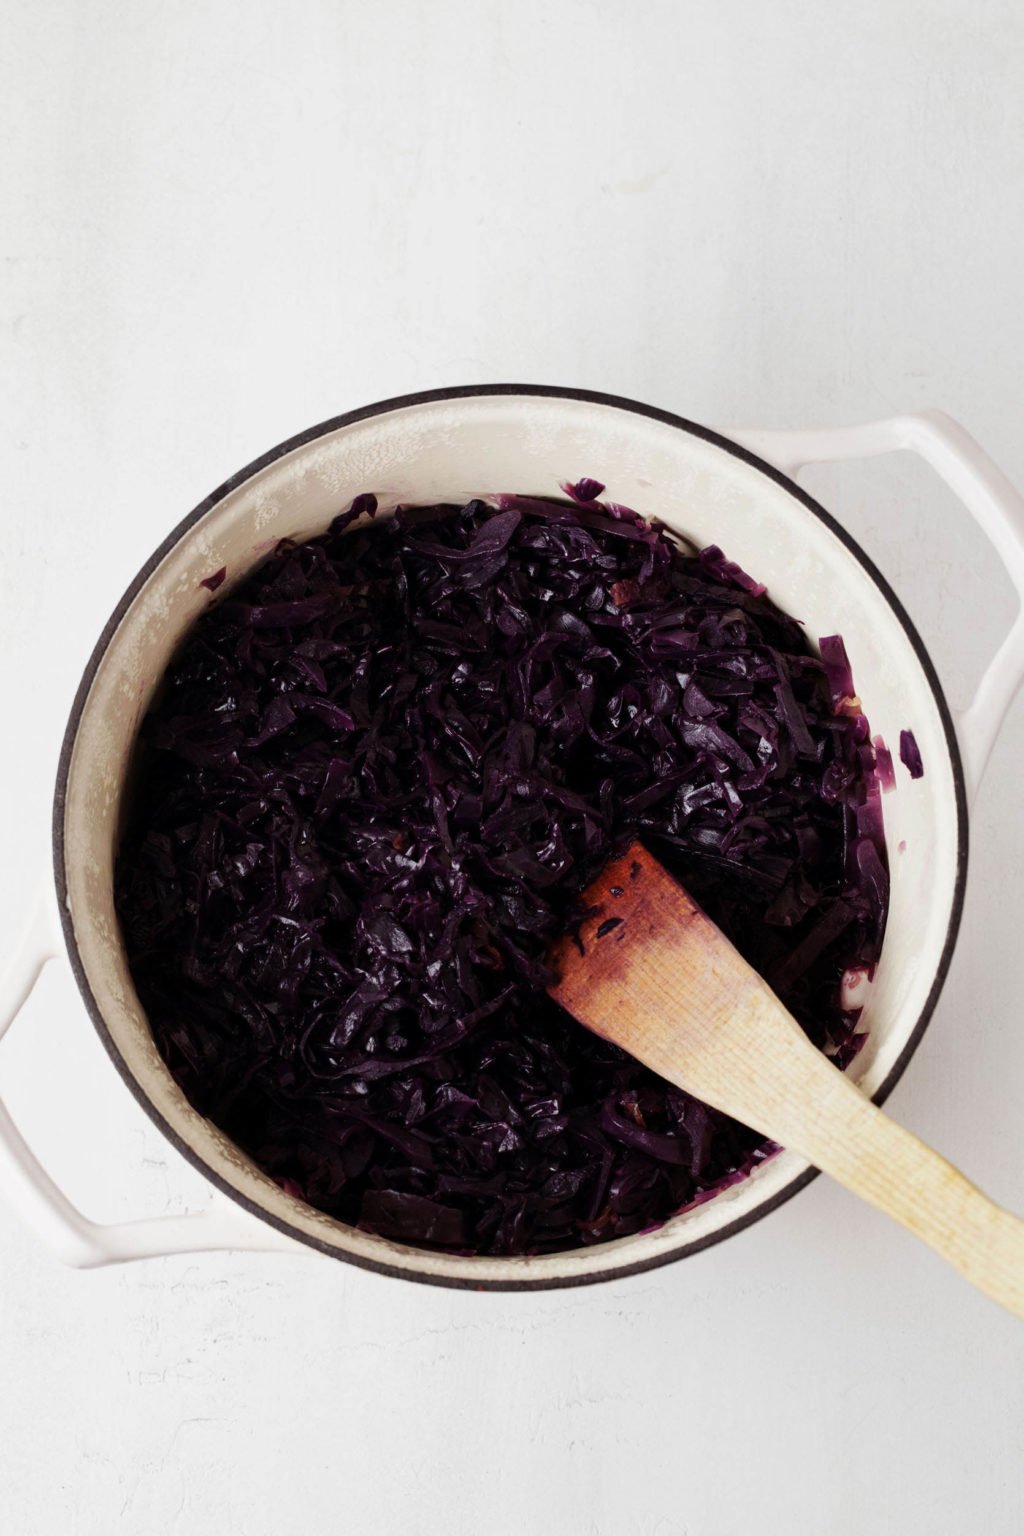
But for all of these excellent uses for this nutritious vegetable, there's really nothing like cabbage in soup.
I first fell in love with cabbage soup when I was writing my cookbook Power Plates.
There are two soups in there that include cabbage: the recipe for ribollita and the recipe for spicy cabbage chickpea soup.
The latter soup has become such a fan favorite that I actually chose to share it on this blog, too.
What I learned in creating these recipes is that cabbage is a great veggie for soups: firm enough not to fall apart, yet also tender enough to be pleasing.
Cooking cabbage for a longer period of time, which is typical for soups, helps to bring out its softness and natural sweetness.
Cabbage also has substance. I love folding leafy greens into soups, but chopped or sliced cabbage is undeniably heartier—and every bit as health-giving.
 Cabbage nutrition
I could go on and on about the many nutrient properties of a humble head of cabbage. But here are some highlights for you:
- Vitamin C
- Vitamin K1
- Phytosterols (plant compounds that may play a role in helping to reduce cholesterol levels)
- Glucosinolates (these are sulfur-containing plant compounds that might be especially beneficial for heart health)
- Dietary fiber
I give a little more detail about how wonderfully nutrient-dense cabbage is in this post.
One quick word about those glucosinolates mentioned above: they become biologically active when cabbage is crushed, chopped, or chewed.
That's part of why it's a good thing that the cabbage in this cabbage stew recipe is chopped up before it's added to your pot.
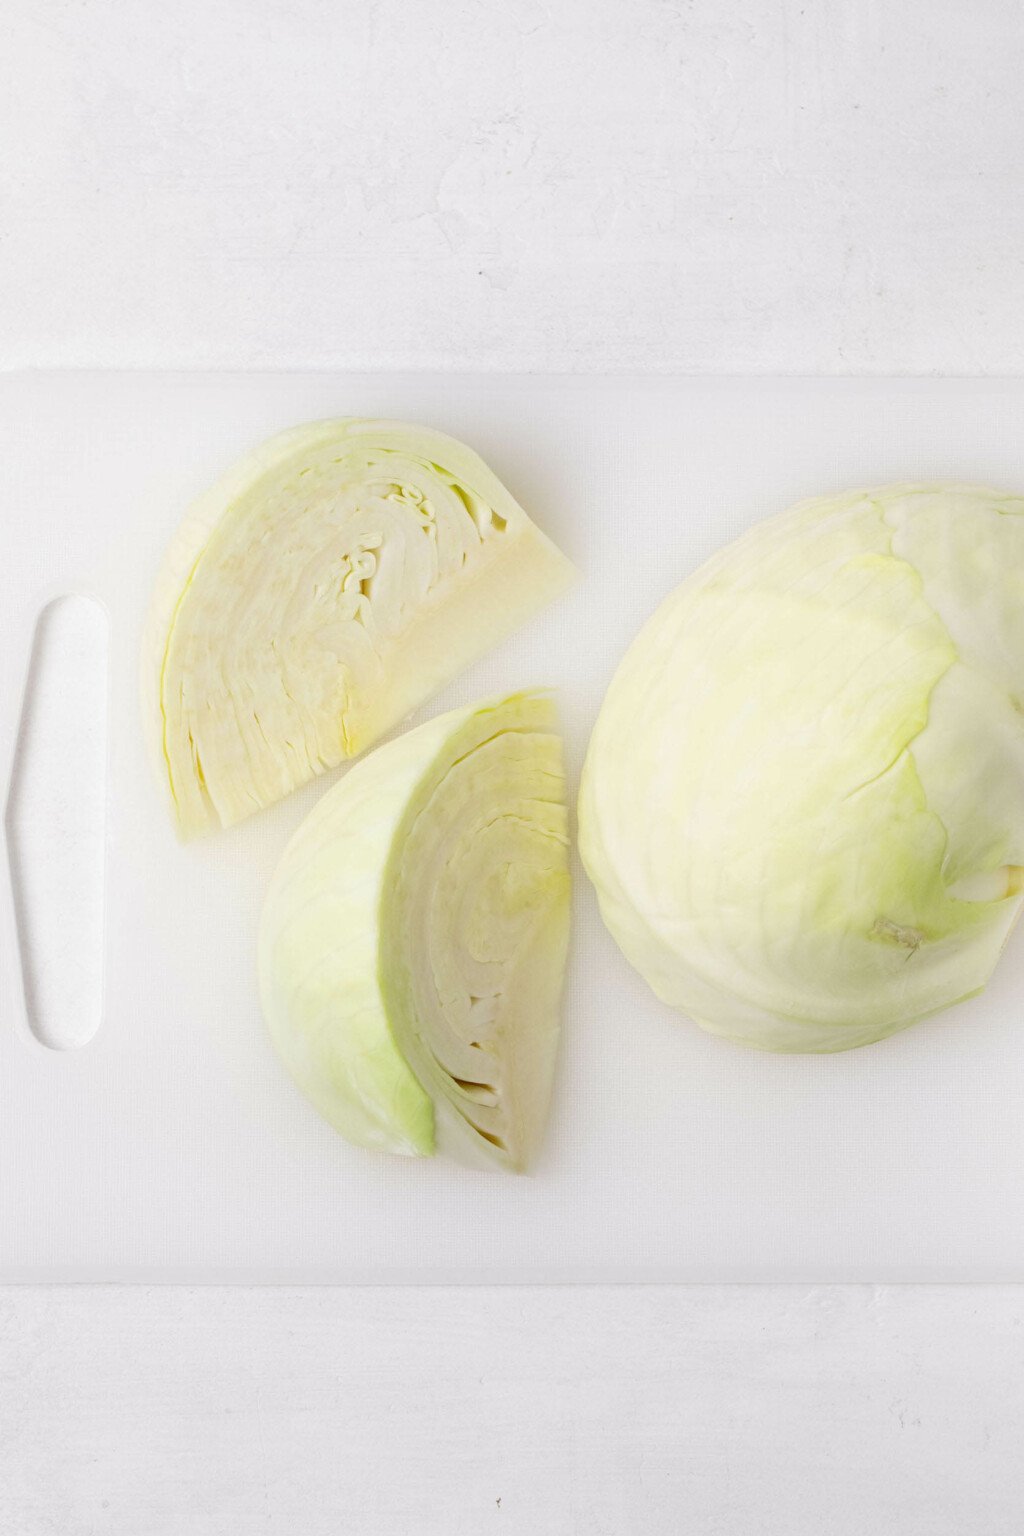
What type of cabbage is best in this cabbage stew recipe?I recommend using green, savoy, or napa cabbage for the soup.
Red cabbage will work from a taste perspective, but the mixture of its purple color and the redness of tomatoes might lead to a muddy-looking soup!
A grain, a green, and a beanOne of my favorite ways to think about meal planning is to combine a grain, and green, and a bean within any plate or bowl.
Whether I've meal prepped extensively and have a lot of vegan basics in my fridge, or I'm winging it for the week, I'm bound to have a can of beans or a block of tofu, some sort of fresh or frozen green vegetable, and a variety of grains at home.
Sometimes creating a meal is as simple as grouping these components together into a bowl and adding a great sauce or dressing.
Sometimes it takes the form of a simple grain skillet or pasta dish.
And there are many instances in which grains, green vegetables, and beans can be turned into a soup.
With green cabbage as the vegetable, navy, great northern, or cannellini beans (basically, your white bean of choice) as the plant protein, and bulgur as the grain, this brothy cabbage stew can be a meal unto itself.
A boost from bulgur wheatI'm a big fan of adding pasta, from orzo to tortellini, to my soups. But sometimes I forget how excellent the many types of whole grains can be in a pot of soup.
From quinoa in chili to tomato soup with rice, grains can enhance the texture and density of soups and stews so nicely. They also add nutrition, of course: lots of fiber, some protein, and more.
In this particular cabbage stew, the grain is bulgur wheat.
Bulgur is a form of cracked wheat. You may be most familiar with it from tabbouleh or other Mediterranean and Middle Eastern dishes. It has a chewy texture and a small shape.
Bulgur is also very nutritious. It's got a good amount of plant protein in each serving—about six grams—along with fiber, iron, B-vitamins, and folate.
I've used bulgur in many types of recipes. Bulgur can create some texture and density in vegan meatballs or chili. It makes wonderful grain salads, including my my sweet potato bulgur citrus salad and lemony bulgur chickpea salad.
I especially enjoy using bulgur as a stuffing for vegetables, such as my bulgur-stuffed eggplants with currants and pine nuts.
Bulgur is sometimes labeled as fine, coarse, or extra coarse. It may not be labeled at all, but usually when I find it at major grocery stores in the US, it has a fine consistency. I like the coarse bulgur wheat, too.
How to make cabbage stew with bulgur and navy beansThe cabbage stew is a one-pot recipe, which means that the steps for preparing it are quite simple. Here's how the process goes.
Step 1: Sauté the vegetablesYou'll begin by sautéing in olive oil the vegetables that play a starring role in the cabbage stew. onion, celery, and carrots go into the pot first and cook for about five minutes.
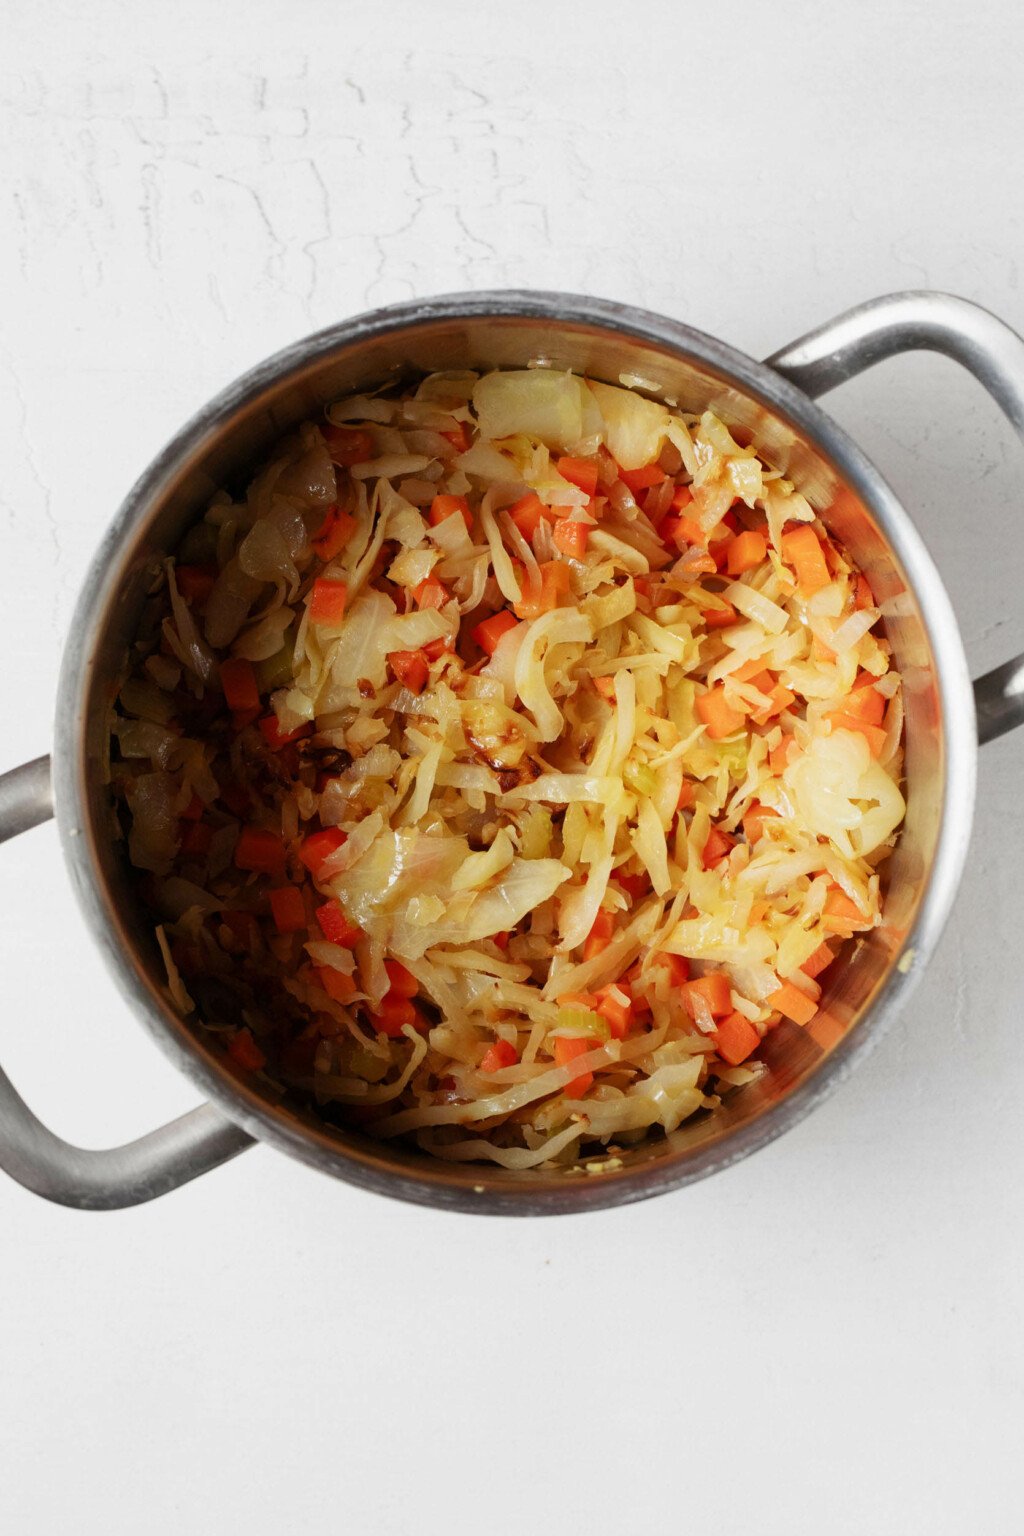
Then, you'll add your cabbage and cook it for about ten minutes, or until it's tender and maybe just starting to brown.
Step 2: Add seasoningsThe seasonings for this soup are simple. Tomato paste will deepen the soup's flavor and add some umami, while two types of paprika add sweetness and smokiness, respectively.
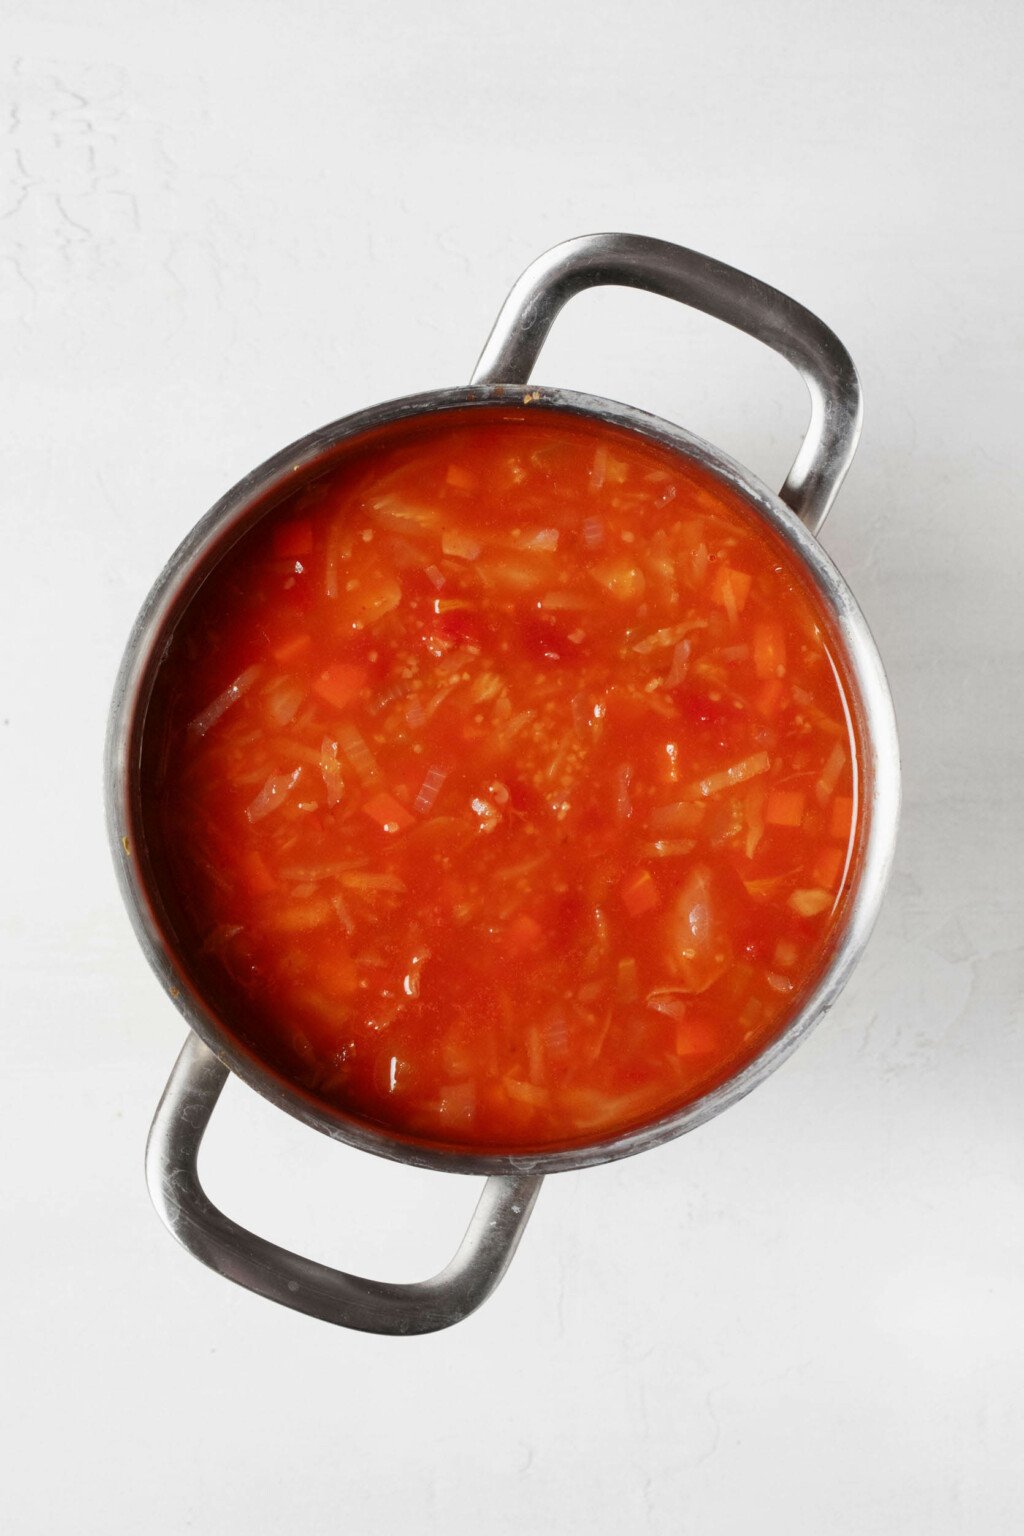
Step 3: SimmerFinally, you'll add the remaining ingredients, which are tomatoes, broth, bulgur, and navy beans, bring the mixture to a boil, and reduce the heat to low.
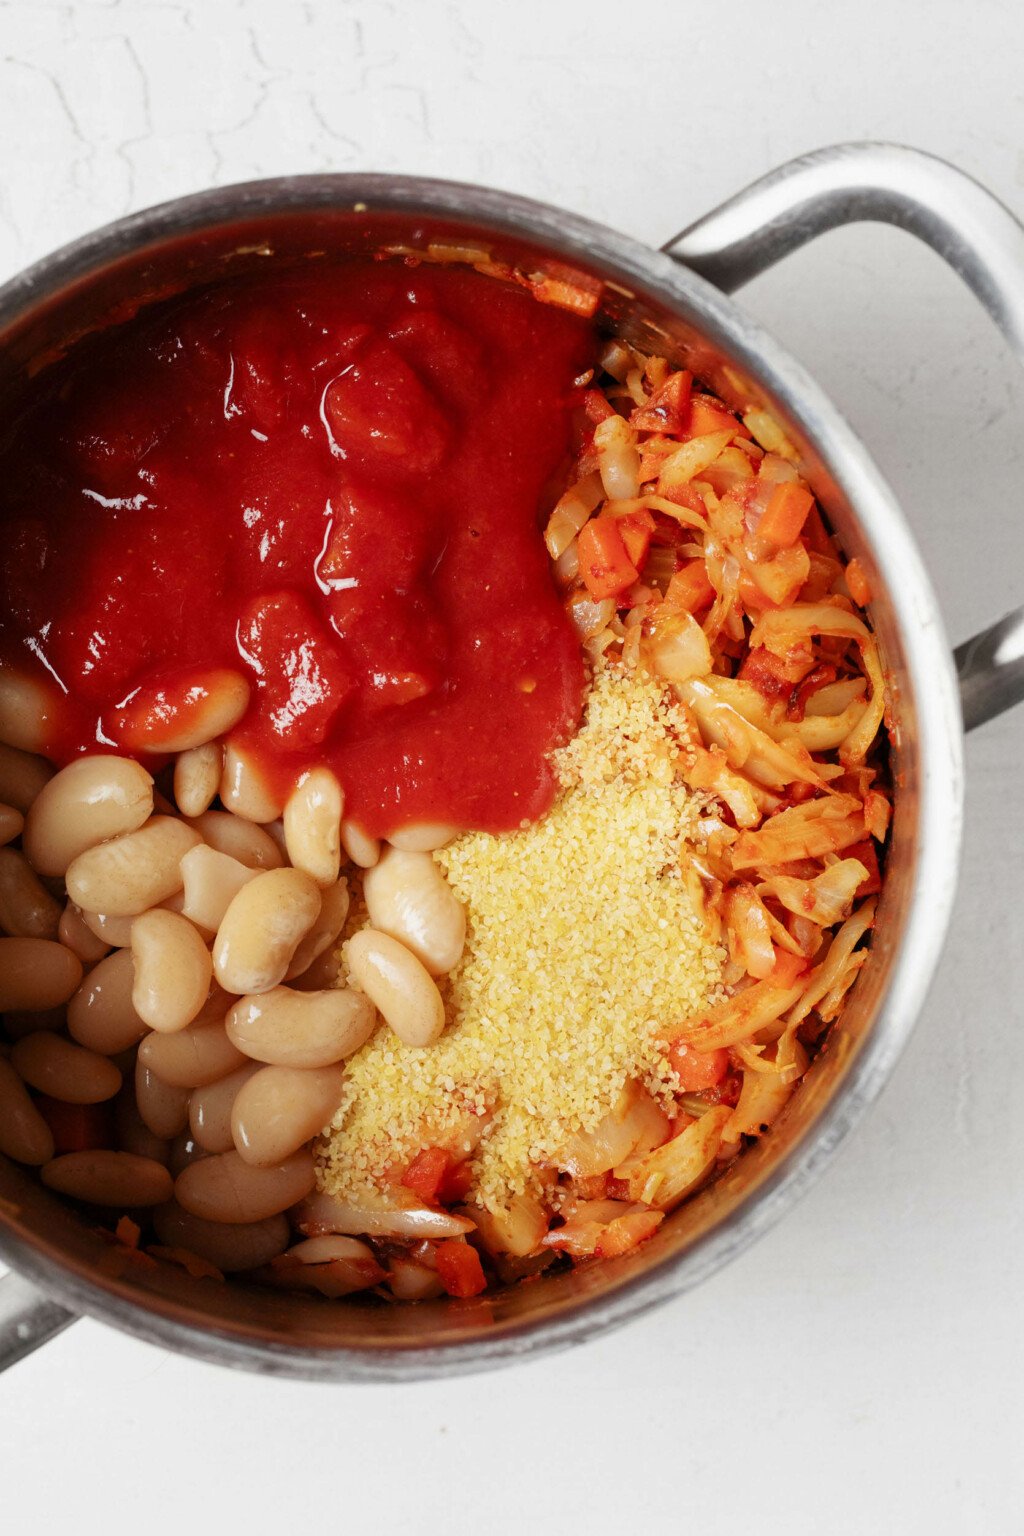
Simmer the soup for twenty-five minutes, or until the bulgur is fully cooked, yet retains its chewy texture.
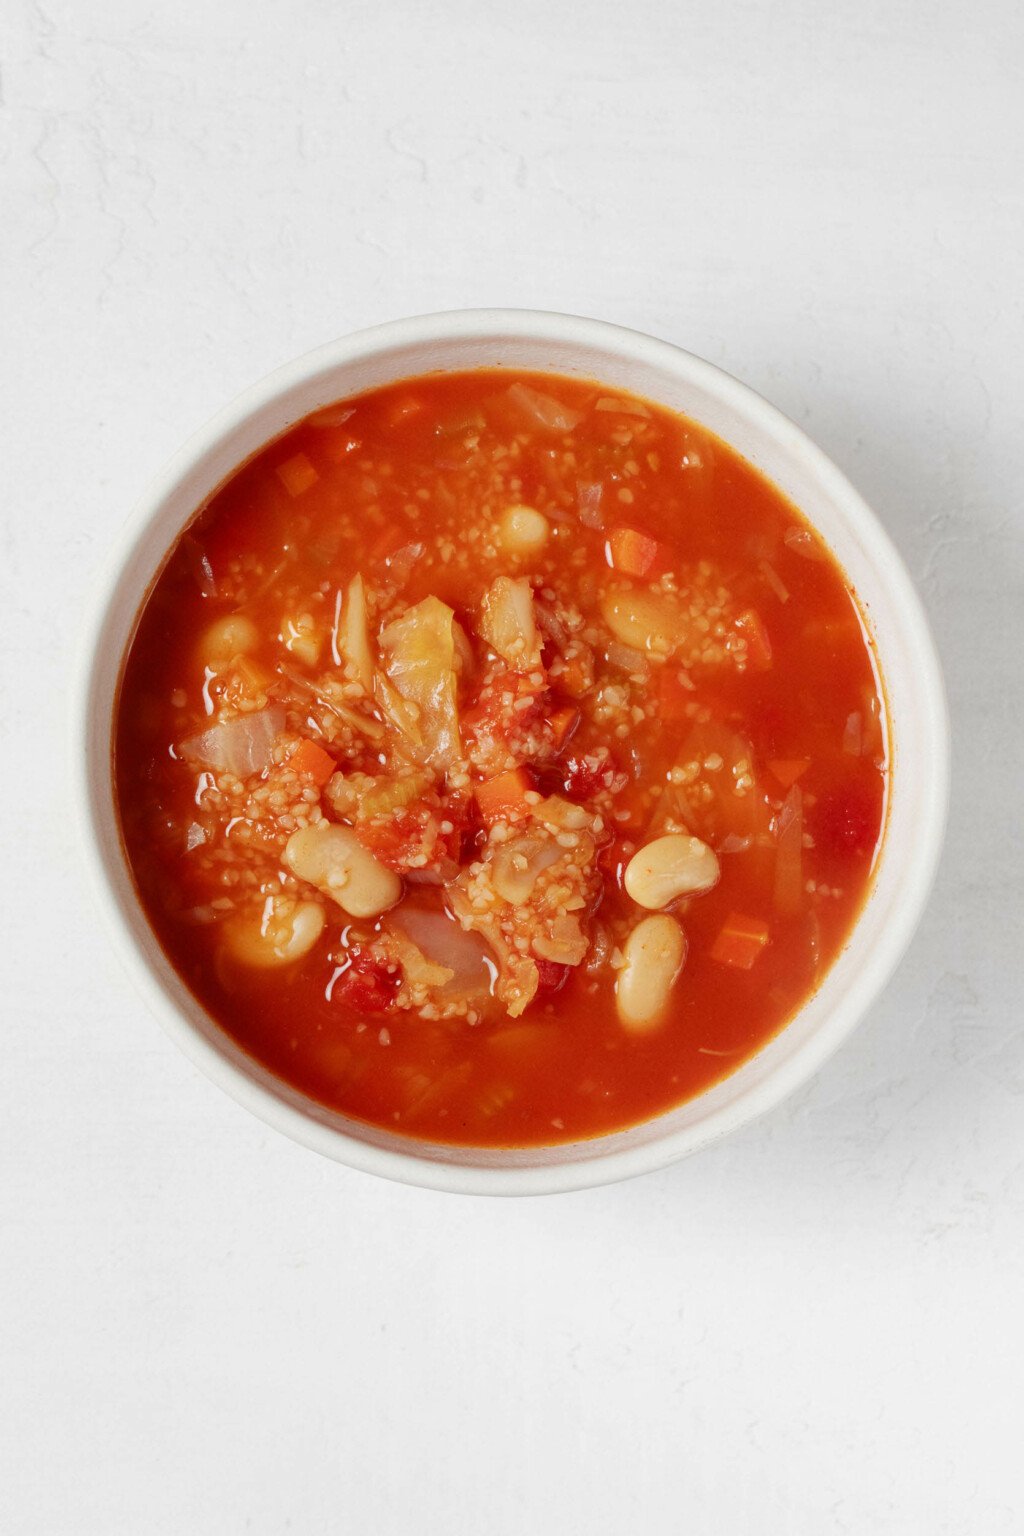
You'll finally season the soup to taste with a little white wine vinegar, as well as any additional salt or pepper that you'd like, and serve it.
There's already plenty happening in the cabbage stew, thanks to its grains and beans and ingredients with lots of substance.
Even so, you might wish to make it even more of a "kitchen sink" recipe. I think that any of the following would be fun additions:
- Chopped, dark leafy greens, such as spinach or kale
- Baked smoky tofu, cut into small cubes
- Lemon pepper tempeh cubes
- Crusty croutons or a sprinkle of rustic breadcrumbs over the bowl
- A little sauerkraut, pickled red onions, or another fermented or pickled vegetable as a topping
If you need to make some substitutions, this recipe can also accommodate variation. For example, you can trade chickpeas for the white beans.
In place of the bulgur, you could use couscous, another small pasta shape, such as pastina, or quinoa. Quinoa would make the cabbage stew gluten-free!
The Vegan Week
Embrace the joy of eating homemade food every day with the hearty and wholesome recipes in The Vegan Week.
Whether you have three, two, or even just one hour of time to spare, The Vegan Week will show you how to batch cook varied, colorful, and comforting dishes over the weekend.
Buy The Vegan Week Meal prep & storageLike many types of soup or stew, the cabbage stew only becomes more flavorful with time. I like it best on the third or fourth day after preparing it.
The soup can be stored in an airtight container in the fridge for up to six days, and you can freeze it for up to eight weeks. It's an excellent, one-pot meal for your weekly vegan meal prep routine.
Make it today, or soon, and enjoy rustic, tasty, and nutritious bowls all week long.

- 2 tablespoons olive oil
- 1 white onion, medium dice
- 1 large or two small stalks celery, diced
- 2 carrots, trimmed, peeled or scrubbed, and diced
- 1 extra small or 1/2 medium small head of cabbage, halved crosswise and then thinly sliced lengthwise (about 1 pound / 455g after preparation)
- 4 tablespoons tomato paste (60g)
- 1/2 teaspoon sweet paprika
- 1/2 teaspoon smoked paprika
- 1/2 teaspoon salt
- 1 1/2 cups diced tomatoes, with their juices (1 14.5-ounce / 415g can)
- 6 cups vegetable or vegan chicken-style broth (1 1/2 quarts / 1.4L; more as needed)
- 1/2 cup bulgur wheat (90g)
- 1 1/2 cups cooked navy beans (1 15-ounce / 425g can, drained; substitute cannellini beans or great northern beans)
- Freshly ground black pepper
- White wine vinegar
- Optional: fresh, chopped parsley leaves, for serving
- Heat the oil in a large, heavy-bottomed pot over medium heat. Add the onion, celery, and carrots. Cook the vegetables, stirring occasionally, for 4-5 minutes, or until the carrots are just becoming tender and the onion is starting to become translucent. Add the cabbage. Continue cooking, stirring often, for 8-10 minutes, or until the cabbage is very tender and browning lightly at the edges. Stir in the tomato paste, both types of paprika, and salt.
- When the tomato paste is evenly incorporated into the vegetables, add the tomatoes, broth, bulgur, and navy beans to the pot. Bring the mixture to a boil, then turn the heat to low. Cover and simmer for 25 minutes, or until the bulgur is tender, yet still chewy. If the stew is a bit too thick for your liking, stir in an additional 1-2 cups / 240-480ml additional broth. Taste the soup; adjust the salt as needed and add white wine vinegar, one teaspoon at a time, to taste. Divide the soup into bowls and garnish according to your preferences.
- The soup can be stored in an airtight container in the fridge for up to six days and frozen for up to eight weeks.
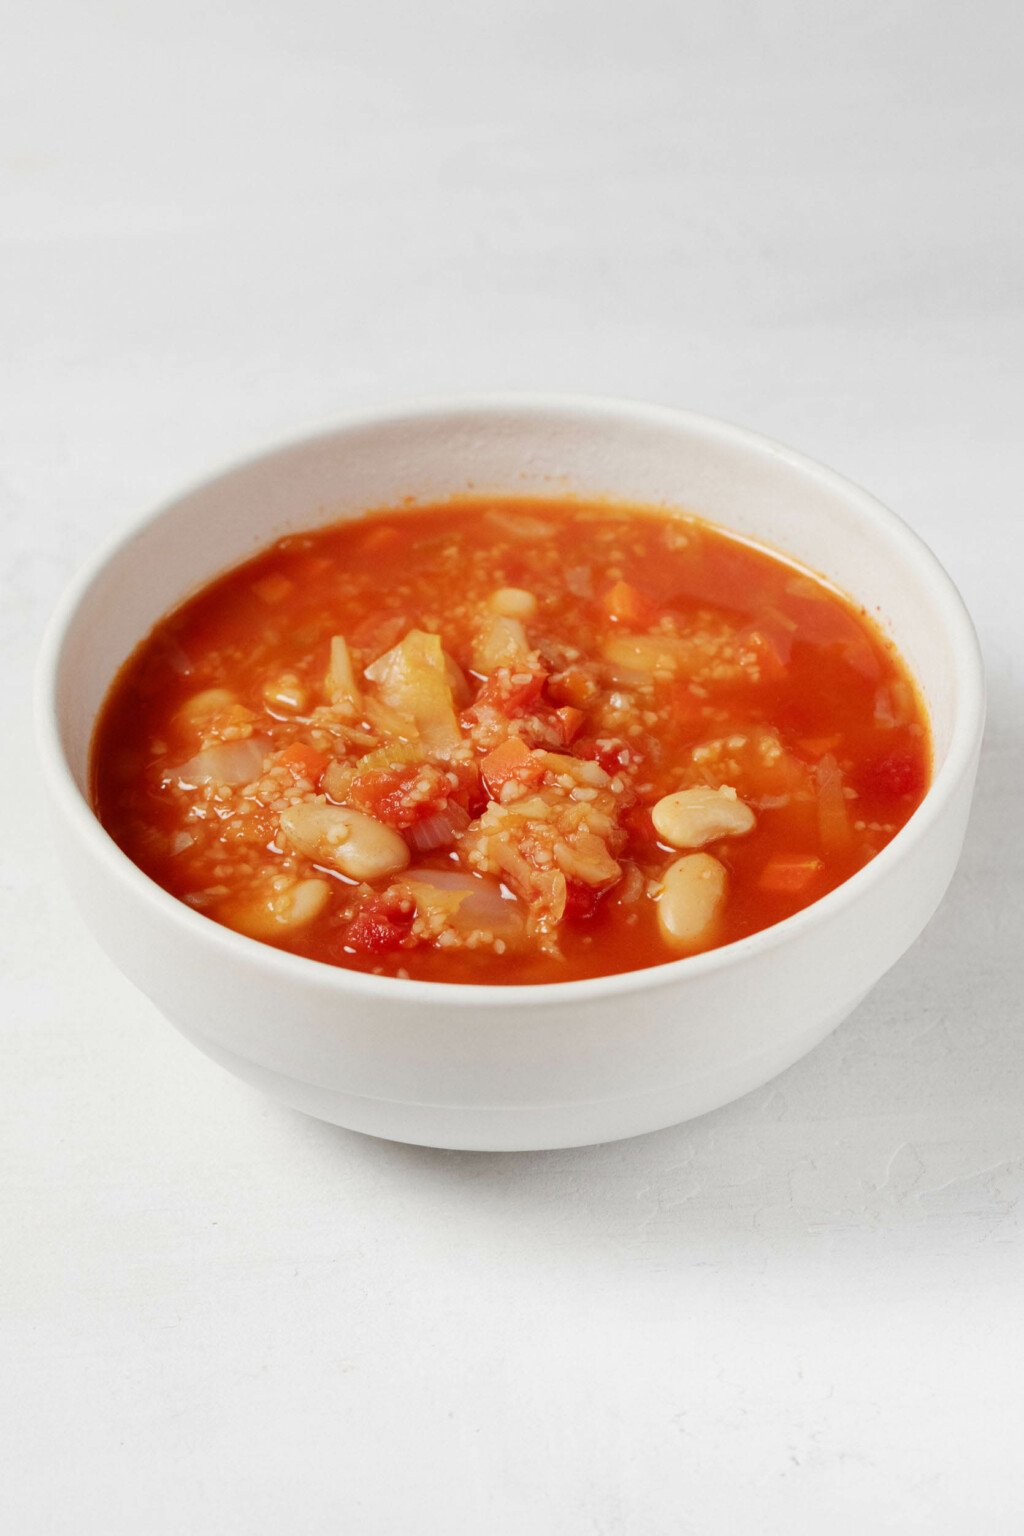
No matter the season, there's just nothing so comforting as a bowl of soup or stew. I love the nutrition of this particular bowl, and I hope that you'll enjoy it, too!
xo
The post Vegan Cabbage Stew with Bulgur and Navy Beans appeared first on The Full Helping.